Hi everyone! I’m excited to be joining several Cricut bloggers this week to share different birthday ideas with you. I’ll be showing you how to make a Sweet 16 Party with your Cricut.

My daughter just turned 16, and she’s dreaming of an outdoor park-party with just about everyone she knows. The current Washington weather doesn’t let something like that happen though, so she’ll have to wait until the summer.
That just means that we have time to work on Sweet 16 party decorations in the meantime. Open the Design Space project here.
What party decorations can I make with a Cricut?
I love using my Cricut to make party decorations, or anything else I might need for a party. Since my Explore Air 2 alone can cut things like paper, cardstock, vinyl and iron-on, the Cricut can make:
- Banners
- Invitations
- Party hats
- Centerpieces
- Cake toppers
- Cupcake liners
- Cupcake toppers
- Place cards
- Stickers for balloons
- Table confetti
- Paper fans for backdrops
- Birthday shirt
- Party foil spirals
It’s fast and convenient because I can use images already available in Design Space, or create my own. I can choose my own custom colors to match what I want.
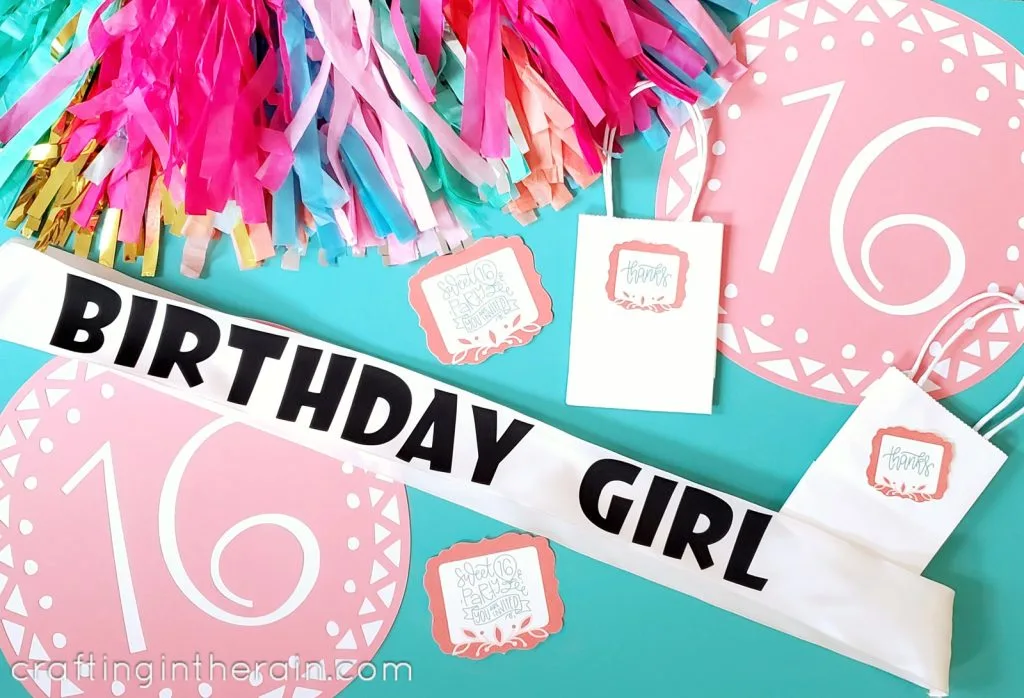
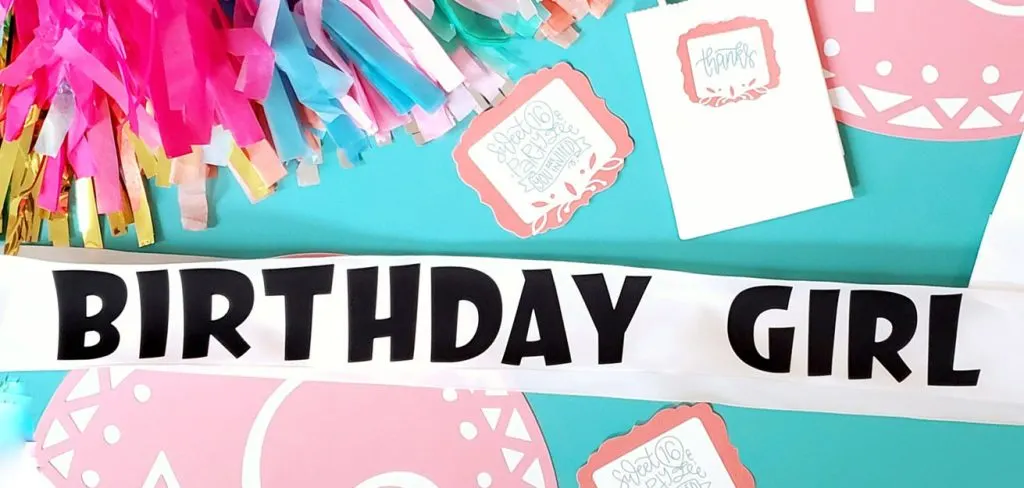
Make a Birthday Sash
There’s no doubt who is celebrating when they’re wearing a birthday sash. You could customize this with any color ribbon and iron-on. Plus, change up the words to match the occasion.

Supplies for making a birthday sash
A celebration sash like this could be made with wide ribbon, or a strip of fabric. To make it easier on ourselves, we went with the ribbon. I was hoping to find 3-inch wide, but had to settle for 2.5 inches. It still works though.

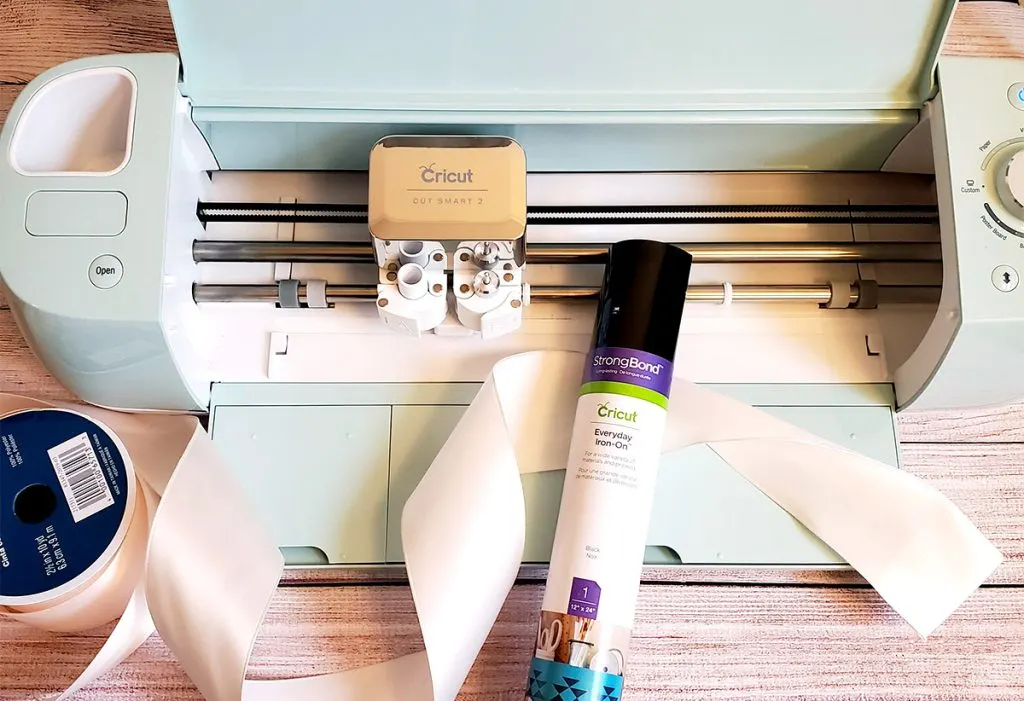
- Wide ribbon (2.5 or 3 inches – these colors look awesome)
- Trim (optional)
- Iron-on vinyl
- EasyPress mini or iron
- Sewing machine, needle and thread, or fabric glue
How to make a personalized sash
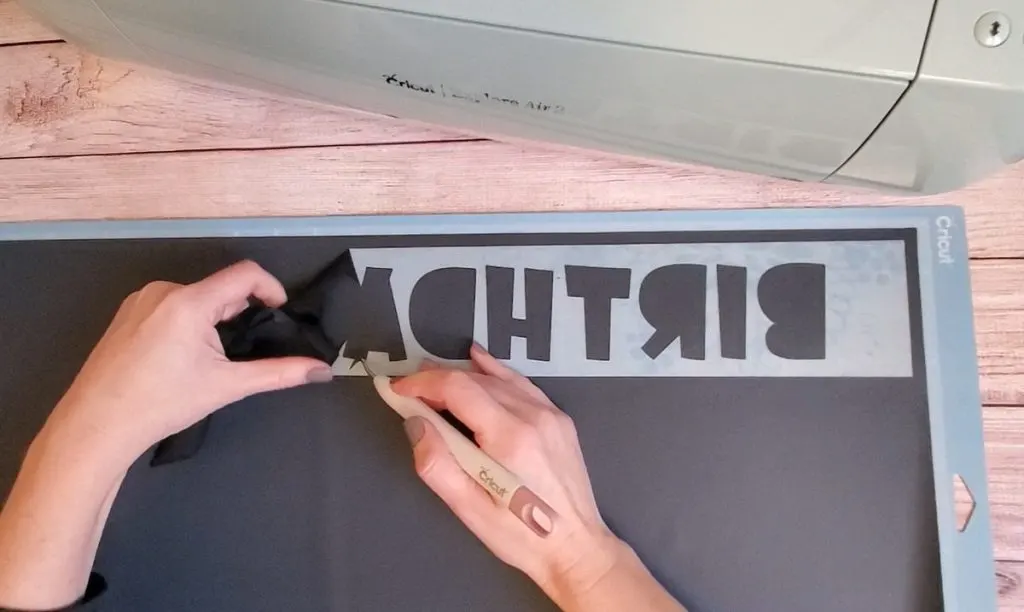
Start by cutting the iron-on vinyl for the lettering. Use the one I designed in the Design Space project, or make your own. Make sure the height of the letters will fit on the ribbon.
Cut and weed the iron-on vinyl.

Fold the ribbon in half and sew a diagonal line (or glue) starting about 1.25 inches down one side. This way the sash will lay flat on the shoulder, but hang diagonally across the body. Trim away the excess seam.
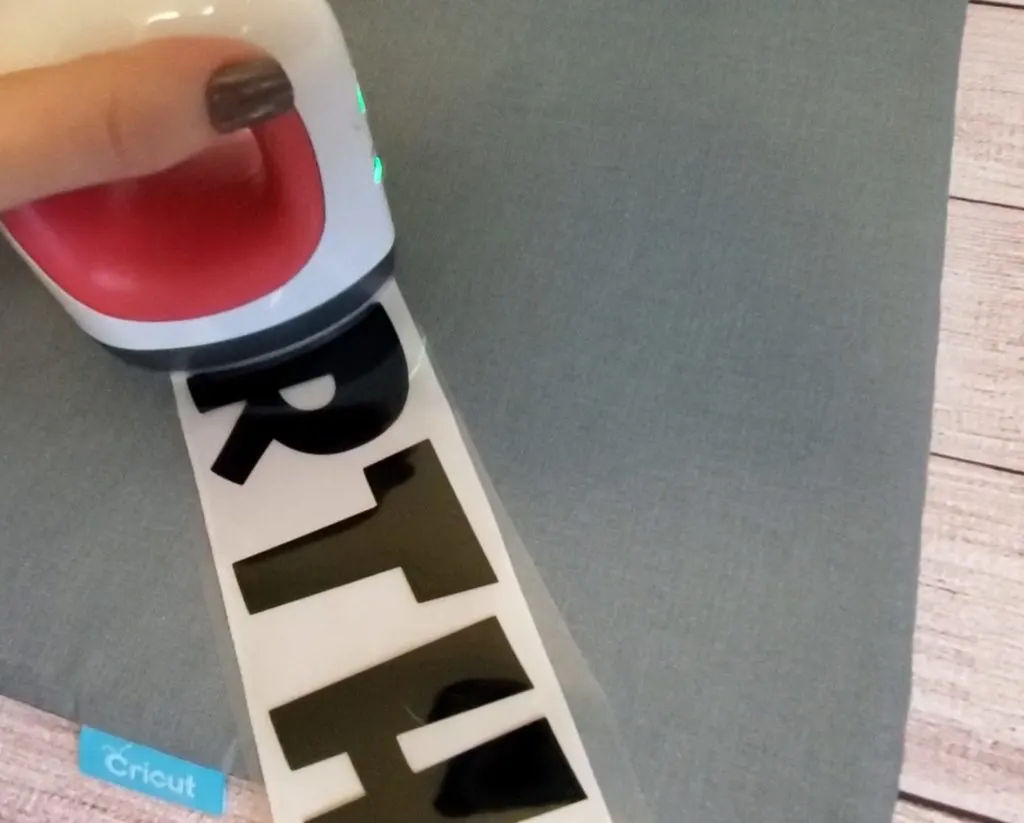
Put iron-on vinyl on ribbon
Heat the EasyPress mini to the Low (first) setting.
Learn about the Easy Press Mini here
Position the iron-on vinyl about 3 inches down from the top of the sash. With a towel or EasyPress mat underneath, start pressing the design with the EasyPress Mini. Move in small areas and heat each section for about 20-30 seconds.

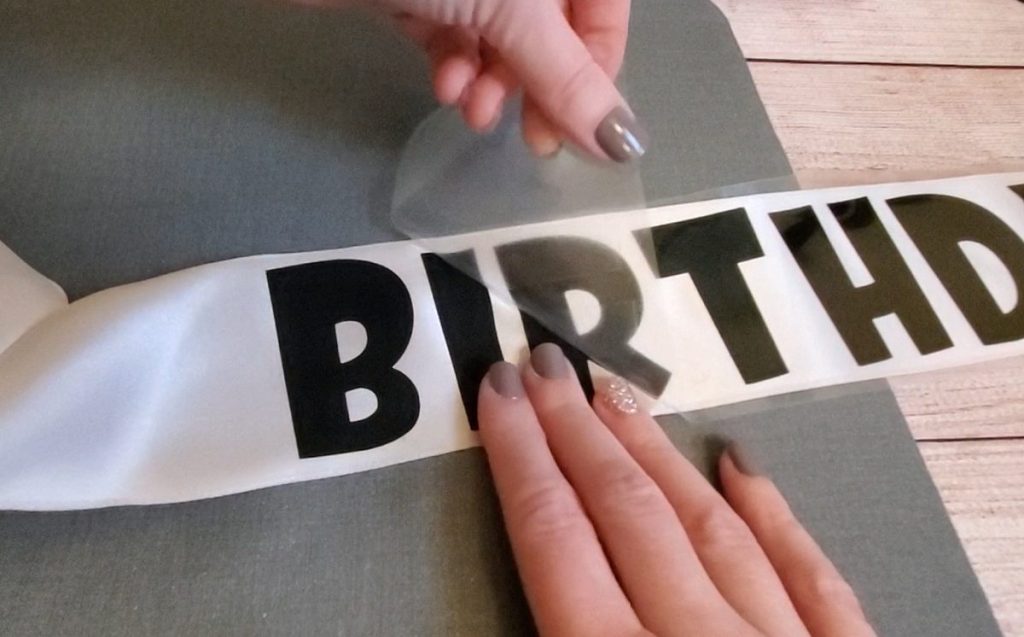
When the whole design has been pressed, let it cool and peel away the plastic carrier sheet.

To finish the sash, it works best to “try it on” yourself or the person who will wear it. This way, you can see where the bottom part should be sewn together.
When you have the spot marked, sew with another diagonal line, making sure to sew it in a way that the sash is folded “inside out.” Since it can get confusing which way the line should go, both seams should angle towards the top of the letters and away from the bottoms of the letters.
If you’re adding any trim, go ahead and add it now to the bottom and top (or just the bottom even) of the sash. We decided to skip any extra decoration.
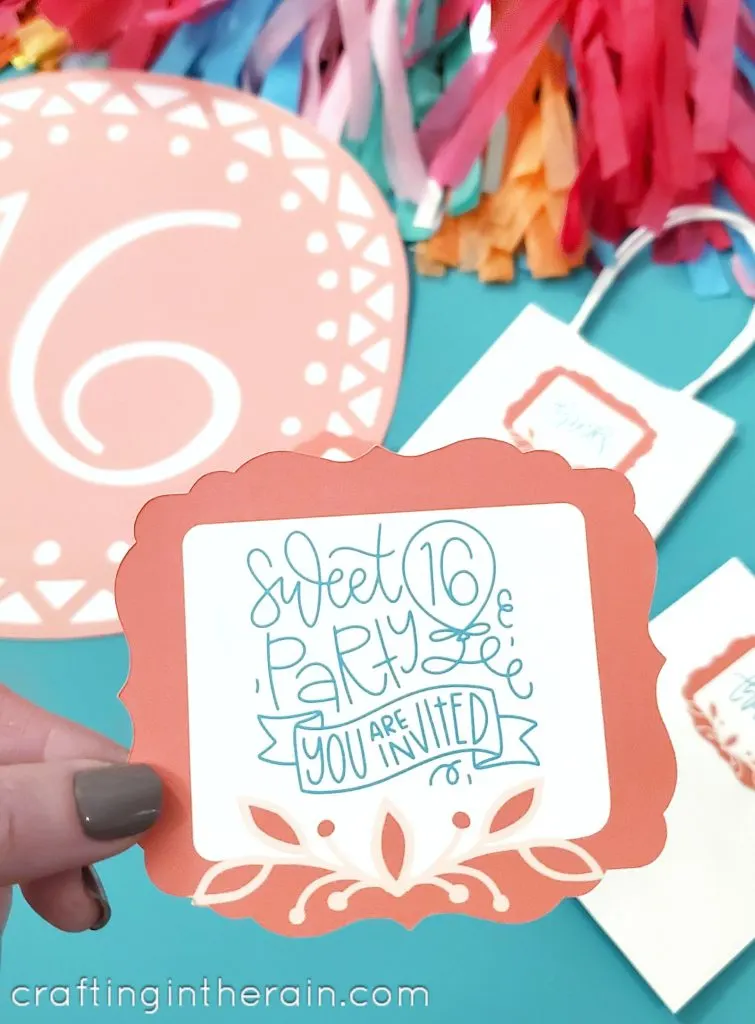
Make a Print then Cut Invitation
The great thing about making a print then cut invitation is the custom result you get without having to cut and glue several layers of a card. It really speeds up the process!

Read this post for my Print then Cut tutorial
When creating your own print then cut designs, there are a couple of important things to remember. First, if there is white space in your design, it needs to be covered with a white layer, or white shape in Design space.
Second, you will attach all the elements together, then click Flatten, so that it becomes a printable design and only the outline will cut.
My first attempt at designing these resulted in my Cricut thinking I wanted all the blue letters cut out, because there was no white layer behind that they were attached to.
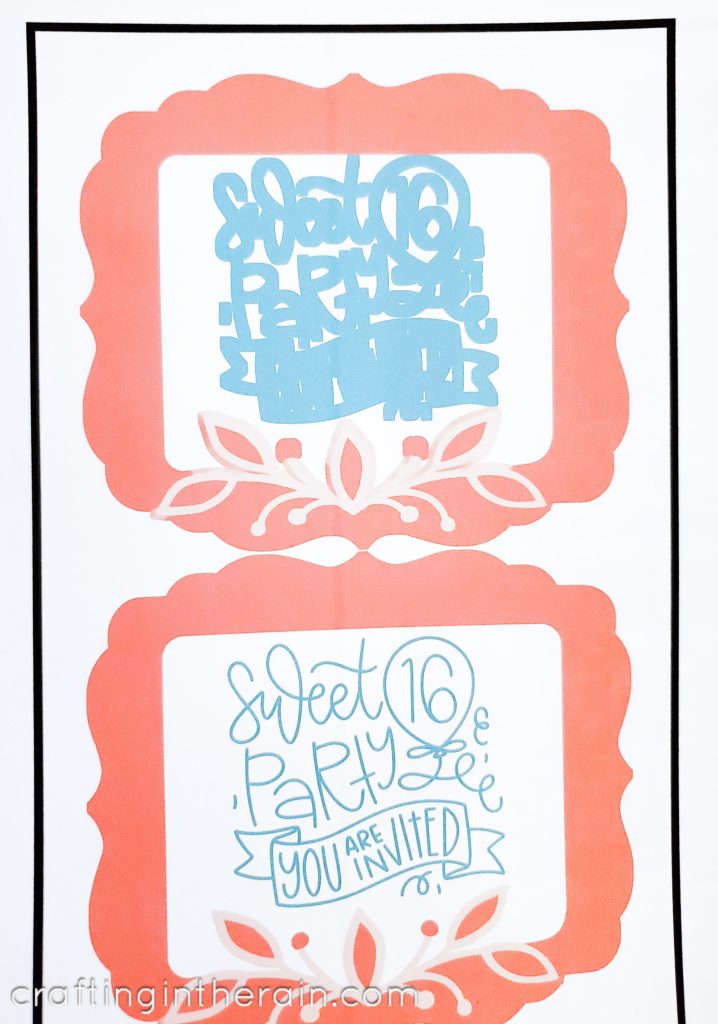
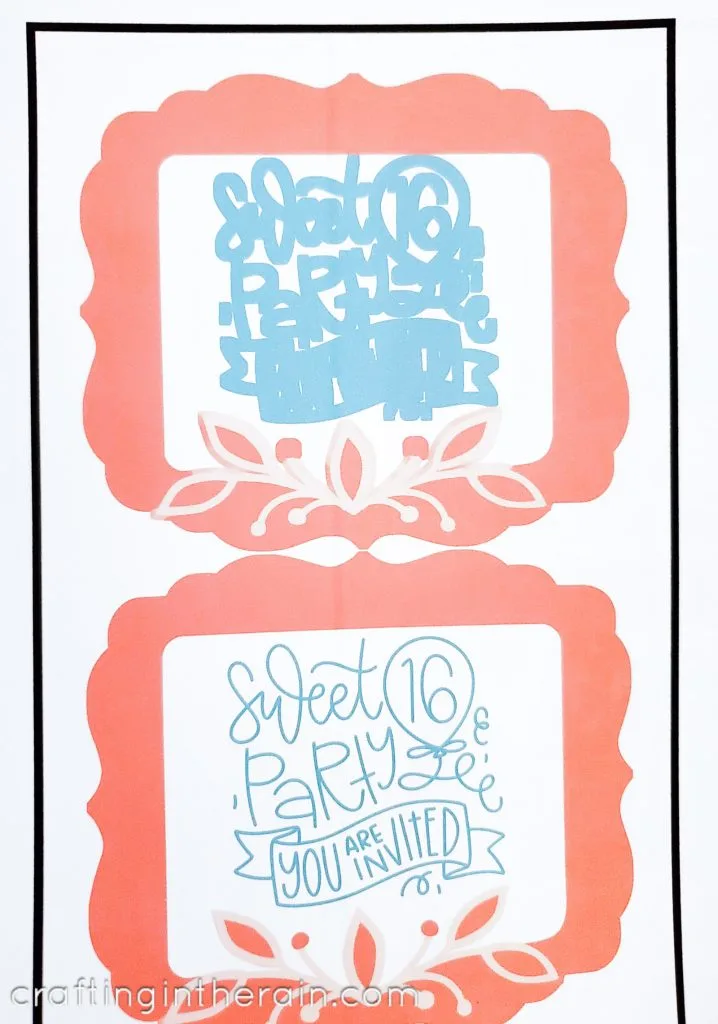
The final step for these invitations will be to add information to the back. Print the information (time, place, etc) on regular printer paper. You’ll be able to fit several on a single piece of paper.
Cut with a paper trimmer and glue on the invitation backs.
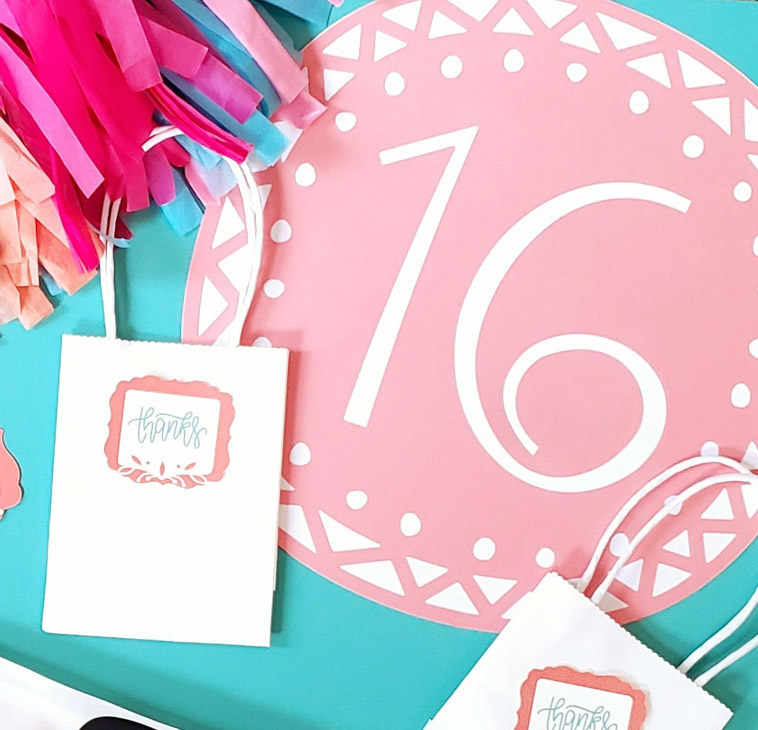
Thanks favor bags
The favor bags are created in much the same way. While you could cut, fold, and tape your own bags with the Cricut, we went with small purchased bags from the craft store and personalized them.
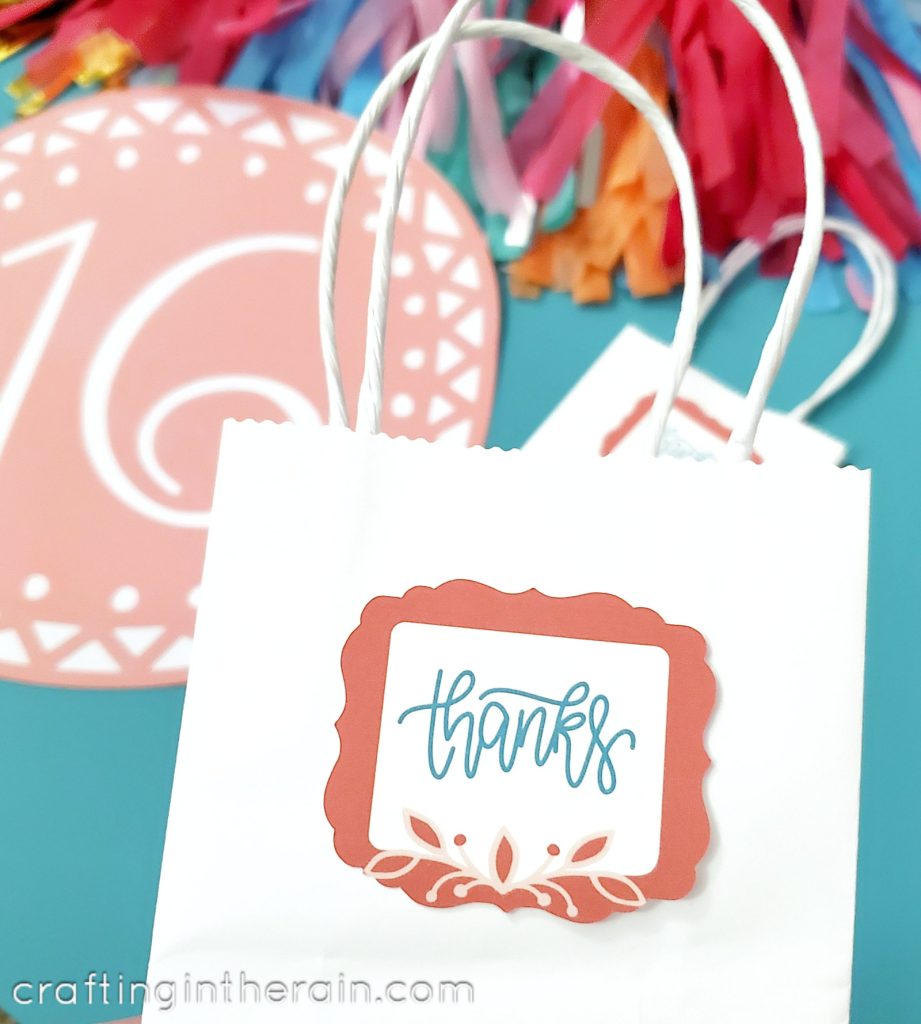
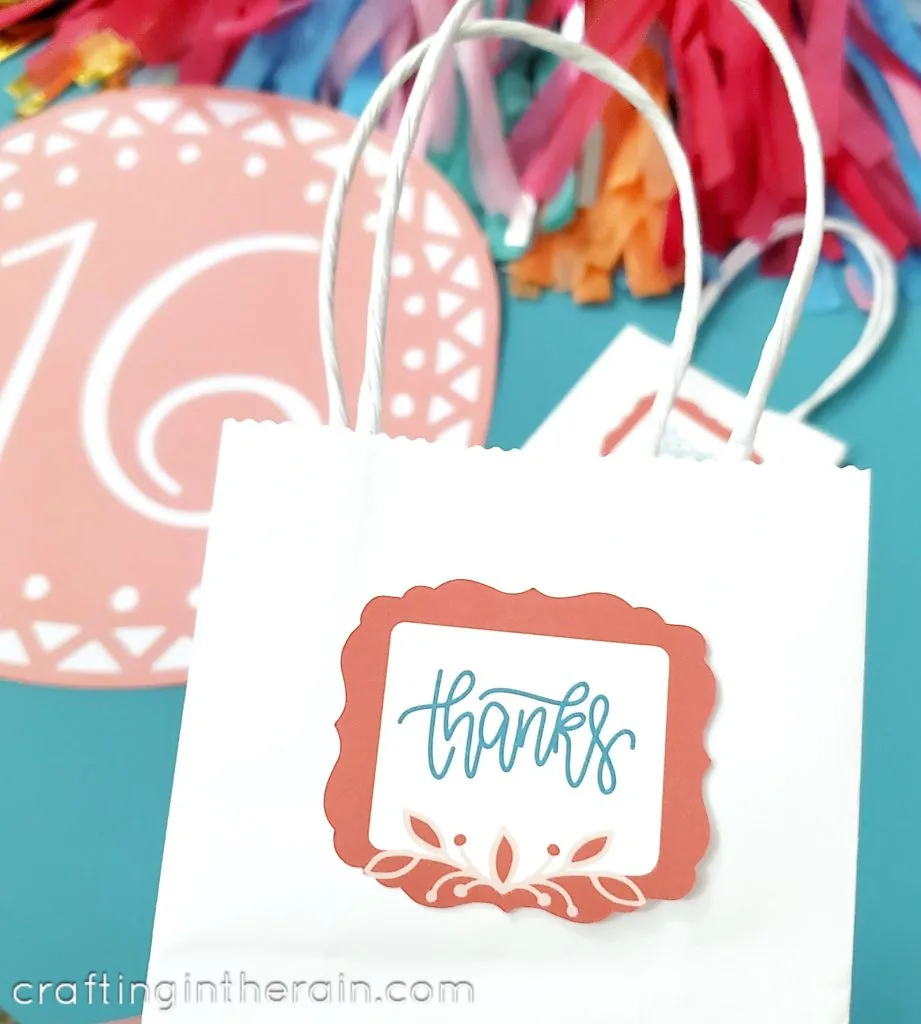
You will need:
- Bags
- Printable vinyl (works better than printable sticker paper)
Following the same concept for the invitations, print the “thanks” tags / stickers on printable vinyl.
Then add one to each bag and fill with the party favors that guests will take home. Since they match the same theme as the invitation, your guests will know you thought of everything, from the beginning to the end.
Sweet 16 Signs
To make our large 16 signs, I found an existing image in Design Space. I chose pink for the top color and white for the base. Mix up the colors how you like – just make sure they don’t clash and make it hard to read the number.

The last request my daughter has is a sign that says “It is your birthday.” Remember that Office episode? So I’ll print that out on a few sheets of paper and hang a 16 on each side.
I made these about 11.5 inches so that I could fit it on a single sheet of 12×12 cardstock. Glue the colored layer to the base layer with a glue stick, glue pen or even a spray adhesive.
Visit these links for more Cricut party ideas.
I hope you’ve found some good ideas for your own party decorations, or a Sweet 16 Party with Cricut. Have any questions about what you’ve seen? Let me know!