Do you have any projects that have gone through more than one makeover? That’s what I did with this resin pour table that I bought several years ago from the thrift store.
This resin pour table top originally appeared on the Resin Crafts Blog.
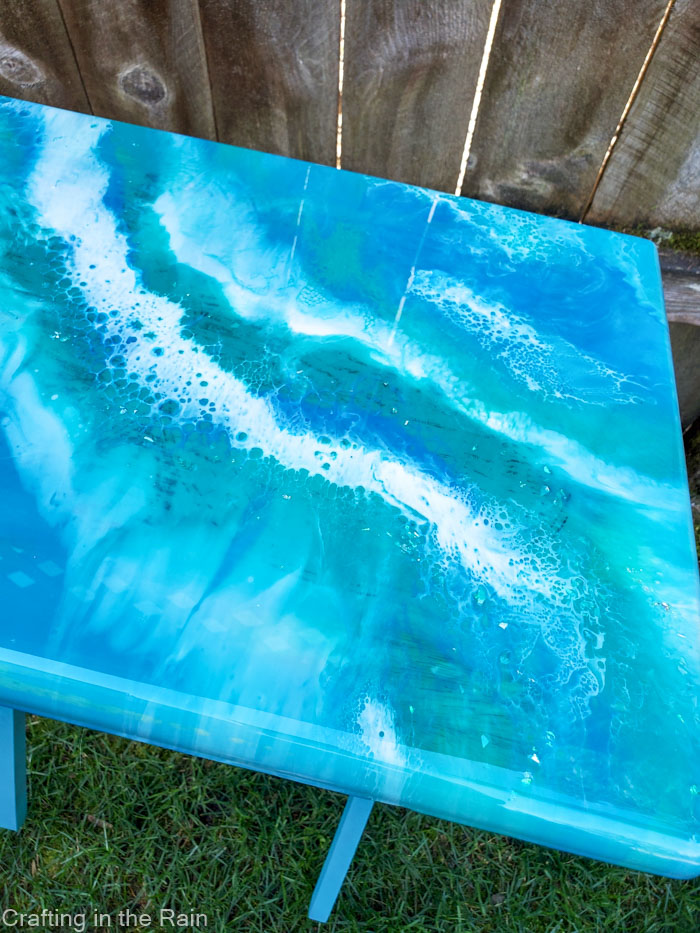
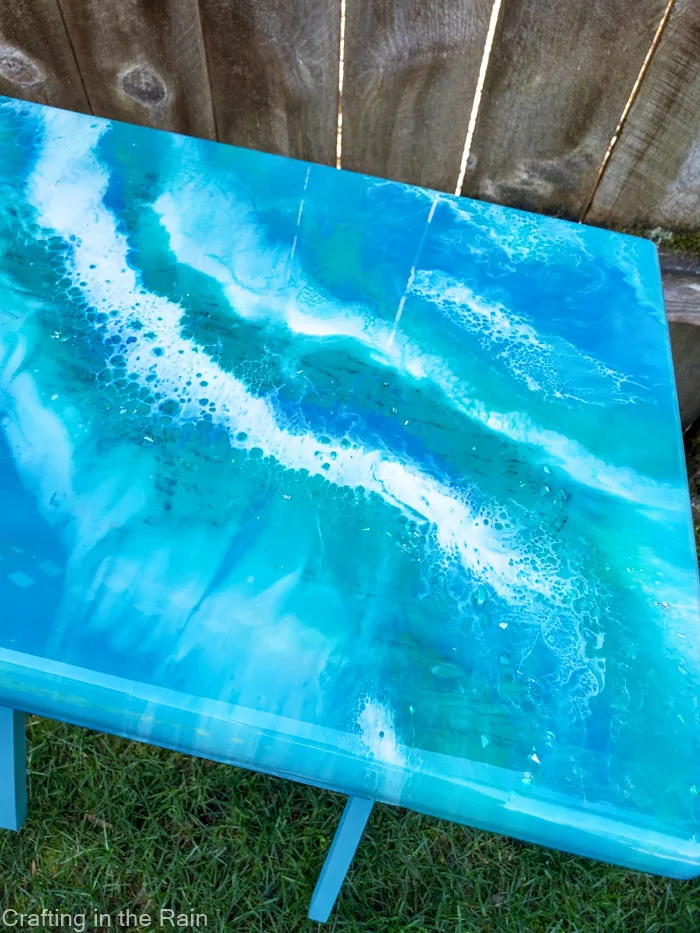
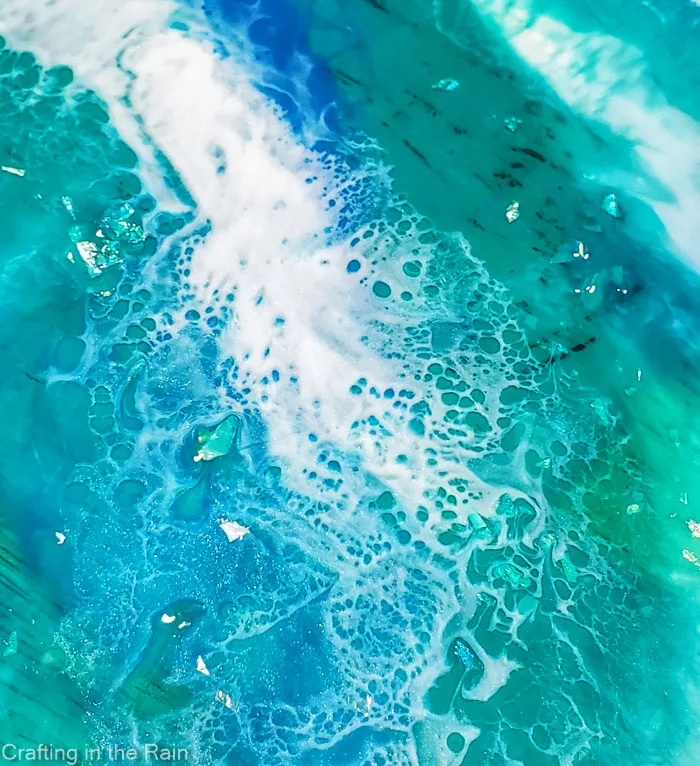
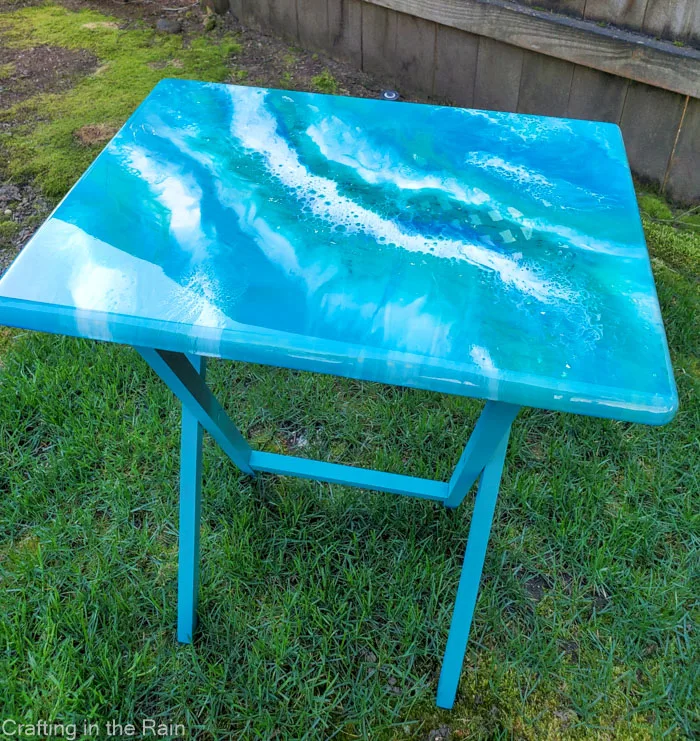
Originally, I painted it and put a map image transfer on top. It was a fun project, but it was time for an upgrade. So I used Envirotex Lite Pour-On Resin in different colors to make this beautiful resin table top.
Projects like this are a great way to start experimenting with larger scale resin pours. If you’re working on an item that came from the thrift store, or that you don’t really care about anyway, you don’t have to worry about having it come out perfectly.
If you still want to do a beginner resin pour, make a resin tray like this.
Let’s start with the supplies and then I’ll give you my process so you can repeat a resin table top at home.

use code CRAFTINGRAIN to get 10% off your order
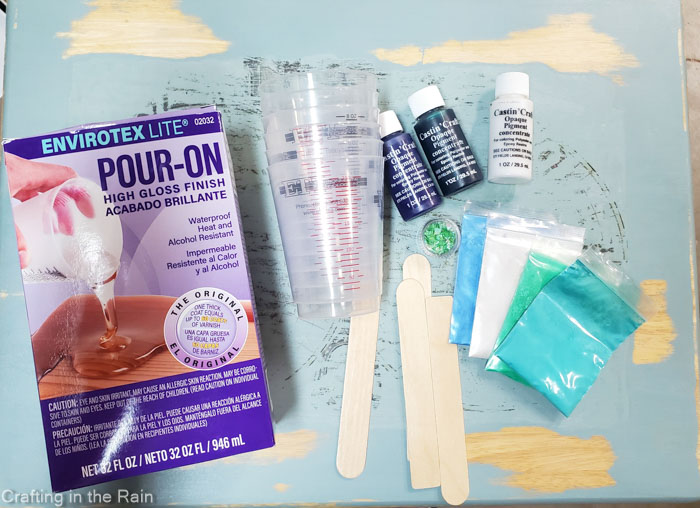
- EnviroTex Lite
- Castin’ Craft Opaque Pigment (blue, green and white)
- Mica powder
- Large glitter flakes
- Mixing cups and stir sticks
- Gloves and glasses
- Heat gun
PREP TABLE FOR RESIN
Make sure that your table top is clean and smooth. I gave my table a good sanding to remove any bumps, and tried to take off most of the map transfer.
**I was lucky that the paint color was blue, so in some places where it showed through the resin a little it was fine. But if you are doing very different colors, make sure you don’t have a color that you might not want showing thorugh.
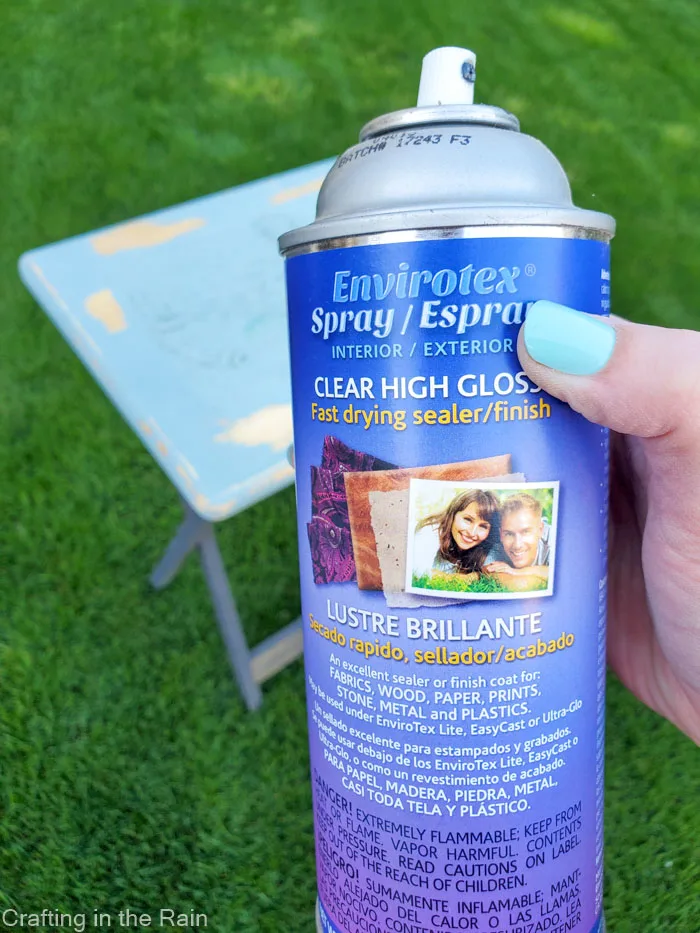
Then I wiped it clean and sprayed it with 3 coats of EnviroTex Spray Sealer. I wanted to eliminate the possibility of any bubbles coming up through the wood.

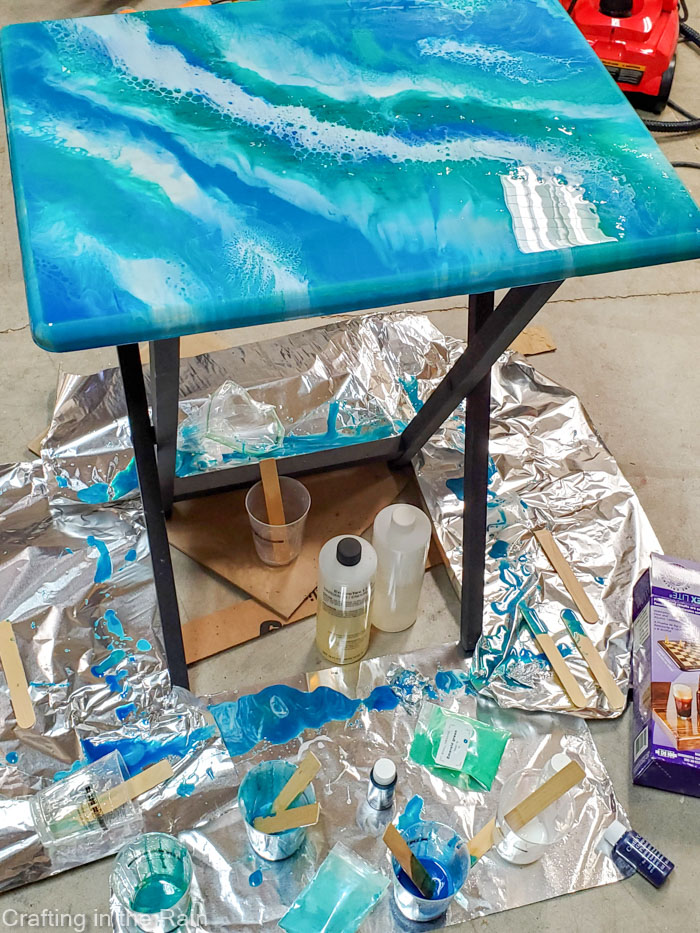
Cover the floor area to catch drips – there will be drips! Also make sure that the table is level.
I did this pour in my garage, so the uneven floor combined with the slightly wobbly legs meant I had to play around with some strips of cardboard under some legs.
MIX EPOXY FOR TABLE POUR
Wearing gloves and glasses, mix equal parts resin and hardener in a cup. Stir for 2 minutes, then transfer to a clean cup and stir 1 more minute.
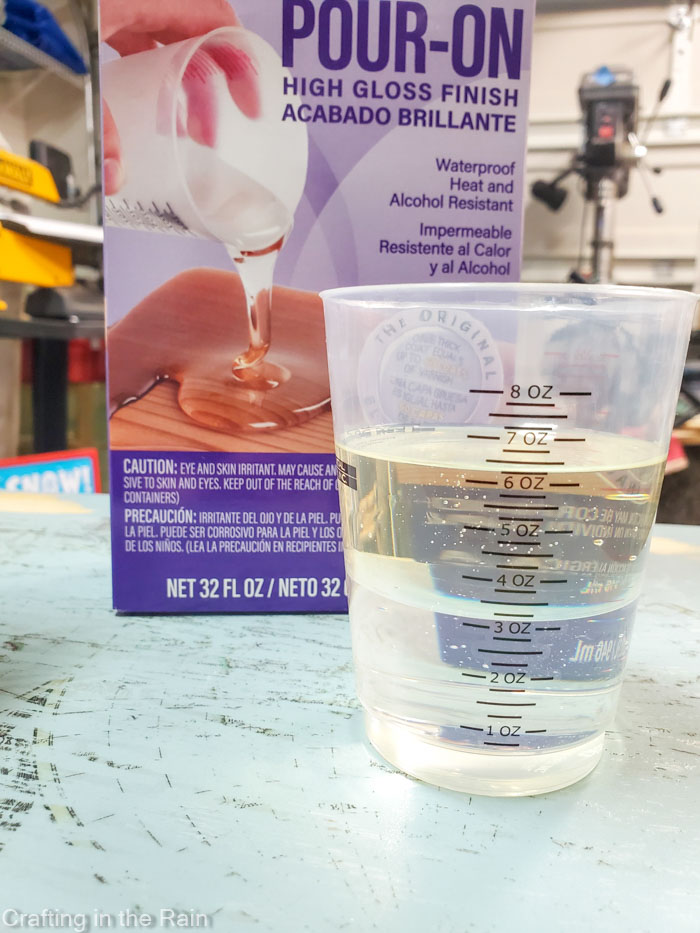

Separate resin into 3 cups and add colors. I did white, then mixtures of blue and green with a bit of white added in to lighten them up.


COVER TABLE TOP WITH RESIN
Then start pouring across the table, staying away from the edges for now. I had to mix a second batch of resin to cover the whole table, so I probably used about 10 ounces in all.
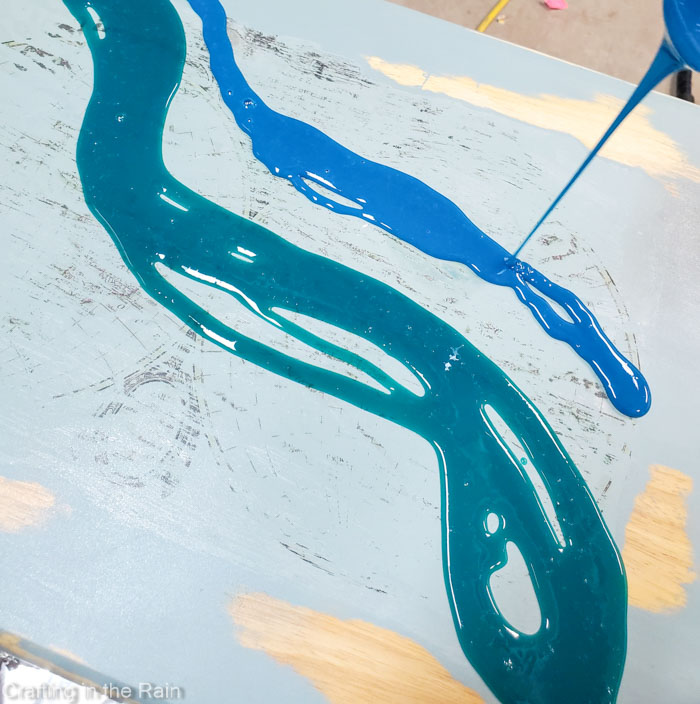

As you continue to pour resin colors across the table, mix some of the mica powder into some of the cups. I had powder in the same colors: blue, green and white. It gives a really cool shimmer to the resin.
Use a stir stick to gently spread the resin and swirl into the next color just a bit.

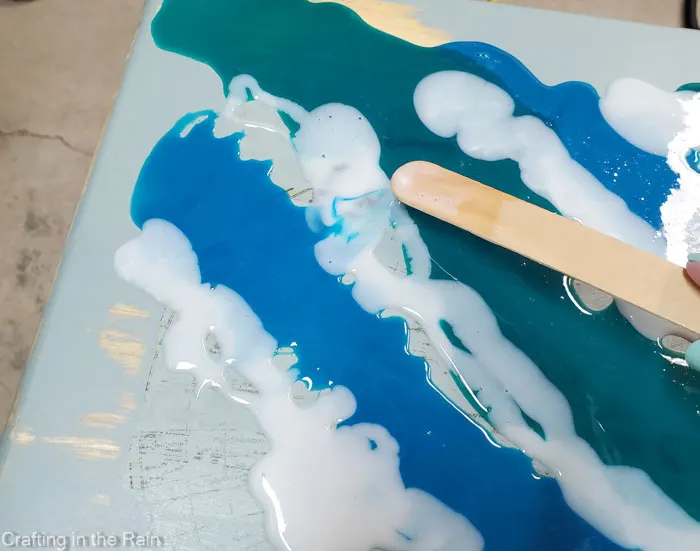
The real magic happens with the heat gun. On low, pass the heat gun over the top of the resin to pop bubbles. Then turn it on high and use it to push the colors of the resin around. Play with pushing the colors over the white, and the white over the colors.

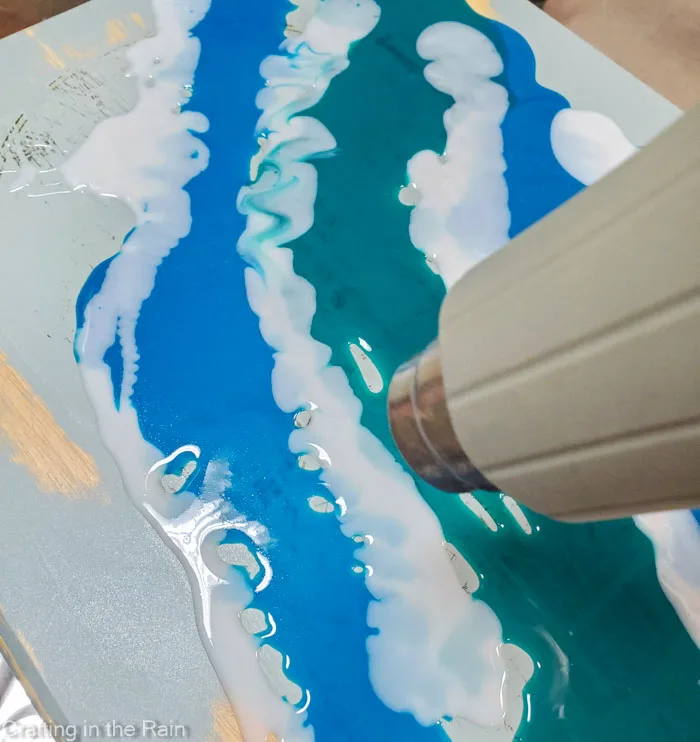
I also added some glitter flakes in a few areas – but you should know these can stick out and cause little bumps in the resin surface. So, either be ok with that, or top with a clear resin coat later.

While working on the top of the table, try to keep drips from running off the edge. When I found a drip, I swiped it with a stir stick to try to keep too much from running off.
When the table top is finished, it’s time to start working on the edges. Use a stir stick or gloved fingers to “paint” the edges with resin. Drag a stick around the bottom edge to catch drips and fill in any gaps on the edge.

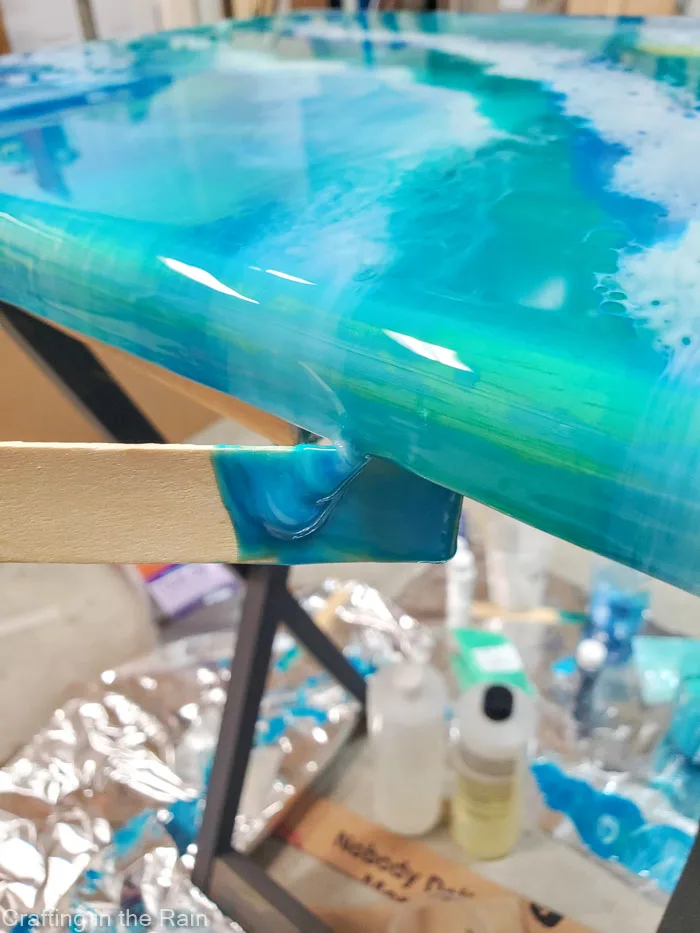
Repeat this process after 30 minutes. When the resin becomes tackier, you’ll notice that when you swipe under the edge, no more drips form and it will settle and cure. You want to remove drips like this along the way so that it doesn’t keep pulling resin off the top of the table.
But you can see here why you definitely need to protect your floor!

After 24 hours the table top should be totally cured with a smooth, glassy finish.
I freshened up the legs of the table also with spray paint, and I’m excited to display my new stunning table on my front porch.
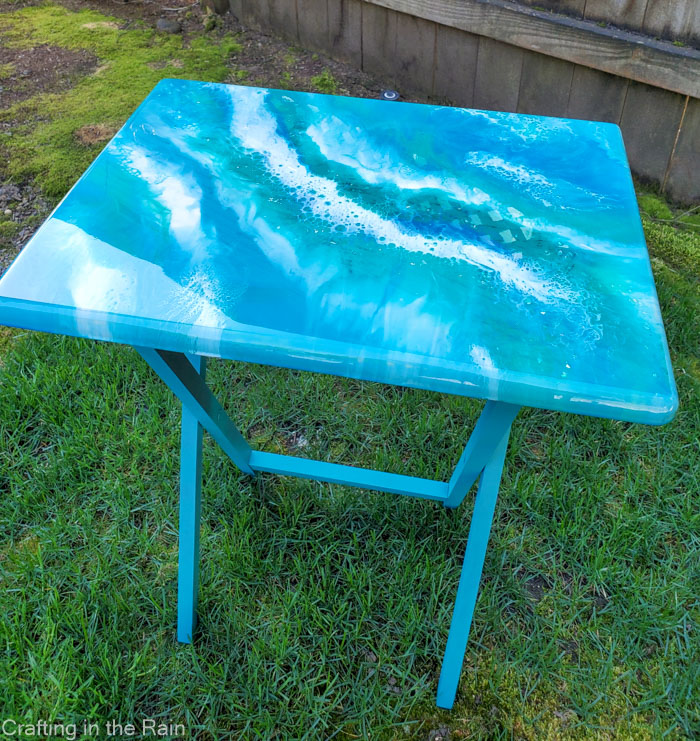
Now that it’s all finished, I’m wondering if the legs should stay this matching color, or if I should do something much darker – black or dark navy. What do you think would look best with the resin table top?
Check out my resin info page for more helpful tips and project ideas.
Kim
Sunday 15th of June 2025
Great job! It’s beautiful and you explained the process so that a beginner like me can understand! Thank you!