Let’s talk about how to upload patterns and use pattern fill in Cricut Design Space and explore the options of what to make with them once they’re there.
Designs Space Pattern Fill
There are a ton of great digital papers, backgrounds, and patterns available online – do you wish you had more ideas on what to make with them? Hopefully, this post will help!
Use this form to access some SVGs and digital paper I designed so you can practice.
You can watch me use them in this YouTube Video
I love using digital papers as patterns and backgrounds because they almost always come in a coordinated set. You don’t have to look for an existing, ready-to-buy scrapbook paper set to get the custom look you want.
Creative Fabrica for Cricut Patterns
Creative Fabrica is a great resource for finding patterns to use.
For starters, they have a great freebie section with fonts, clip art, and more.

Here you will find their patterns, or digital papers. Fine-tune searches to find specific colors, foods, animals, holidays, and more.
With Creative Fabrica you’ve got two payment options.
1 – No membership / a la carte
You can buy individual items (graphic packs, fonts, whatever) and you have them to own.
2- Membership
You can pay for a monthly subscription and you get access to EVERYTHING on the site! Download unlimited items and go nuts!
Benefits of Creative Fabrica Subscription
- $4.99/month, billed as $59.88/year (normal price $348)
- Discounted price valid forever – Renews at $59.88/year
- Access to millions of Graphics, Fonts, Classes & more
- Personal, Commercial, and POD use of files included
Creative Fabrica licenses
Everything comes with a commercial license, meaning you can use these fonts, patterns, graphics, etc. to make new designs and files, or end products, that you sell or offer as freebies.
Be sure to read the license details for specifics, but remember that if you are on the subscription plan, you can only use the things you’ve downloaded for as long as you continue to pay for the subscription. Once you end the subscription service, anything that you previously created can still be used, but you cannot create new items.
Now that you know all about the cool stuff you can find at Creative Fabrica, pick a background pattern or paper pack, and download it.
If it downloads as a zip folder, right-click and extract the files.
Patterns in my Etsy Shop
I have a few design kits in my Etsy shop that include themed SVGs and some digital patterns to match.
Check out the design sets here

Upload pattern to design space for pattern fill
Then let’s learn how to upload a fill pattern to Design Space. We’ll be making a notecard and sticker set to demonstrate the process.
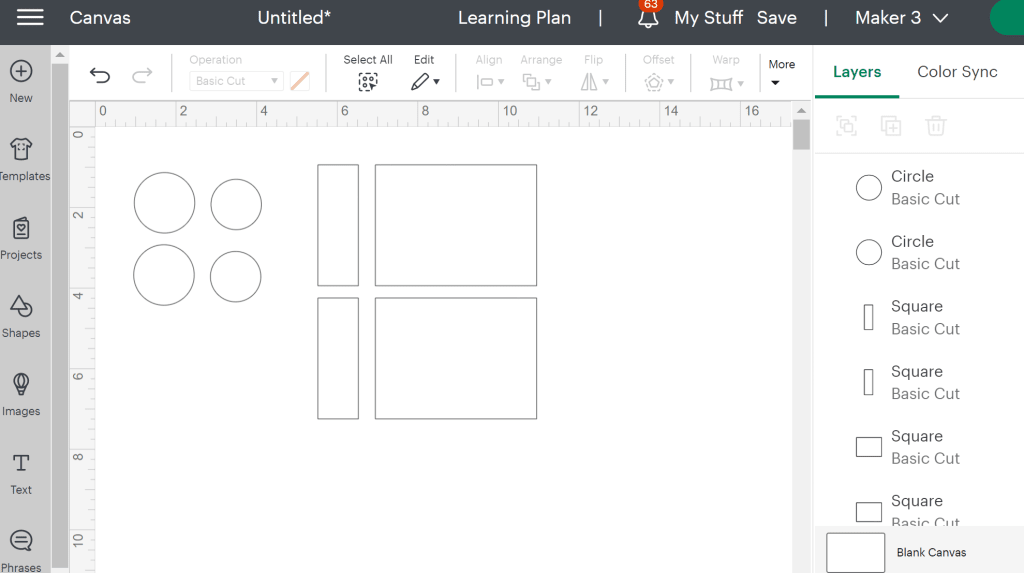
Open Design Space and create the following shapes on the canvas.
- 1.5 inch circles
- 1.25 inch circles
- .75x.3.25 inch rectangles
- 4.5×3.25 inch rectangles

Next, click Upload. It’s the bottom icon on the left in Design Space.
You have probably used the button on the left often to upload SVG files or other images. This time, click Upload Pattern.
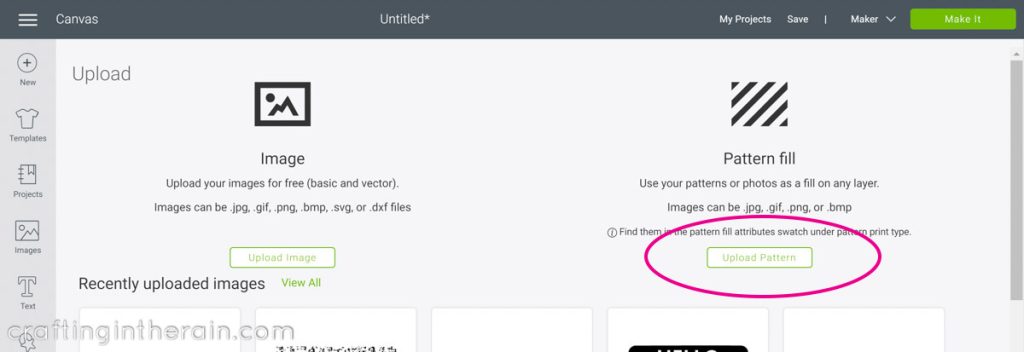
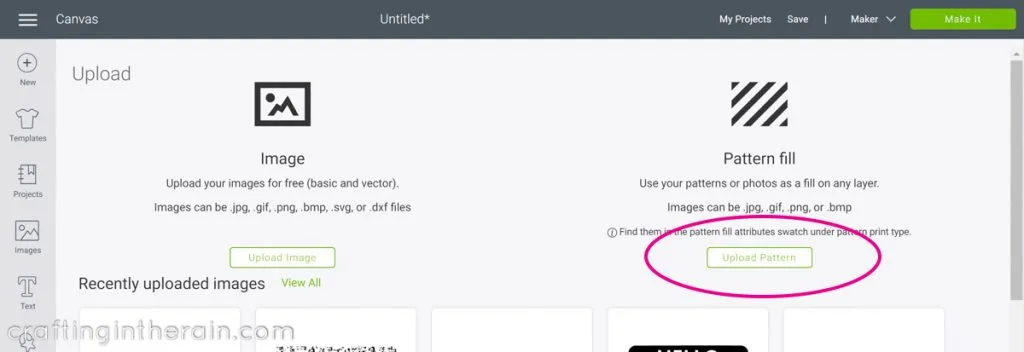
Navigate to where the pattern file is on your computer (in your Download folder, or if you have saved it in a different folder, like for background patterns.)
On the next screen, the pattern appears and you can give it a name as well as assign it categories and a color swatch. Then Click Save.
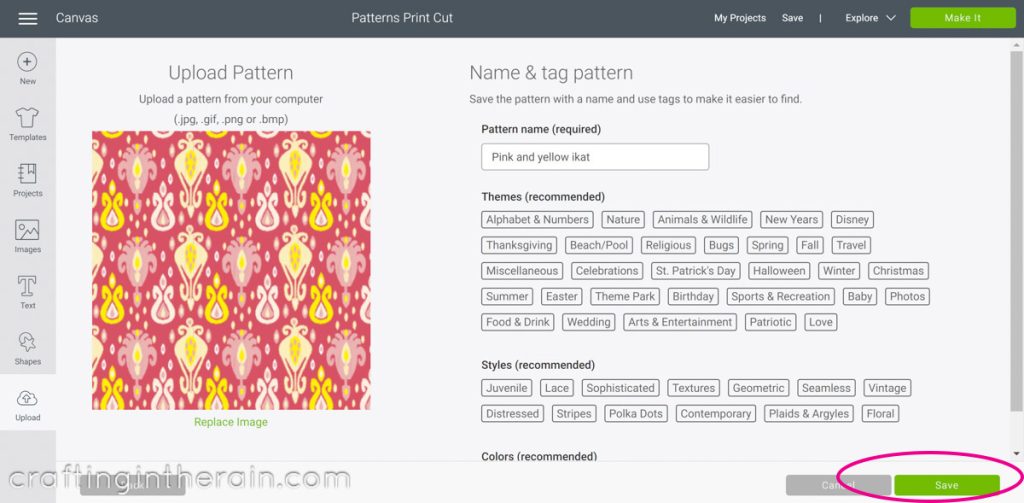
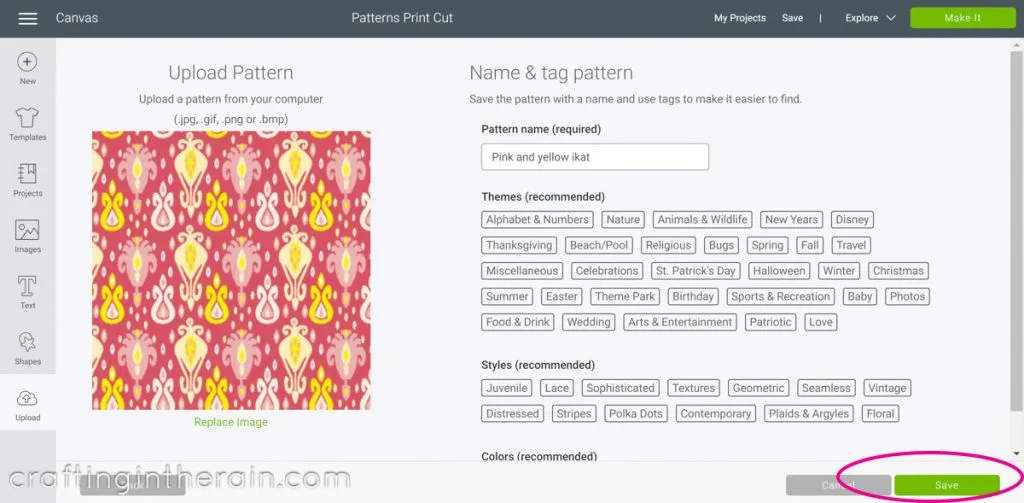
Now the pattern is saved in Design Space.
Can I search patterns in Design Space?
Unfortunately, not at the moment. There is no way to search or sort the pattern swatches in Design Space.
You can pick a color category, so the best thing to do is assign a color when you upload a pattern, and it will cut down the number of pattern swatches you have to scroll through.
Use Cricut Pattern Fill
The menus at the top bar have changed just a little, so watch this updated video to see how to give a shape a pattern fill.
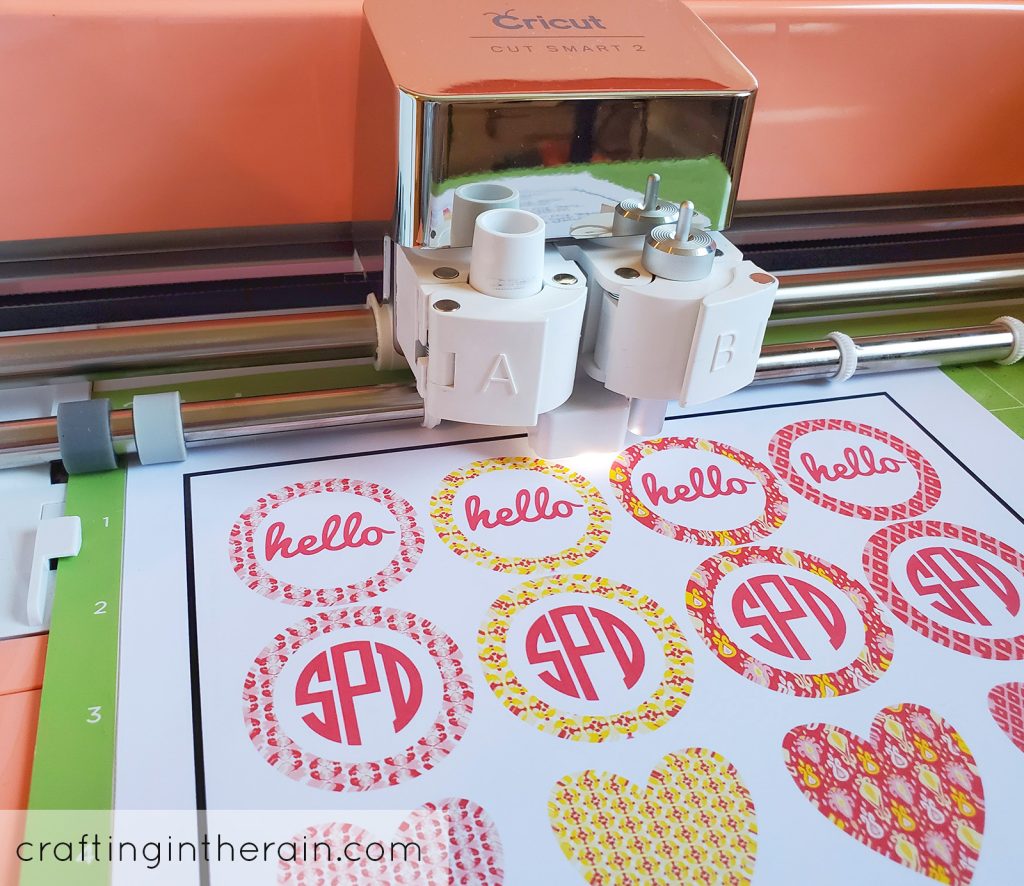
To change a shape from a solid color cut to a pattern print then cut, click on the shape, like the rectangle below.
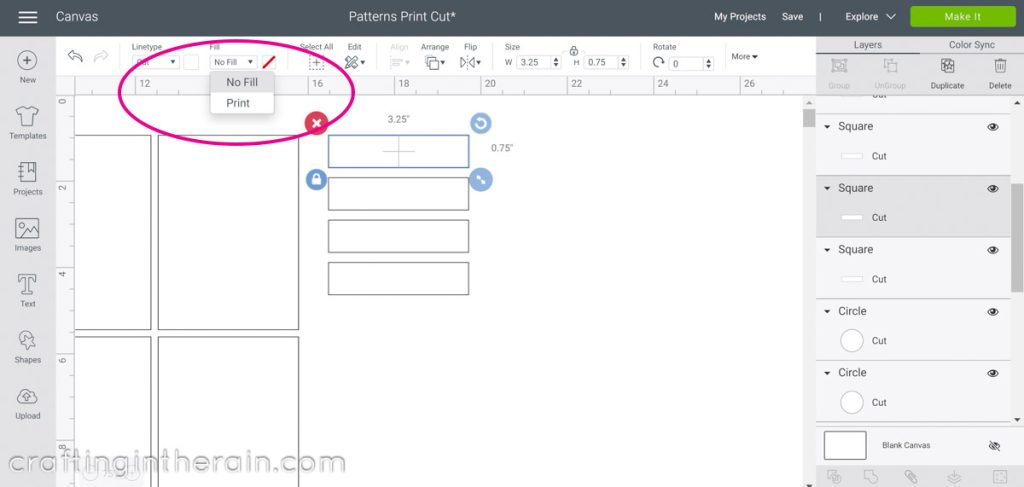

Click the drop down box that says No Fill, and select Print. Defaul will be set at Color, so change it to Pattern.
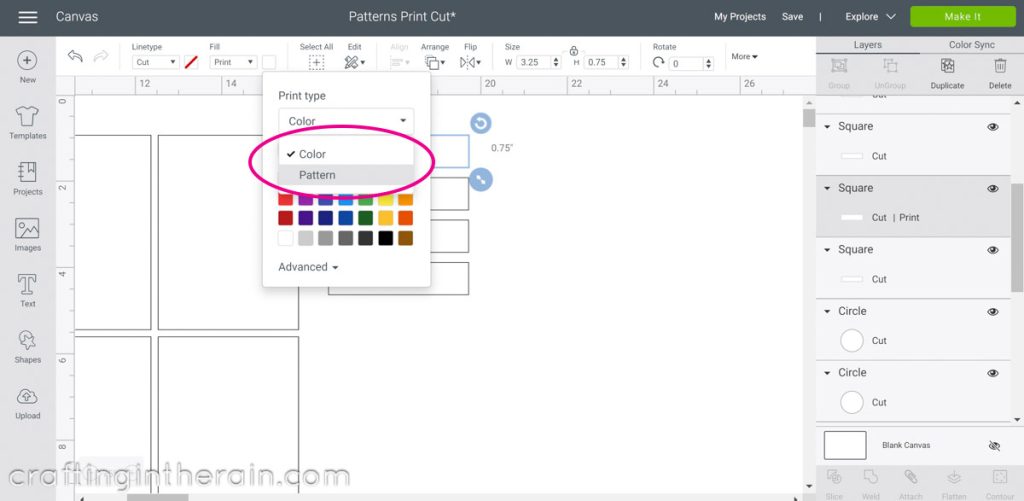

Then the pattern box shows up, and the patterns you have uploaded show up recent to old. There are also a bunch of patterns preloaded into Design Space that you can use. Click the pattern you want.


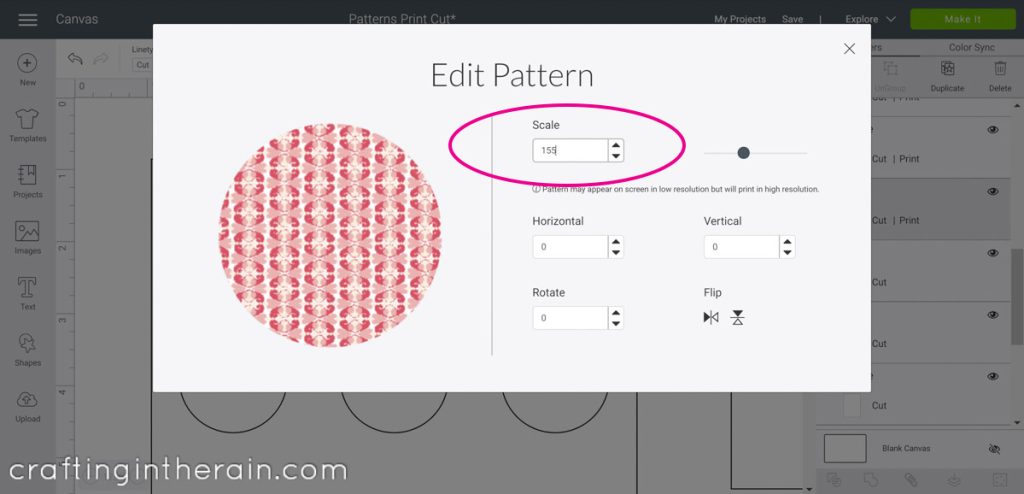
You can also adjust the pattern by clicking Edit Pattern at the bottom of the pattern box.
You can change the scale – how big or small the pattern print is. You can also rotate, flip, or scoot horizontally or vertically.
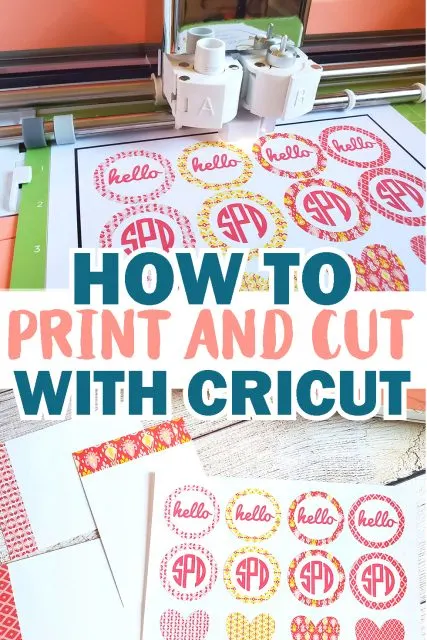
Make sticker with patterned background
Here’s how we’re going to make some hello stickers.
Fill a larger circle with pattern, then center a smaller white circle on top.
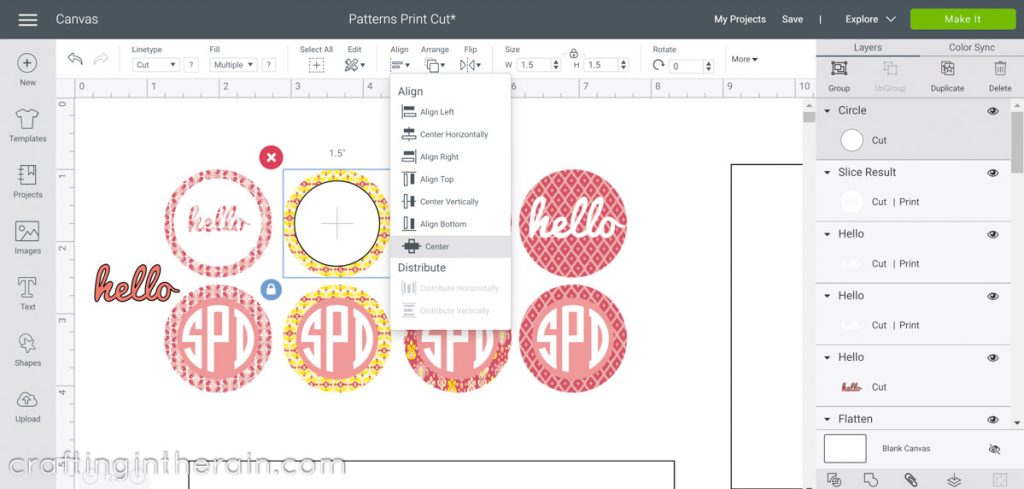

The “hello” I used is an image, but you could also type it in a font you like. (Remember to weld a script font!)

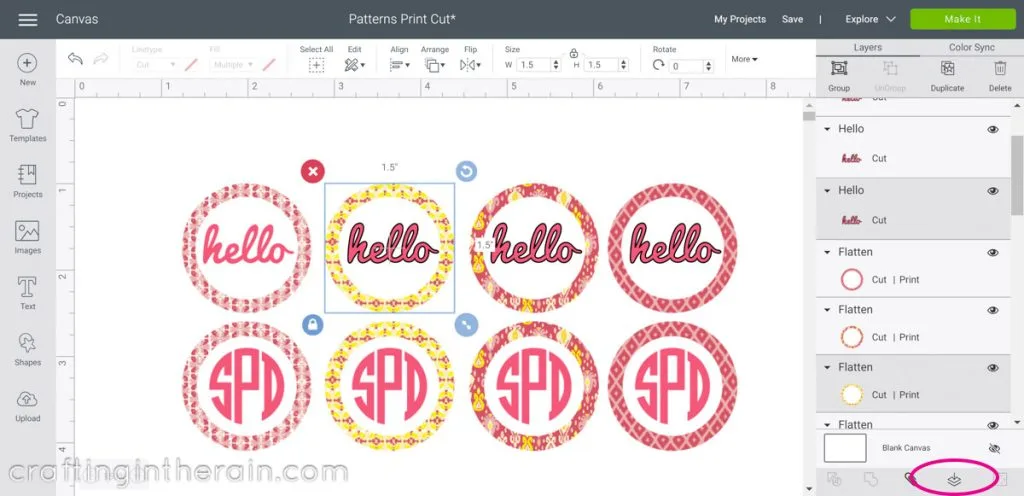
Then select the circles and the word and click the flatten icon – bottom right of the Design Space window. This turns it into a Print then Cut image, and only the large circle will be cut.
Repeat the process for making monogram circles or another type of sticker. Text can also be replaced with a pattern.
NOTE: If you were to create just a patterned ring, and then put the word inside and flatten, the machine would cut around the outside of the ring, AND around the word. That’s why we layer a white circle, so that it’s not actually blank space.
Make notecards in Design Space
To make the note cards, change each small rectangle to a pattern and line it up to the top center of each larger rectangle. Select the pattern and the card and click Flatten.
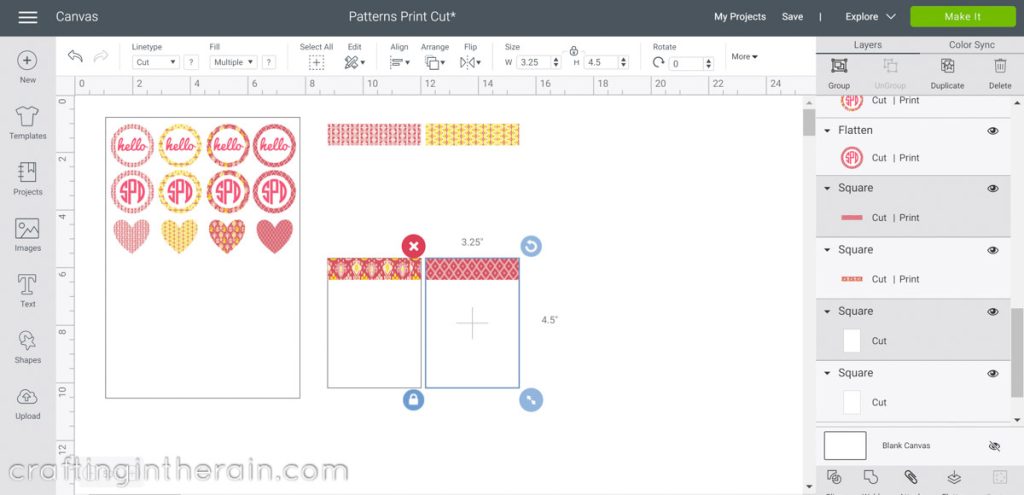

Now it’s time to print a page of stickers and a page of notecards. To make sure all the note cards print on the same paper, select all for cards and click Attach.
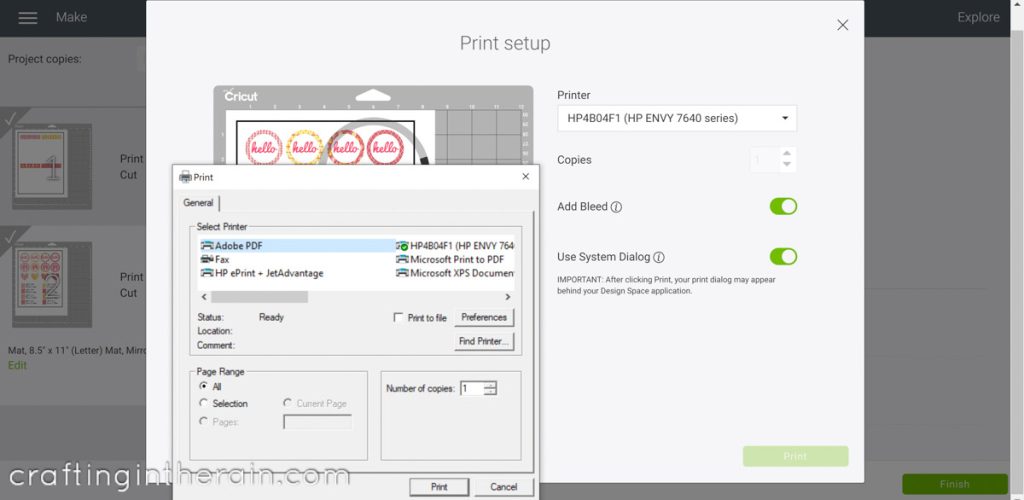
*STOP* at this point, be sure to save your project in case anything goes wrong when trying to print. If you don’t, you’ll be sad. And you can guess how I know this.
Click Make it, and hit Send to Printer. Double-check what is going to print first so you can load your printer correctly. Cardstock for the note cards, or Matte Sticker Paper for sticker (read why I like it better than Sticker Paper.)
PRO TIP: Sometimes Design Space will stall out when you’re trying to print and just keep spooling. Since you previously saved your project, this is no problem. Close and reopen Design Space. When you go to print, choose to Use System Dialog and change the print job to save as a PDF instead of going right to the printer.
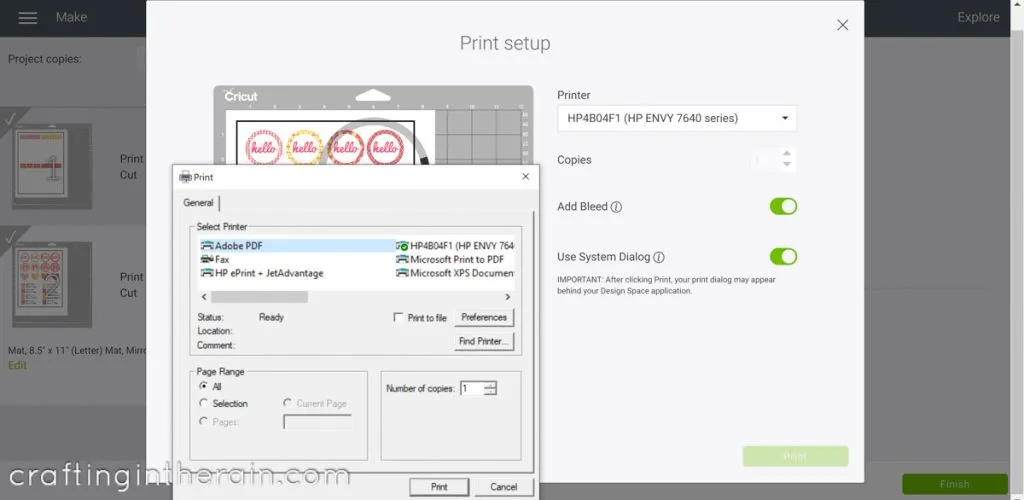
Then you can go to the PDF and print it (print at best quality.)
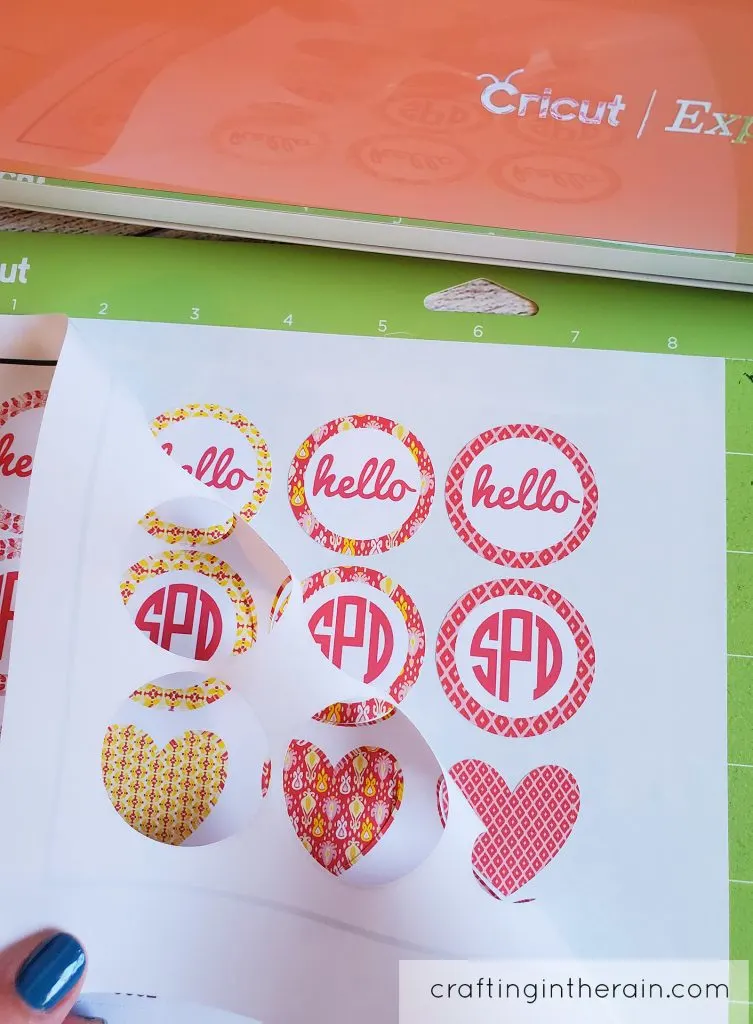
In Design Space, you will now click “I’ve already printed.” Load the cardstock and vinyl on mats, setting the correct material on your Cricut. The light will scan over the black registration square first.

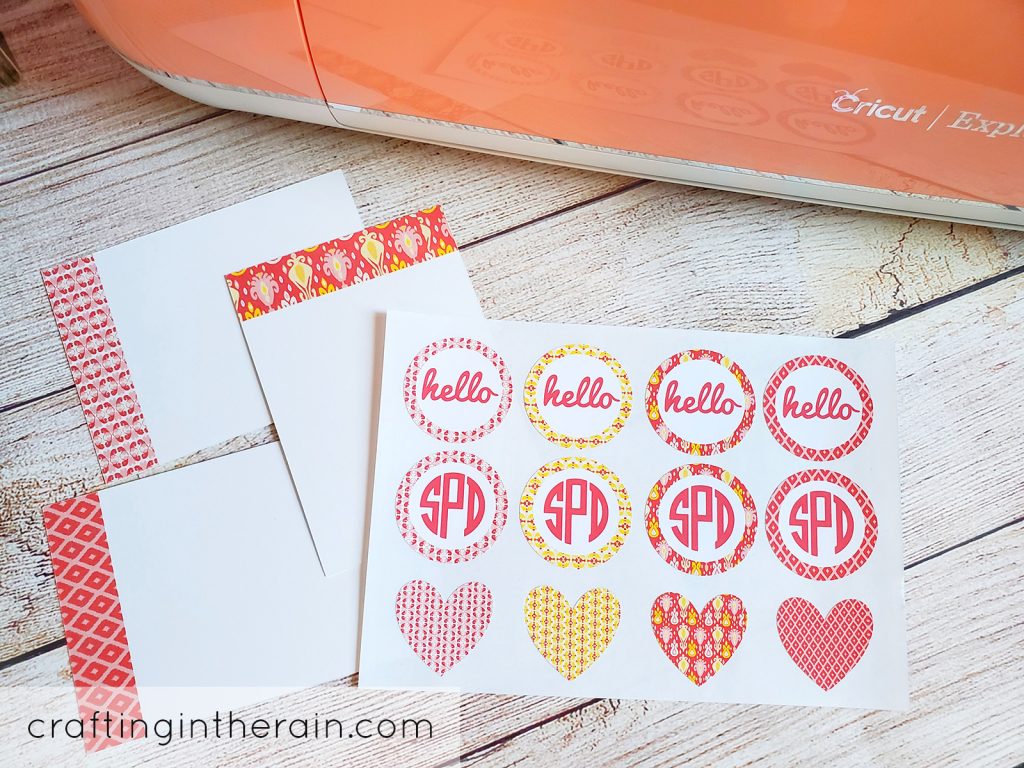
Peel away the extra vinyl from around the stickers, and pop the notecards off.

Now you can send out some cute handwritten notes sealed with your custom stickers!

Using these same techniques, here are things you can print then cut with patterns – and they can all be perfectly coordinated.
- Cards
- Stickers
- Bookmarks
- Banners
- Planner pages
- Magnets
Patterns used in this post: Summer Digital Paper (pink and yellow ikat)
Cricut supplies you’ll need:
- Cricut machine (Maker or Explore – Joy doesn’t support Print then Cut)
- Matte Sticker Paper
- Cardstock


Kim P
Saturday 17th of May 2025
I can not find the form to fill out to access the SVGs and digital paper you designed so I can practice.
Carol Jenne
Wednesday 31st of July 2024
I love your explanation on how to edit the patterns - however, what if the pattern you pick and edit will not edit on the DS screen you're working on? Is there a tip you can give me on how to complete an edit? thank you
Dee Dee
Saturday 19th of December 2020
In choosing a background fill design for a 4x6 card (print then cut) the pattern repeat of the design is not lining up For a continuous design and creates a funky somewhat mirror image. In the lesser patterned choices there is a white line (blank space) in the final print. Is there a fix? Is the 4x6 card too big?
Dyane
Sunday 28th of June 2020
Thank you! I have enjoyed reading all your articles for many years. I learn so much and appreciate your tutorials:)
Lisa Kellett
Saturday 27th of June 2020
Thanks for going over this. I haven't used print then cut for much of anything, but I was interested in making stickers. Now I feel a bit better about using print then cut.