Welcome to the third day of the series I’m writing about how to use text in Cricut Design Space. The last post was about letter spacing. Today I’m going a little more specific and talking about spacing and connecting script letters in Design Space.
UPDATED: July 2022
In recent Design Space releases, changes were made to the text box functions, and script fonts will automatically connect. However, you may still want to adjust some letter spacing because it still isn’t perfect, so you can follow the steps below.
Want all the information from the whole series in an easy-to-read eBook? Sign up here!

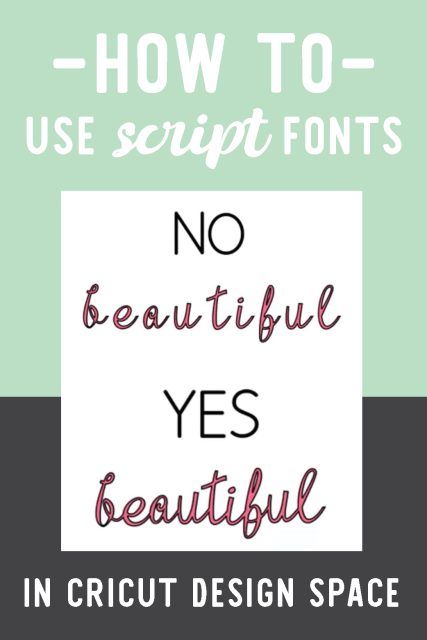
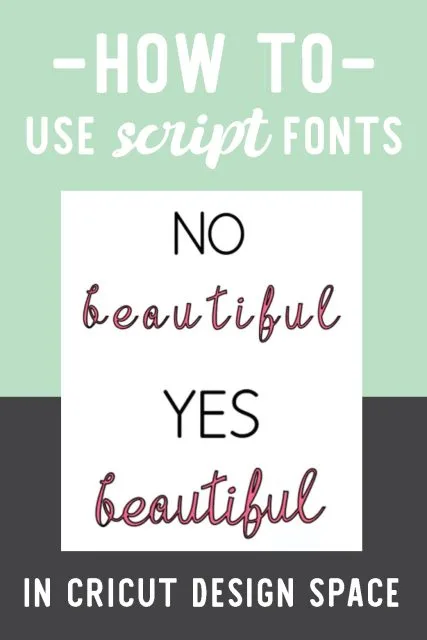
How to connect cursive letters in Design Space
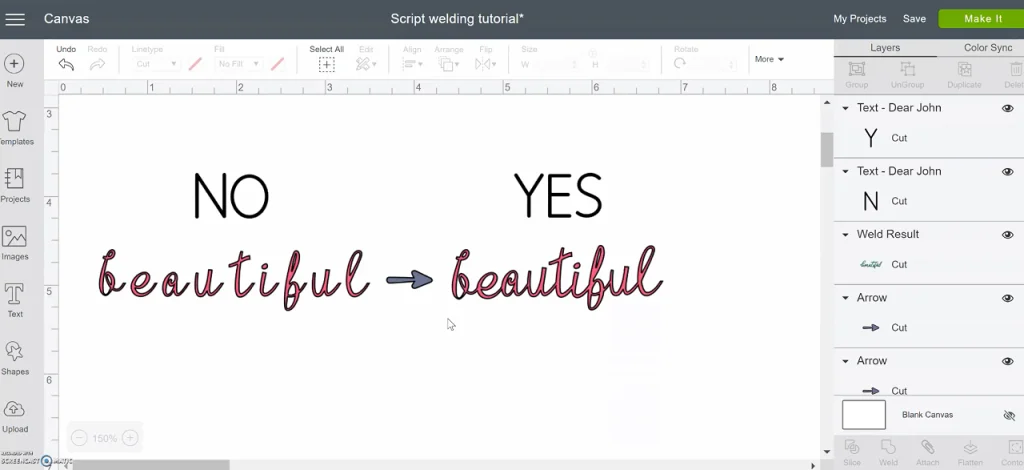
Common Rookie Mistake: Not connecting / welding letters to make a single word that looks handwritten.
The biggest mistake I see when using script fonts is that people skip the step of connecting the letters! It doesn’t matter how long you have actually been crafting and designing – if I see script letters that haven’t been connected, it looks like you missed a step. Maybe that’s terrible, but we can fix that!
So let’s learn this easy process to take all your script words to a professional level.
Choose a script font
Add a text box and type your word or phrase. Choose the font you want.
READ THIS POST ON how to choose Cricut fonts
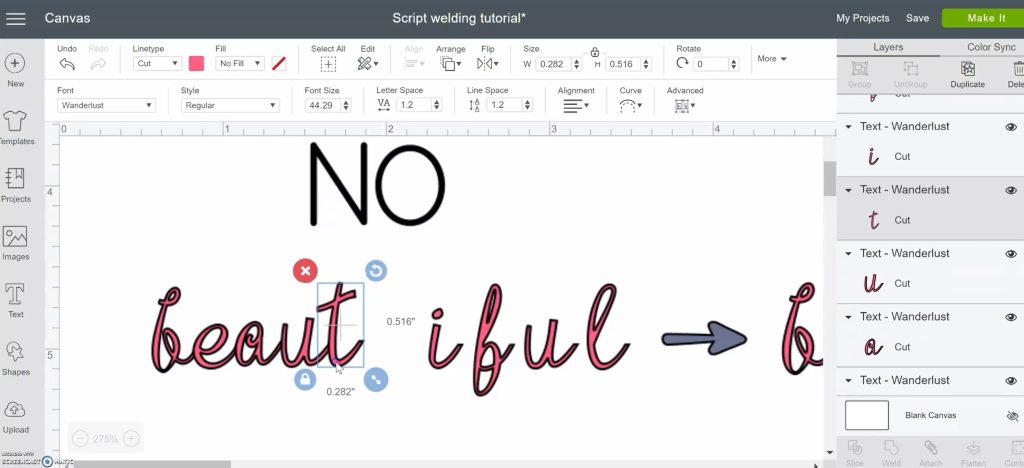
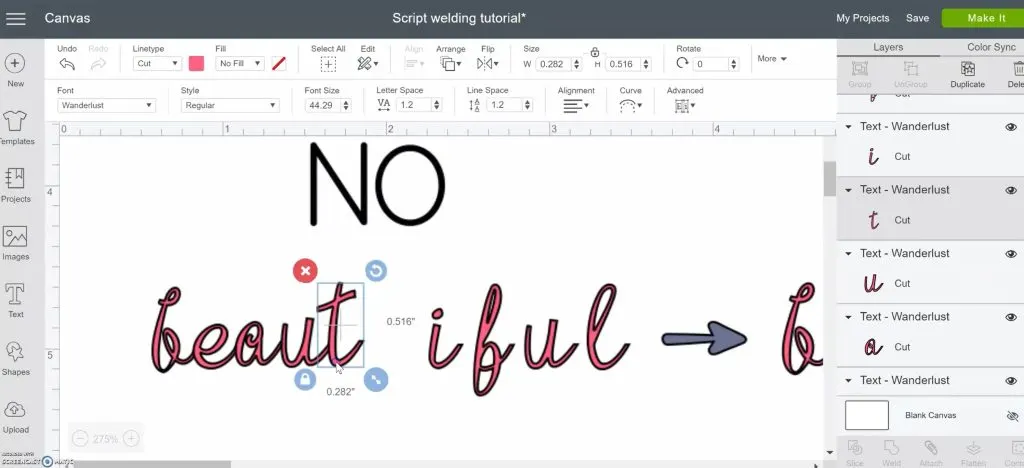
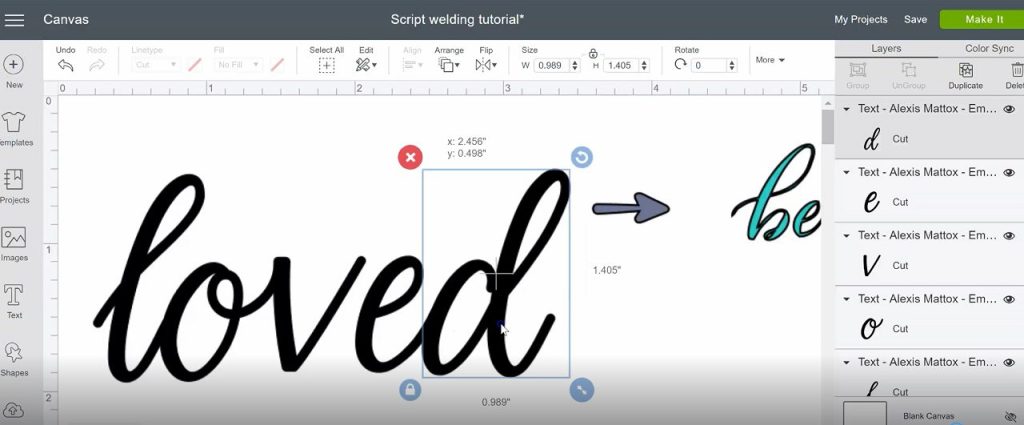
Select the text box and click “ungroup to letters.”
Close in space between letters (kerning)
Use the mouse to drag letters next to each other and overlap whenever possible. When overlapping, do your best to keep the natural line of connecting those letters.
What I mean by that is an “o” may not have a tail coming off of it, so you can decide if it should touch the next letter, or just be very close. Some letters may need to move more to get the tails to blend into the next letter, even moving up or down a little. Try to make everything look as natural as possible.
That may depend on what you are cutting as well. With vinyl or iron-on vinyl, the spacing between all letters will transfer to the final project.
If you’re cutting out cardstock that needs to be one complete cut in the end, keep that in mind and make sure everything overlaps a little.
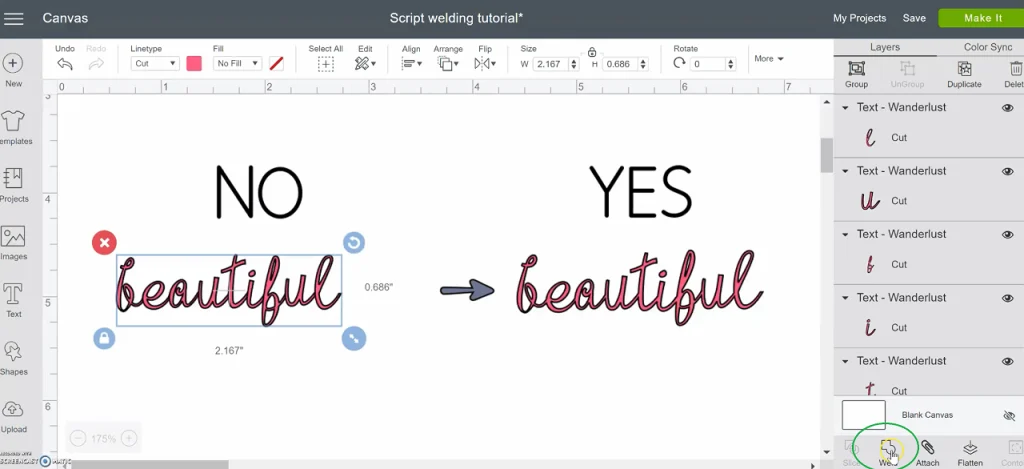
Weld letters to cut word in one pieces
Select all the letters of the word or phrase and weld. This creates a new path all the way around so that individual letters aren’t cut out. If you attach, each overlapped part still cuts and you get a bunch of tiny messed up pieces. So don’t attach.

A letter blacked out when I hit weld
POSSIBLE PROBLEM: Help! The insides of letters disappeared after welding!
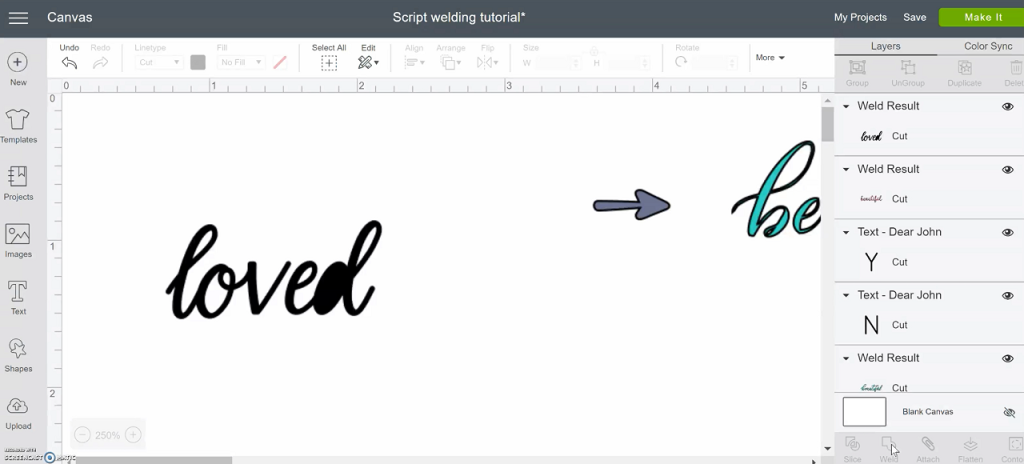
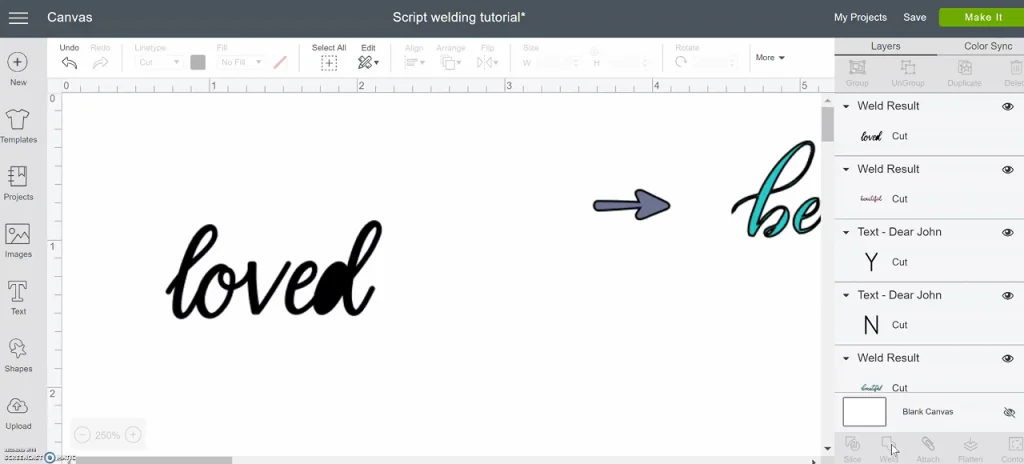
Sometimes the inside of an e or o or another letter disappears when you weld. This happens because the letter next to it was overlapped just a little too much. You can undo and try to scoot it over just a tiny bit and try again. You can also increase the size of the whole word, correct any needed spacing, and weld. Then return it to the size you need.
So now you’re ready to dive into the world of script fonts and have them look great.
Connect Cursive Letters in Design Space

Connecting letters in Cricut Design Space is the most important skill to know when using script fonts. Learn how to weld cursive letters
Tools
- Cricut Design Space
Instructions
1. Add a text box and type your word or phrase. Choose the font you want.
2. Select the text box and click “ungroup to letters."
3. Drag letters next to each other and overlap whenever possible.
4. Select all the letters of the word or phrase and weld.
Notes
Sometimes the inside of an e or o or another letter disappears when you weld. This happens because the letter next to it was overlapped just a little too much. You can undo and try to scoot it over just a tiny bit and try again. You can also increase the size of the whole word, correct any needed spacing, and weld. Then return it to the size you need.
Recommended Products
As an Amazon Associate and member of other affiliate programs, I earn from qualifying purchases.

You still may prefer using downloaded fonts with your Cricut. FontBundles is one of my favorite places to purchase fonts, and they have a collection of free fonts also.

READ THIS POST ON How to Use Your Own Fonts in Cricut
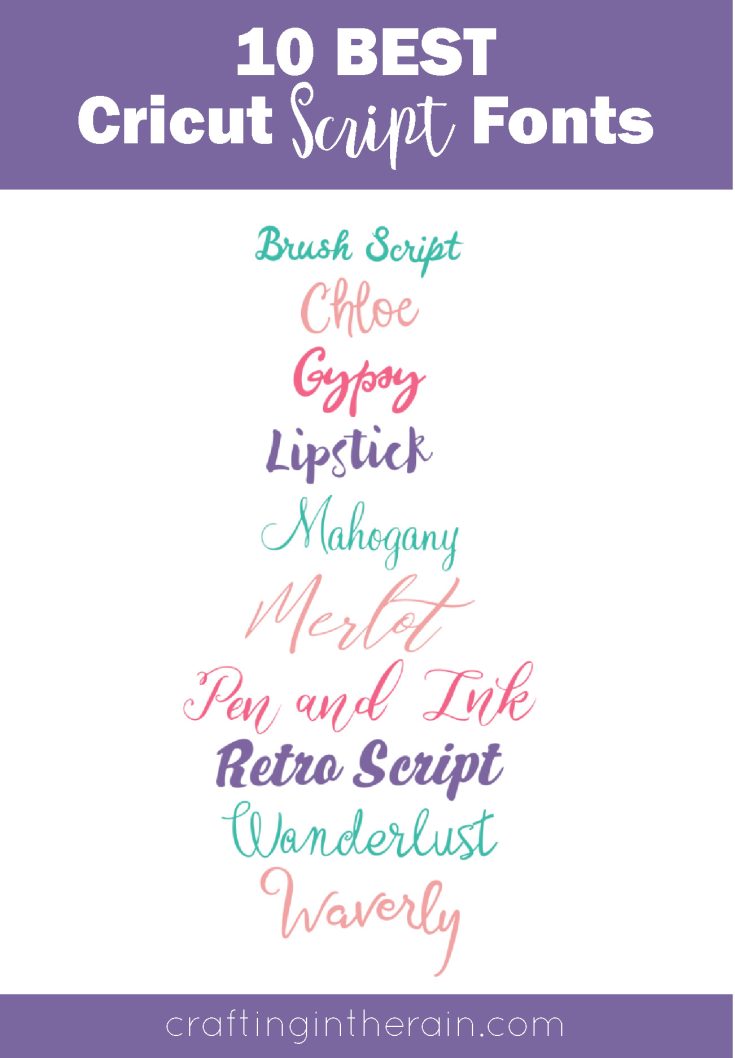
I included this list in my first post about using Cricut text, but I’ll include it here too. They’re some of the best script Cricut fonts to help you get started. Did I leave out one of your favorites?
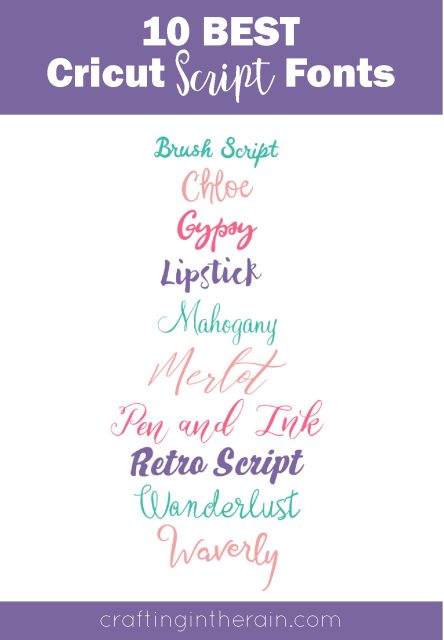
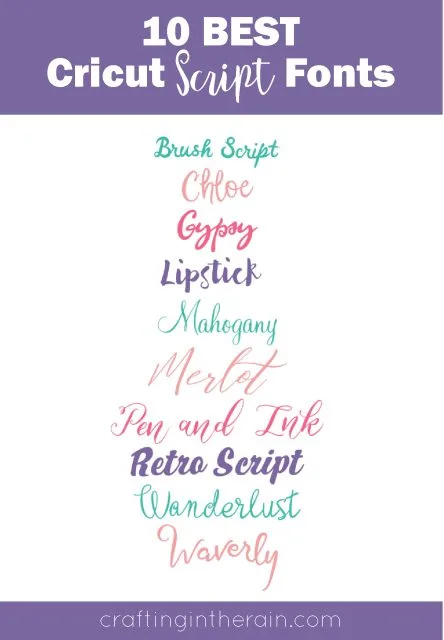
Renee
Tuesday 13th of July 2021
LIFE SAVER! Thank you for the info on overlapped letters!!!
Sonja Peffer
Tuesday 1st of December 2020
When I try to drag the letters, they won’t move. I have done everything else but cannot drag the letters on the iPad.
Breanna
Saturday 4th of July 2020
Thank you! Super helpful - exactly what I was looking for :)
Njohn
Tuesday 16th of June 2020
Thank you so much, I have been trying to do this for days.