Custom stickers have never been so popular, or so easy to make, when you have your Cricut machine to help you out. Want to make custom Cricut stickers for your planner? an upcoming party? your business? Watch how easy it is to upload images to Cricut – then turn them into stickers!

Supplies for making stickers
- Sticker Paper or Full Sheet Labels (I love these for making planner stickers)
- Cricut Design Space
- Cricut Explore or Maker
- Printer
- Image you want to turn into a sticker (I used this watercolor unicorn set)
Calibrate Cricut Print then Cut
If this is your first time doing a print then cut project with your Cricut, you’ll want to calibrate the blade with the sensors reading the registration marks.
It’s really easy to do this, and Cricut has a tutorial you can follow here. You’ll print a test page and load it into your machine and follow the on-screen prompts. You’ll answer questions about which cuts are most accurate and the machine makes adjustments accordingly.
Upload image to Design Space
In Design Space click “upload image” and browse to find the image you’re using.

Click around the background of the image to remove it. (It gets replaced with the checker pattern)
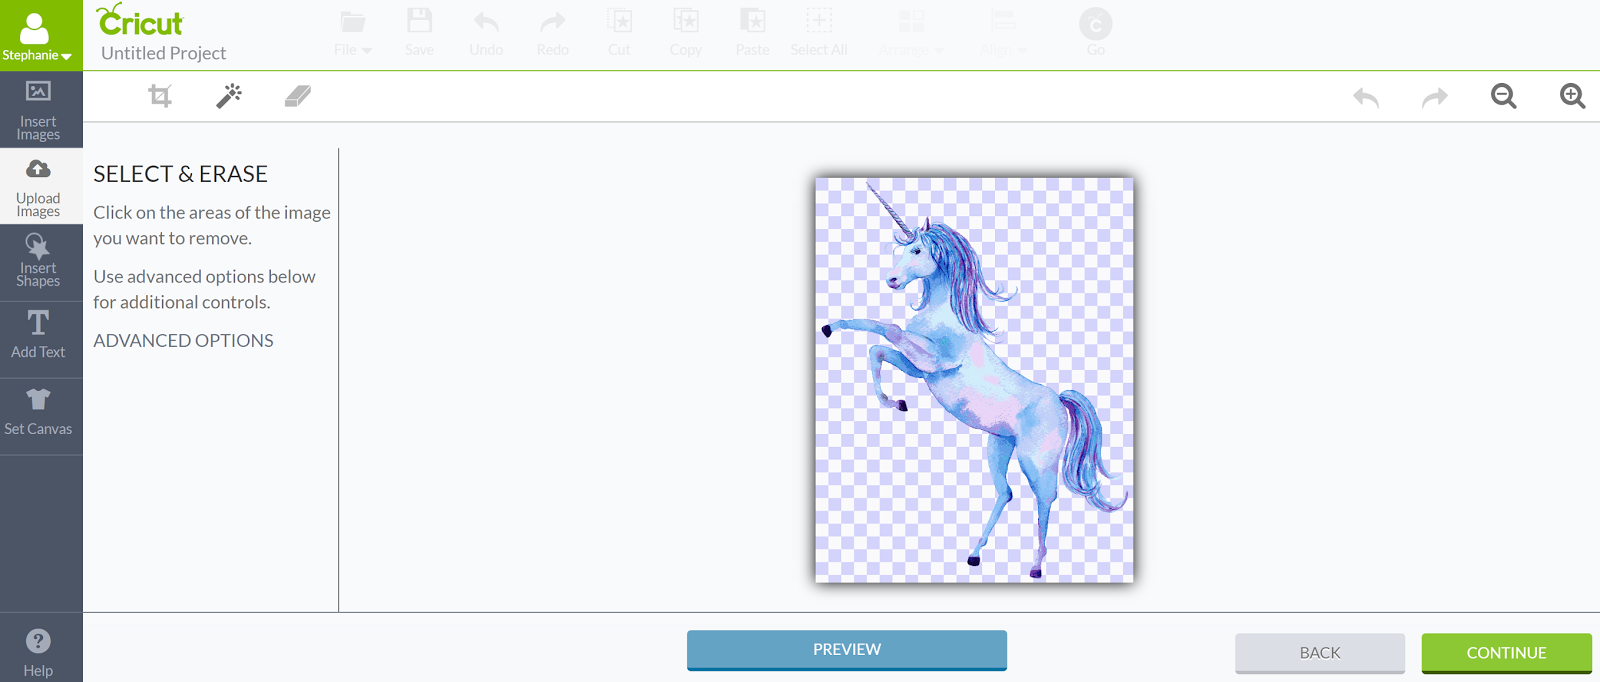
Select “save for print then cut” option and insert into project.

Resize the image if needed.
I repeated those steps multiple times to get a lot of the different unicorn images.

Printing stickers with a Cricut
Follow prompts to print the design. Toggle on the option for Bleed. This adds a bit of color around the outside of your image so that you don’t end up with a sliver of white around it after it’s cut. It will look a little fuzzy when it prints, but the cut looks correct.
Make sure you put the Sticker Paper into your printer the right way. Mine has to go right side down! (PS Cricut brand Sticker Paper always jams my printer, so that’s why I recommend these label sheets instead.)

Position the paper on the mat and continue to follow directions by loading mat into machine and pressing cut. For the labels I recommend above, I set the material to printable vinyl.
The Cricut Explore finds the registration marks and then cuts around all the sticker designs. Unload the mat, and all your stickers are ready to use!

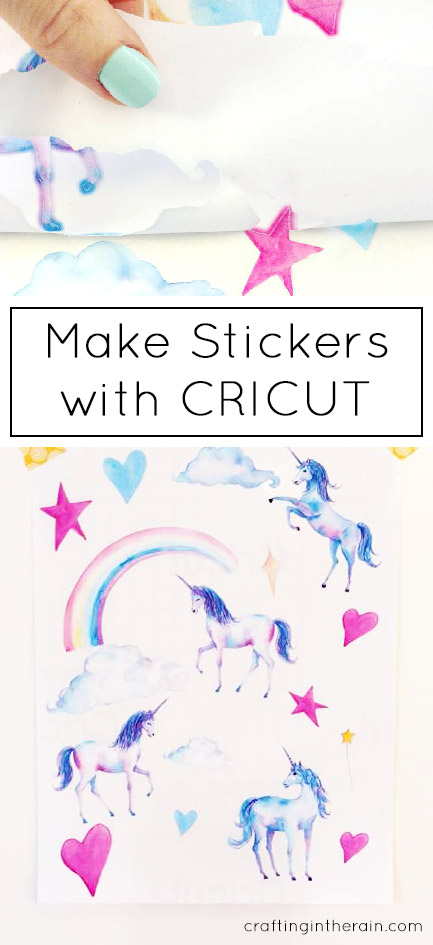
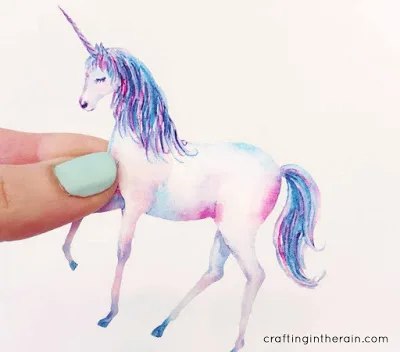
This is how the final stickers came out! My sticker set printed out on two sheets of sticker paper, but I combined them to one. How happy would this set make a little girl (or you!) in your life?
See how easy it is to upload images? So many possibilities for your Cricut open up when you can do that huh. What do you want to make stickers for?
Cricut Sticker with Uploaded Image

Custom stickers have never been so popular, or so easy to make, when you have your Cricut machine to help you out.
Materials
- Sticker Paper
Tools
- Cricut
- Printer
Instructions
1. Find the image or images you want to turn into stickers (check Etsy, sites like Design Bundles) It should be a jpg or png
2. Upload the image into Design Space
3. If the image has a white background, click around it to remove. If the image was a png, the background will probably already be gone (Design Space will put a checkered pattern around it)
4. Save for "print then cut" and insert the image into your project
5. Repeat to add more stickers and resize as necessary. The printable area limits are 6.75 inches x 9.25 inches
6. Load sticker paper into printer
7. Click Make It in Design Space, then Send to Printer
8. Use the system dialog to print at the best quality
9. Set material to printable vinyl and load mat
10. Cricut will scan for the black printer outlines, then cut around each sticker
Recommended Products
As an Amazon Associate and member of other affiliate programs, I earn from qualifying purchases.


If you want to watch a video tutorial of the same process, but with a different image, check out this post about uploading images to Design Space.
This walkthrough video shows different images, but the process is the same.
12 Ways to Make Stickers with Cricut - DIY Crafts
Saturday 3rd of December 2022
[…] Oh, the charm of unicorns and their enchanting sensational appearance. Make your own customized stickers and add a glammed up touch to your notebooks or planners. Get the step by step guide with illustrations here. craftinginthe […]
Need to Create Custom Stickers? Let Your Cricut Machine Do the Magic – Manny Maker
Friday 15th of April 2022
[…] Make Custom Cricut Stickers with your Own Images […]
Desiree Taylor
Monday 14th of March 2022
Can you do all of this with the cricut crv001?
Stephanie
Monday 14th of March 2022
Unfortunately no, but it can be done with any version of Explore or Maker. Those machines have the sensors needed to read the registration marks that get printed around the images.
Angela
Monday 2nd of August 2021
Can this technique be used for the Cricut Joy too?
Stephanie
Monday 23rd of August 2021
The joy doesn't have the sensors needed to do Print then Cut.
Stephanie White
Tuesday 25th of February 2020
If I’m wanting to print. Stickers that have multiple colors in the design what color paper do I load in the tray? Sorry I’m brand new at this lol
Stephanie
Tuesday 25th of February 2020
You'll want to put white paper or white sticker paper into your printer. The printer will then print the colored images from Design Space (make sure the image is "flattened" first so that only the outline is cut by the blade when you put it on a mat and load it in the Cricut.