This is the second post in a series about using fonts in Design Space. I’m sharing tips and tricks that will help you get professional looking results in your Cricut projects. Today we’re talking about how to space letters in Cricut Design Space.
Want all the information from the whole series in an easy-to-read eBook? Sign up here!
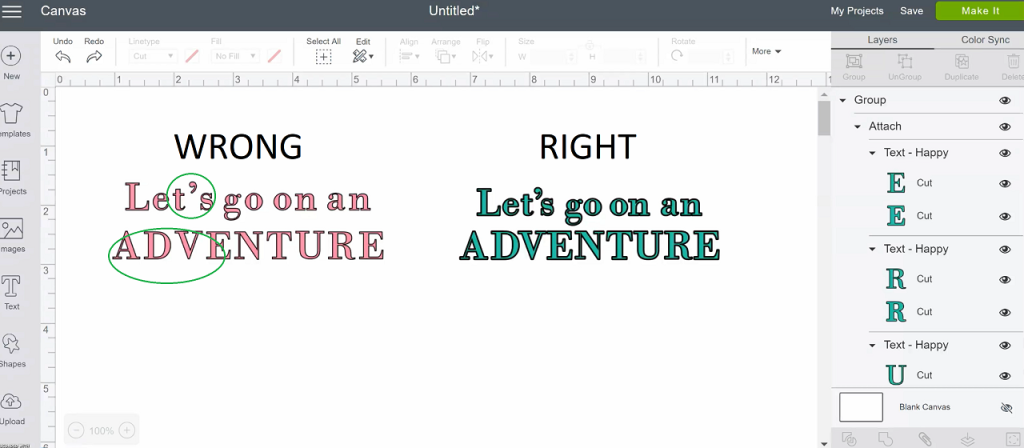
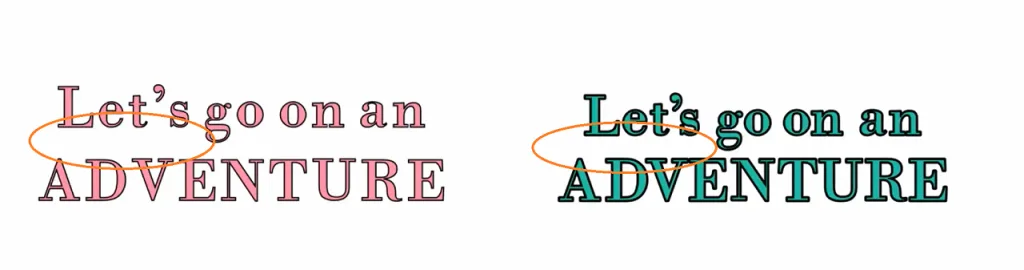
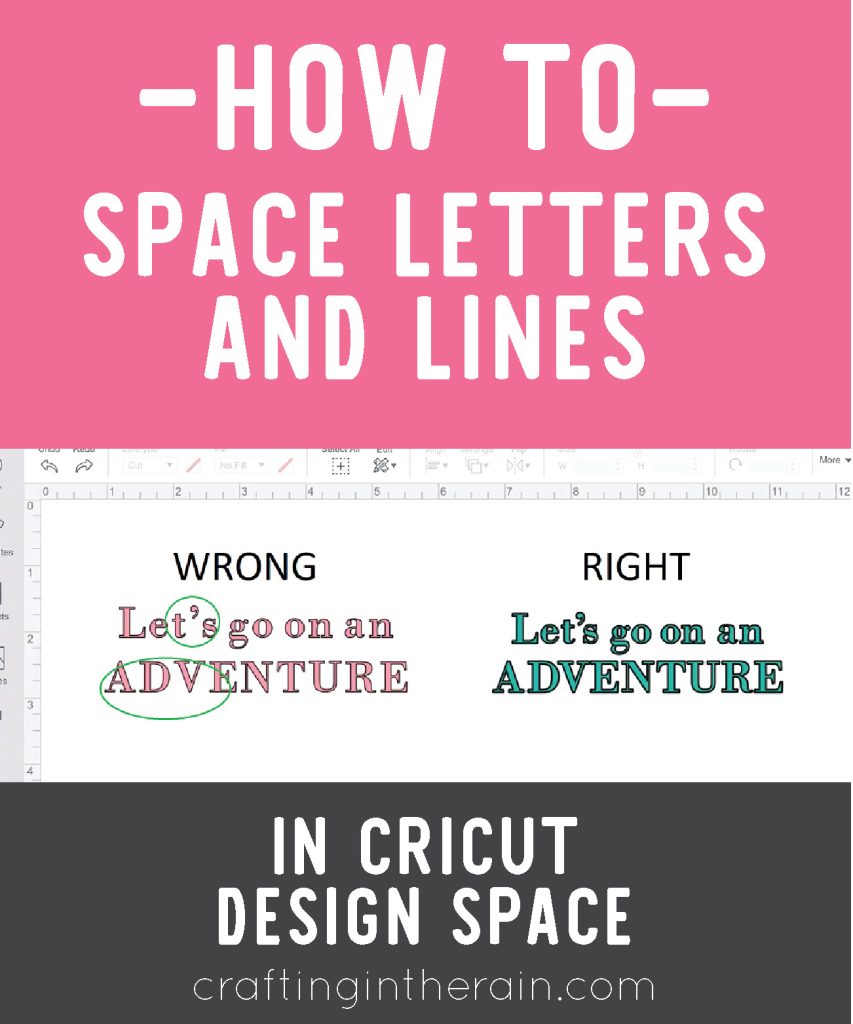
Common Rookie Mistake: Leaving too much space between lines, or some letters.
When you type a word into Design Space, each letter gets its own invisible box around it. The “boxes” don’t overlap, so you sometimes get funny looking spaces between letters. This can be annoying, but it is fixable. Watch the video to go through the process, or read through the post and images.

If you’re cutting letters out of paper or cardstock, you’ll fix placement when you’re gluing them down so it doesn’t matter.
But if you’re cutting vinyl or iron-on, you want everything to be spaced correctly before you cut.
Start by typing the words and choosing the font you want.
READ THIS POST ON how to choose Cricut fonts
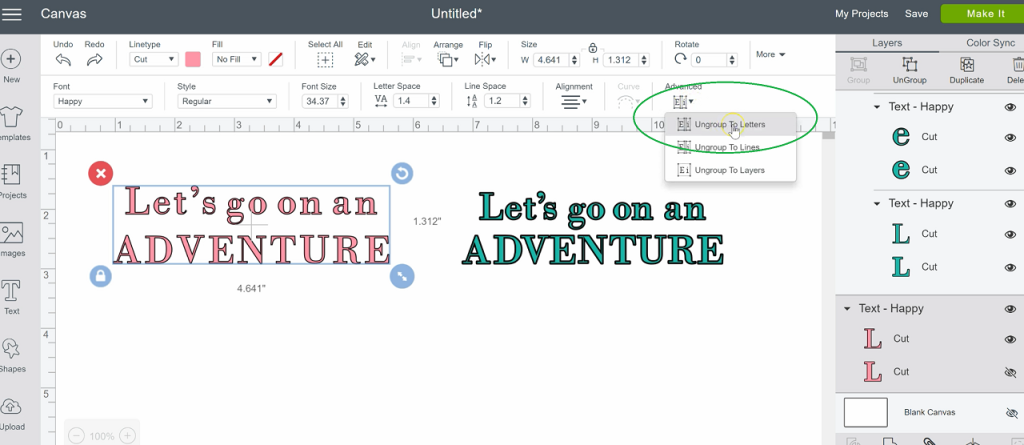
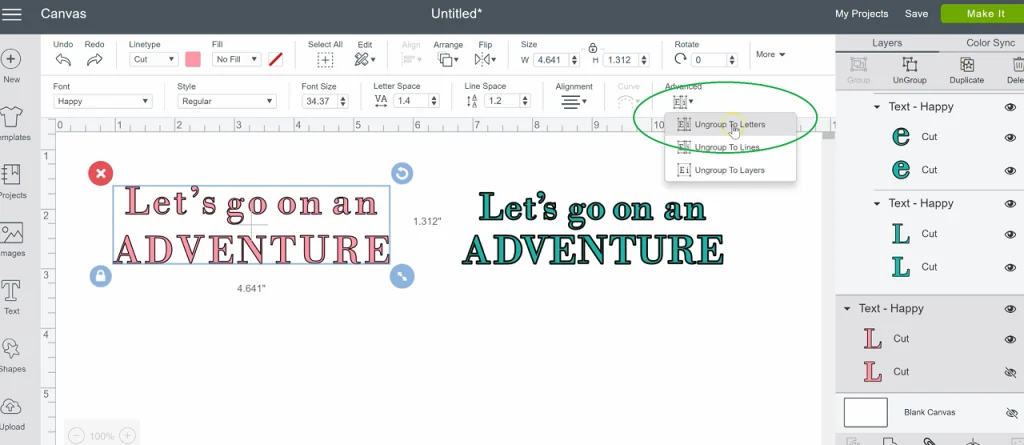
Then select the text box and click “ungroup to letters” Now each letter can be moved individually and scooted around where they look right. For script fonts, you’ll want to overlap slightly before welding. For other fonts, just correct any spacing issues.
READ THIS POST ON how to weld script letters
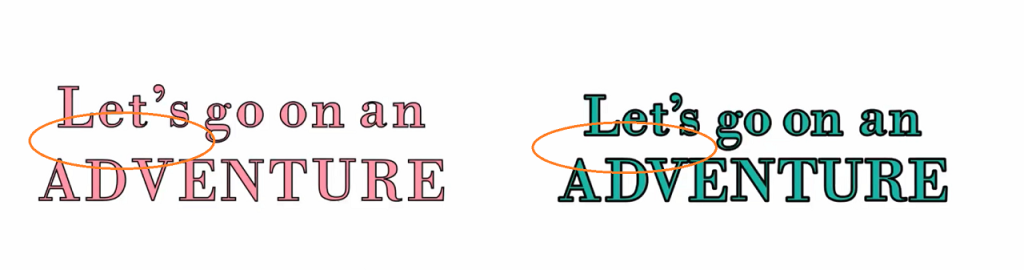
There are no hard and fast rules for how close or far apart to put your letters. The best way is to look at the text and see if anything jumps out at you as looking funny.
But there are certain letters to watch out for, and if you tighten up spacing around them you’ll end up with great looking results.
- Letters with slants like A, K, V, W, Y.
- Letters with a cross-stroke like L or T.
- Certain letter combinations like W and A, or F with a lowercase letter.
Watch for extra spacing that shows up between these letters and fix them.
The final step is extremely important – you must attach or weld! Otherwise, these letters won’t stay together and will scatter all over the mat. Be sure to weld if you have used a script font. Otherwise, the overlapping letters will still cut out individually.
I also want to talk about line spacing. I use this much less often than letter spacing because I usually just cut a word or two, and not a whole phrase or block of text.
But spacing between lines is also important for professional looking design. After fixing any letter spacing, simply attach or weld each line of text together. Then each line is a single object and can be brought closer together.
Again, trust what your eyes are telling you. If all the lines are equally spaced, but one line has a t, h, l and k that all stick up, and the next line down doesn’t, there would be more white space above the second line and it would look uneven.
In the example in the video, the descender of the g is brought down closer to the next line than the other letters are.
Now I hope you have more confidence in moving around your letters and text in Cricut Design Space so that you get great looking results! Still have questions? Let me know!

Buy a Cricut Machine
Buy Cricut Access
You still may prefer using downloaded fonts with your Cricut. FontBundles is one of my favorite places to purchase fonts, and they have a collection of free fonts also.

READ THIS POST ON How to Use Your Own Fonts in Cricut
Angela
Wednesday 6th of March 2019
Another important blog about Cricut design, I am loving your blogs. Keep on writing such wonderful blogs.