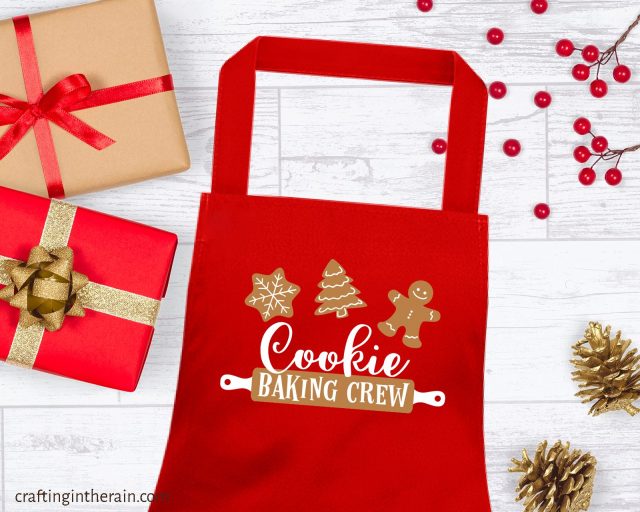
Today’s post is all about how to make an apron with iron on vinyl. A friend recently asked me to make some aprons for her family for their annual Christmas baking day. They turned out so cute!

How to decorate an apron
Iron on vinyl is a great choice for decorating an apron. HTV (heat transfer vinyl) will work best on cotton, polyester, or cotton-poly blend. Most kitchen aprons will probably be made of these types of fabrics.
Don’t try to put iron on vinyl on a rubber or nylon apron.
Cutting vinyl for an apron
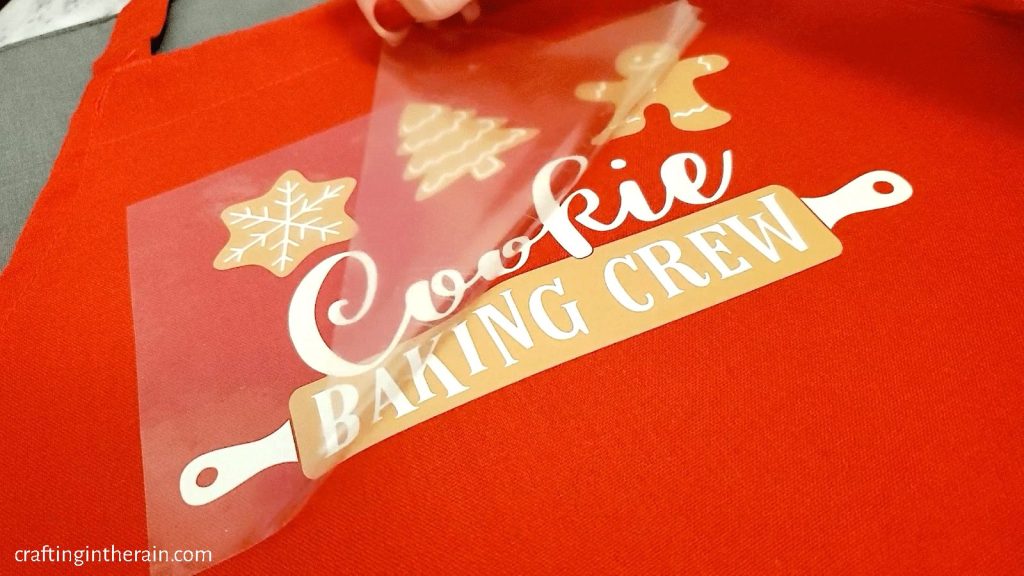
My friend chose this adorable “cookie baking crew” design on Etsy. After purchasing the design, I added the SVG to Cricut Design Space.


Read this post on how to upload an SVG to Design Space.
Since the htv was going to be applied to a red apron, I had to tweak the design a little bit to make all the pieces either tan or white.
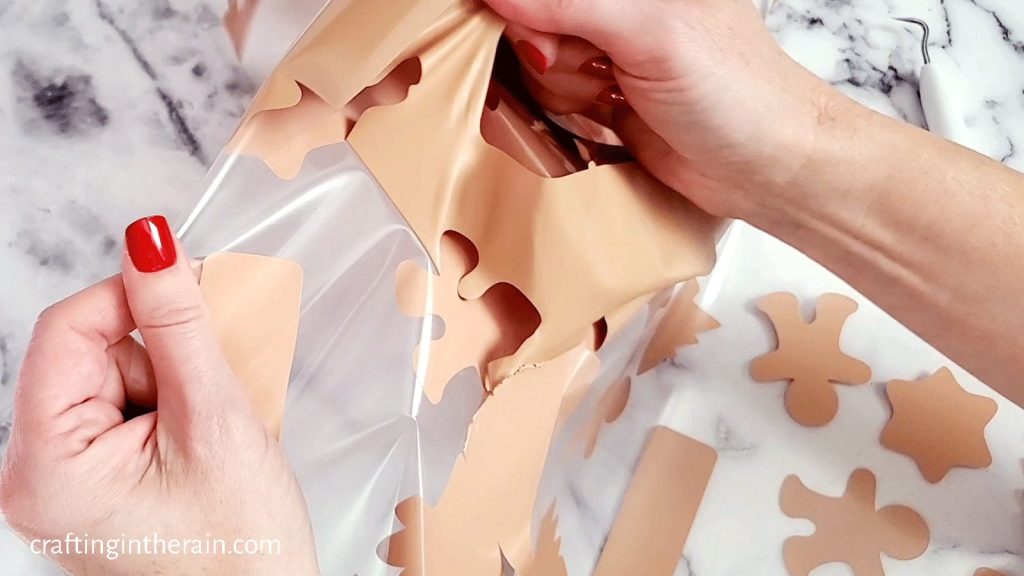
Cut the iron on vinyl with the shiny side down and remember to “mirror.”
Read this post on how to use iron on vinyl.
Supplies for making a custom apron with iron on vinyl
- Iron on vinyl (I used white and tan)
- Cricut or Silhouette
- Weeding tools
- EasyPress
- EasyPress mat
- Blank aprons (available in bulk options too)
Vinyl placement on apron

Once the vinyl has been cut and weeded, it’s time to figure out the vinyl placement on the apron. I like to layer the iron on pieces while still on their plastic carrier sheets so I get the full visual effect of what it will look like. NOTE: don’t press the design like this – you’ll have to do one color layer at a time.
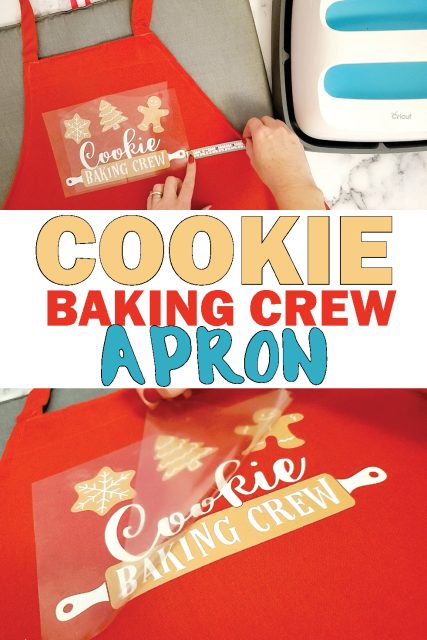
Measure down 2-3 inches from the top. Then center the vinyl in the top part of the apron.
Use a ruler to check the space on each side.
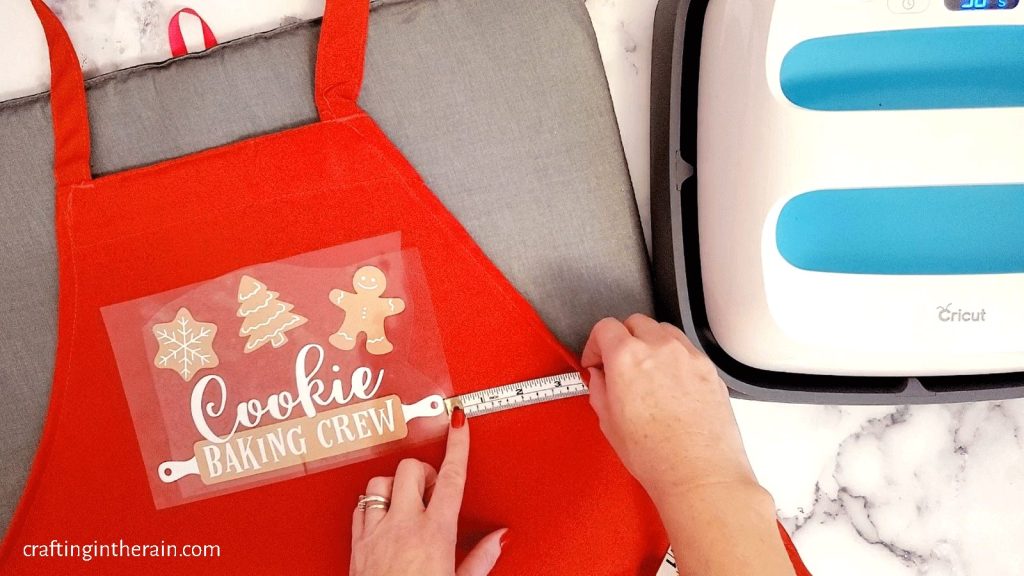

Be aware that depending on the quality of the apron you’re using, the apron itself may not be perfectly symmetrical. So don’t be afraid to use the eye-ball check too. Does the vinyl look like it’s in the right place on the apron?
How to apply iron on vinyl to an apron
Start with the bottom layer of the design. In this case, it’s the tan vinyl, because the white frosting has to go on top of the cookies.
Set the Cricut EasyPress to 315 (or whatever the Cricut Heat Press Setting Guide tells you to use for your vinyl type and apron fabric.)
Press the first layer for about 10 seconds and then lift up the plastic carrier sheet. I like doing a shorter press for the first layer because htv can shrink a bit when heated. This minimizes any initial shrinking so the top layer will line up correctly.
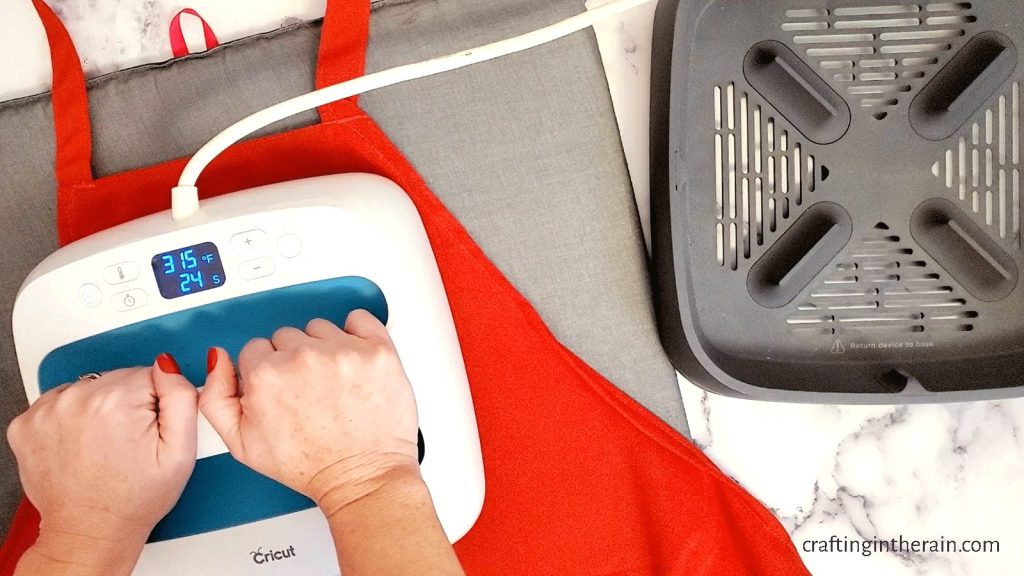

NOTE: I have found that Cricut iron on vinyl needs to cool down before peeling the plastic up, or it will pull away from the fabric. Other brands of iron on vinyl, like from Expressions Vinyl, are usually fine peeling while it’s still hot.
Then position the top layer of htv and press for the full 30 seconds. If any of the bottom layer is exposed and not covered by the carrier sheet of the top layer, cover the design with a piece of parchment paper to protect it.
Heat for 5 seconds from the back side of the fabric and peel away the carrier sheet.

Care instructions for apron with htv
An apron with applied iron on vinyl can be washed as usual. Follow the wash instructions on the apron tag. Dry on low, and only iron from the back if needed. This will protect the iron on from the iron plate which may be hot enough to damage it.
Any customized apron with iron on vinyl would be great for a gift or a fun way to remember a family baking event, like these. Have any questions about customizing aprons with htv? Let me know!