If you haven’t read my Infusible Ink basics post, go back and read that to make sure you’ve got a good handle on what Infusible Ink is and what it does. Since I found it has a bit of a learning curve, I want to show you a couple of things to watch out for and how to fix Cricut Infusible Ink problems.


If you’re like me, you’re probably a little bit impatient with your crafts. I like to use a hair dryer to speed paint drying for example. I’m also not great with reading instructions. I kind of browse, and figure it out along the way. I mean, I’ve been making things since I was a kid, right?
Even with reading all the directions, I had a couple of errors in my very first Infusible Ink project – but found a way to fix them (at least kind of) so I wanted to share!
I feel like it’s also my job to tell you that instructions for how to use Infusible Ink are kind of hard to find on the Cricut website. No instructions come in the box either – it just says to go to infusibleink.com. But that page is mostly just project ideas and some brief info.
To see step by step infusible ink instructions for all ink and base combinations, see this list at the Cricut help page.
Things that will cause problems with Infusible Ink
Here’s a good starter list that may help you fix Cricut Infusible Ink problems. If you read through the post and still have an issue I haven’t covered, leave me a comment so I can try to help!
| PROBLEM | WHAT CAN HAPPEN |
| Moisture or oils on your hands when you touch the transfer sheets | Can cause uneven ink transfer |
| Moisture in the material | Can cause uneven ink transfer |
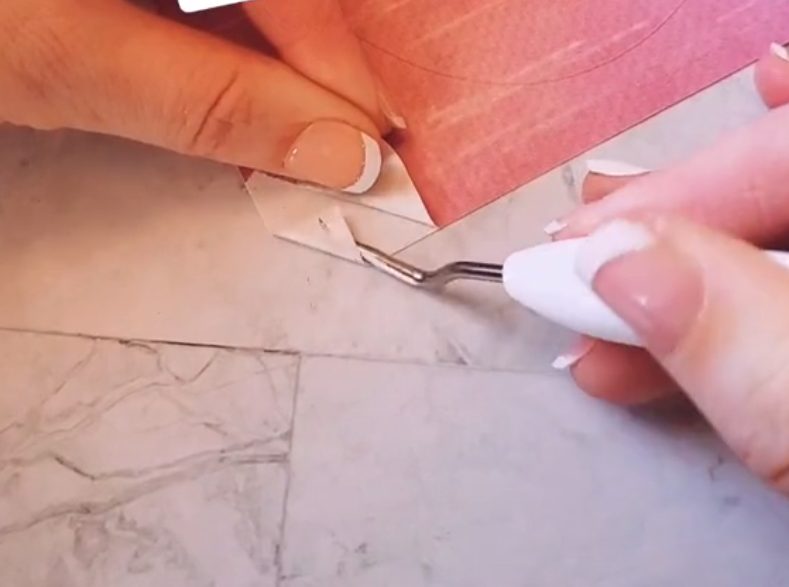
| Using weeding tools on the transfer sheets | Can press tiny amounts of ink into the carrier sheet that then show up in blank areas of your project |
| Making the design larger than your EasyPress surface | You need to be able to press the whole design at one time or you risk overlapping discoloration |
| Lint or fibers on the surface of the blank | Can create dots of stain on the project |
| Not covering fabric with butcher paper | Heat can damage the fabric |
| Reusing butcher paper from another press | Can transfer ink picked up from a previous project |
| Not covering EasyPress mat with cardstock | Can transfer ink onto the mat which can be picked up by the next project, or at least stain your EasyPress mat forever |
| Shifting the design while pressing | Can smear the design and cause ghosting |
| Pressing with the wrong temperature or time | Colors may be dull |
| Using a non-compatible blank | Color will be dull, wash out, and may not transfer at all |
| Pressing over seams, zippers, or buttons | Creates uneven pressure that results in uneven coloring |
| Letting the design touch back down on the blank when you’re trying to remove it | Ink may still transfer from the paper |
| Folding the material on itself before it’s cooled | Ink can transfer while it’s still hot |
| Pressing over an area again | Ink will turn back into gas and lift up from the project and become lighter |
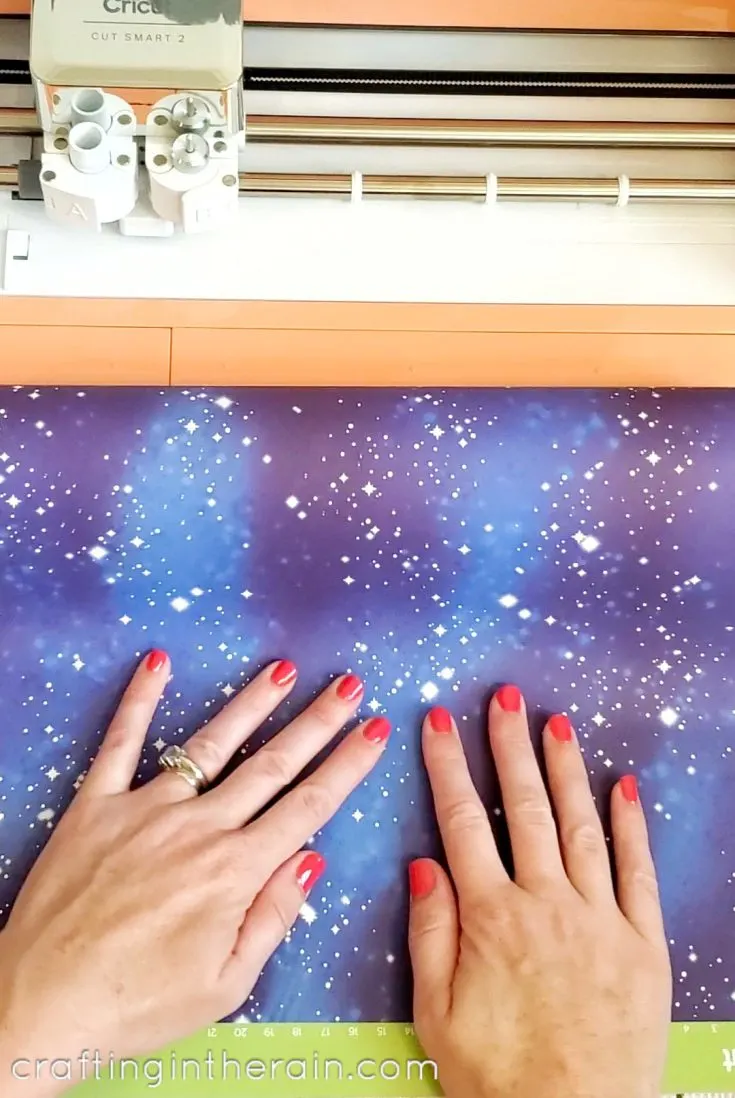
Cutting Infusible Ink Sheets
Infusible Ink sheets can be cut with the Cricut Explore, Cricut Maker, and even Cricut Joy. Remember that you will always mirror your design and place the sheet colored side up.
If you’re having a hard time getting the sheet to stay stuck on the mat, roll over it with a Cricut brayer or tape down the edges with some washi or painters tape.
Infusible Ink Cut Settings
In the Custom Materials menu, there is a setting for Infusible Ink. Just like when cutting vinyl, you want to cut all the way through the ink-paper part, but not through the backing. The clear carrier sheet is what holds your design in place after weeding out the extra parts of the design.
If this is your first time cutting Infusible Ink sheets with your machine, please do a TEST CUT first. Do this by placing a small shape on your canvas in Design Space. A heart, a circle, a letter, etc. Size it to about 1.5 inches and have your Cricut cut it from an ink sheet. Then check to see if the shape cut through cleanly, but leaves the plastic layer uncut.
Infusible Ink cutting all the way through
One problem that you may encounter is that the cut has gone all the way through the Infusible Ink and the plastic liner. This means one of two things. Either the setting has too much pressure or the blade is too deep. If your blade is too deep, you have probably already had problems with cutting other materials too, so you probably already took care of it with a new blade.
Try changing the pressure to “less” on your next test cut. If it’s still going all the way through, try a different setting like vinyl.
Infusible Ink not weeding
The more common problem, at least for me, is that the ink sheet doesn’t cut all the way through the paper layer, making it very hard to weed. The “paper” splits, only part peels up, and it can get frustrating for sure.
I always set my pressure to “more” when I’m cutting with Infusible Ink and that seems to give me a clean cut every time. You can also go into the specific material setting and increase the default pressure for the Infusible Ink setting.
Here’s something else that can help. If the paper layer is peeling, you can try grabbing the stuck part with a weeding hook to get it up off of the carrier sheet. And if you’re having trouble with small inside cuts of Infusible Ink not coming out, as long as the layer with the ink has been removed and there’s just a white spot left, the transfer should look fine still in the end.

Infusible Ink gets Hot!
And here’s another tidbit I discovered – after preheating my bag, it was still so hot that when I was cleaning it off with the lint roller, my nail dragged along it and the bag picked up a streak of nail polish! So, besides being careful to not touch the bag because it’s hot, be careful with your manicures!
Also – I learned I was supposed to remove lint BEFORE heating – (see bullet point about lint above.) But the basic warning here is that things will be hot, so be cautious.
I tried to clean off the streak with acetone. It significantly lightened but didn’t disappear completely. So I just put the design on the other side of the bag.
Watch the video to see the whole process.
**NOTE** My friend Karley worked at Cricut and gave me another tip that will help with future layering projects. On this design, take all the plaid pieces off their liner and put them on the larger liner that has the black pieces. That way there’s not an extra layer of liner that can also cause a lighter transfer!
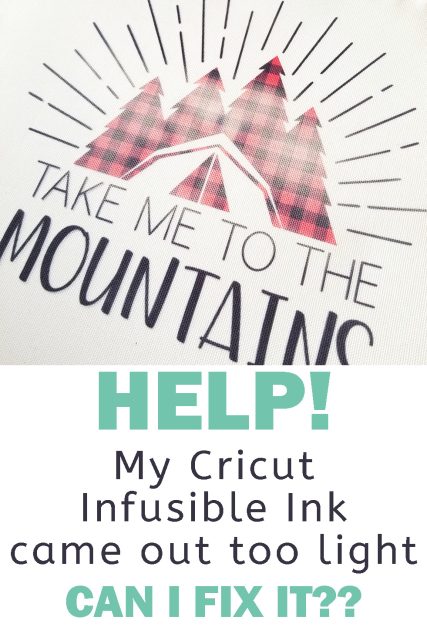
Fixing Infusible Ink that’s too light
When I made this bag, the plaid mountains didn’t transfer well and it was way too light in the middle of the design. If you are making a project and wonder “Why is my Infusible Ink not transferring?” you may have one of these issues.
Sublimation Ink not Transferring
If your Infusible Ink isn’t transferring, make sure that you’re trying to apply it to an appropriate base. Use a Cricut base, a high polyester percentage, or something marked for sublimation.
There can also be problems if you press on an uneven surface or over a seam. For best results, press on a flat surface of the material and use an EasyPress mat underneath.
I was worried that there was no way I could line up all those burst lines exactly, but I did want to try to press it again.


So I removed all the black pieces from the plastic sheet. Then I took just the plaid pieces and secured them to the bag with heat resistant tape – making sure to not overlap with any of the black design.
Repress Infusible Ink Design
I covered the whole design with the plastic sheet and pressed again for 30 seconds with more pressure. Sure enough, that did the trick!
Don’t do this again though, because that plastic carrier sheet has now picked up a bit of the black ink, and that will go into your fabric if you press again.
It also did lighten up the black a little bit – so it really isn’t ideal to press twice. But I feel like this was a good fix for the plaid design and making that color more vibrant.
Next time I will apply little more pressure when putting an Infusible Ink design on a bag, and I’ll move everything to a single carrier sheet. Hopefully, this will help you fix Cricut Infusible Ink problems too.
Open the Mountains Design Space project.
Shop in store or on Amazon Infusible Ink products

Infusible Ink Problems

Learn how to avoid common problems when using Cricut Infusible Ink
Instructions
- Remove moisture or oils on your hands when you touch the transfer sheets
- Increase pressure of cut if the sheet is hard to weed
- Use fingers to weed
- Size the design to fit under your EasyPress
- Remove lint
- Cover press with butcher paper, but don't reuse this paper
- Cover EasyPress mat with cardstock
- Keep EasyPress still while transferring
- Press with the correct temperature and time
- Don't press over seams
Recommended Products
As an Amazon Associate and member of other affiliate programs, I earn from qualifying purchases.


You can also see how I made round Infusible Ink coasters here.


Celebrate St. Patrick's Day with Cricut Craft Ideas
Wednesday 26th of February 2025
[…] https://craftingintherain.com/how-to-fix-cricut-infusible-ink-problems/ […]
Teri
Saturday 7th of December 2024
Hi, I made a mug that turned out really well except that one of the man's eyes slipped down on his nose. Can I do anything to fix that?
Aliesha
Thursday 24th of October 2024
I am working on a project with coasters for work, and for some odd reason the color didn't transfer correctly. I used the smaller gray sheets, followed all of the instructions and was very careful not to touch the colored side of the transfer sheet with my hands. Yet instead of transferring gray, several of them transferred tan. ugh! Could it have been because I did more than one at a time? I used the larger easy press 2, layered the project just right with the heat mat, cardstock, blanks, butcher paper and then the press. Followed the temp & time exactly, with no pressure. Can I fix this do you think?
Jackie Reichenbach
Sunday 27th of August 2023
Used infusible ink sheet on the pillow blank - looks great except a odd black Dot appeared in area that should be blank - any way I can remove it? Bleach?
Vicki
Wednesday 2nd of August 2023
I did earringblanks one side came out fine did other and it came out lighter
How long do u wait from doing one side to the other? If u do it straight away will the ink run from the bottom half?