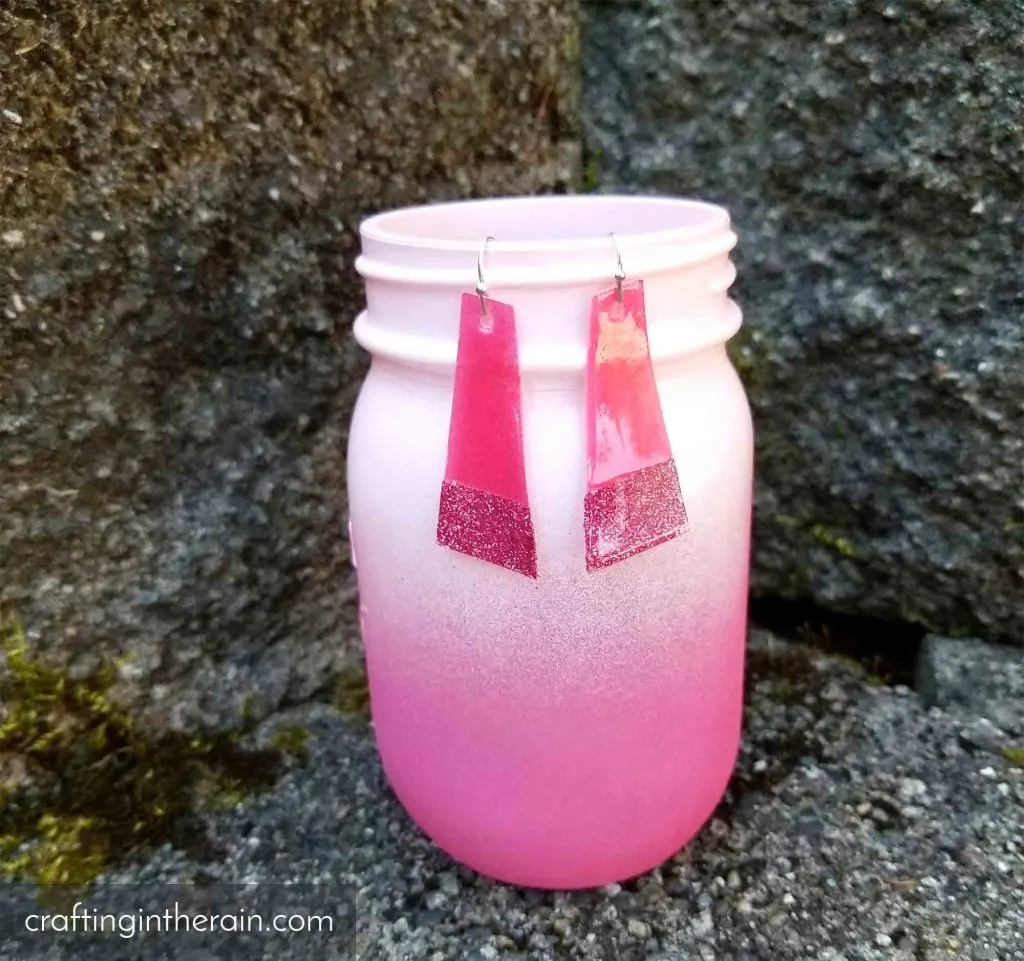
I have another easy decoupage craft today with these Mod Podge glitter earrings. I have made DIY paper earrings before, and this time I wanted to add some sparkle, so I used two types of Mod Podge. (some links affiliate)

Here are the supplies you’ll need to make Mod Podge glitter earrings:
Cardstock
Mod Podge
Dimensional Magic
Glitter
Transfer tape
Washi tape
Earring hooks
True Control Knife
Cut earring shapes with Cricut from pink cardstock. I used this project in Design Space.
Press earrings down on a piece of transfer tape, sticky side up. This keeps the paper flat and secure while you work on them. It also keeps the table clean.
Divide each earring with a strip of washi tape.

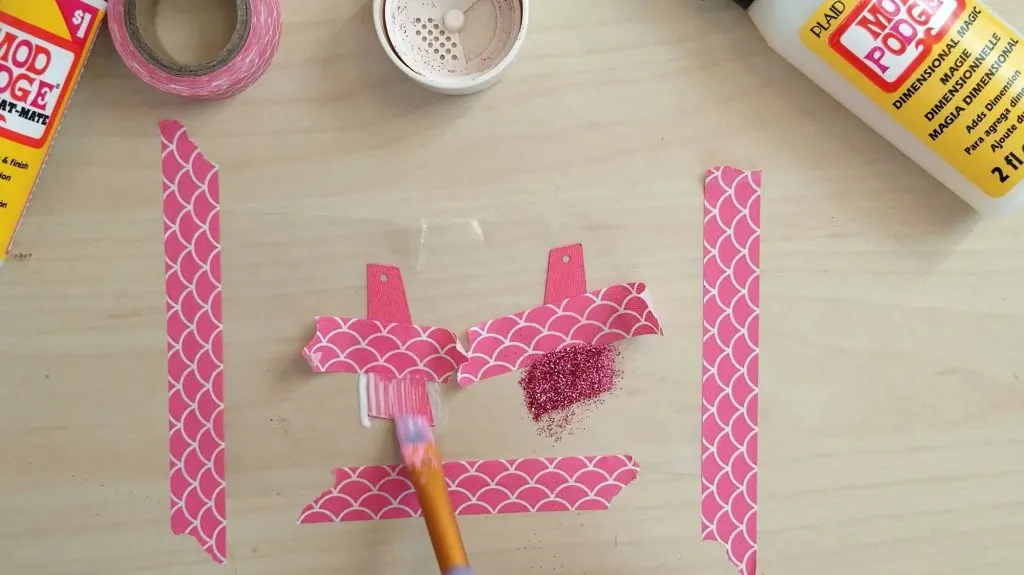
Brush on a layer of Mod Podge.
Lightly sprinkle on glitter and let dry for a bit. Then remove the tape and shake off the excess glitter.
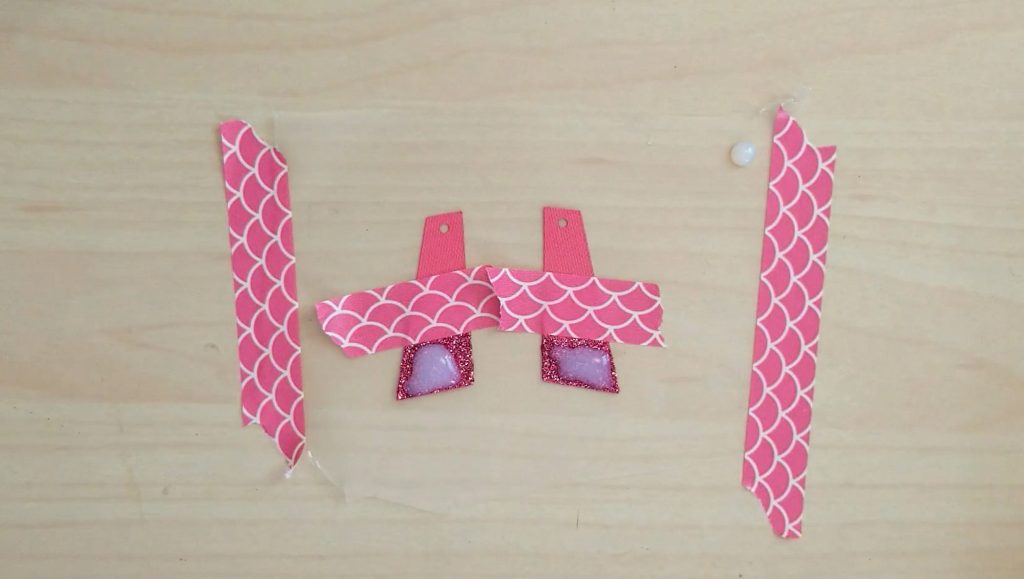
Move earrings to a clean piece of transfer tape and press down new washi tape at the glitter line.
Apply Dimensional Magic over the glitter section and let dry for a few hours.
Carefully cut through the clear layer with a knife to remove the washi tape.

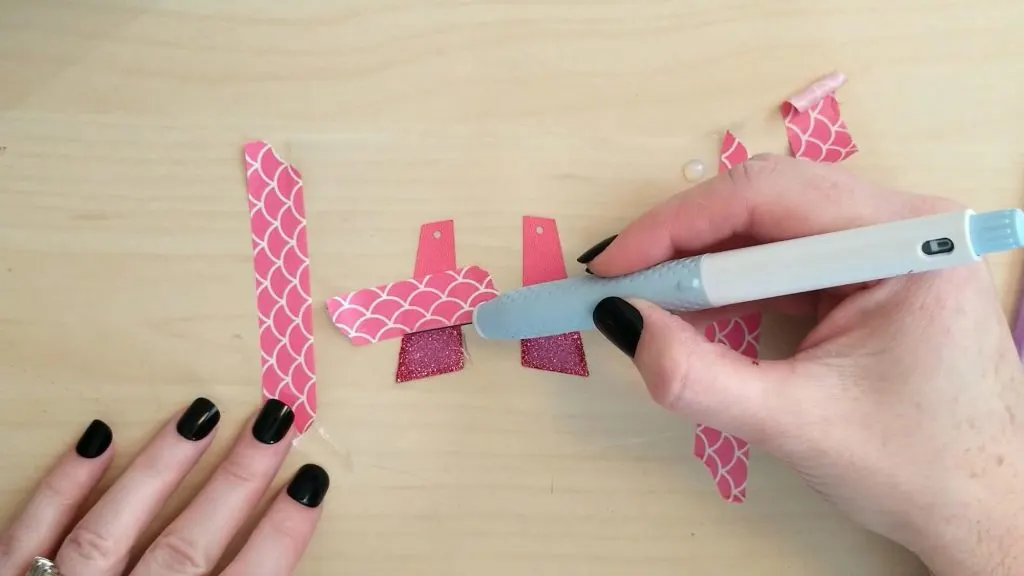
Then cover the whole earring with Dimensional Magic.
Remove any bubbles by popping or dragging off to the side.
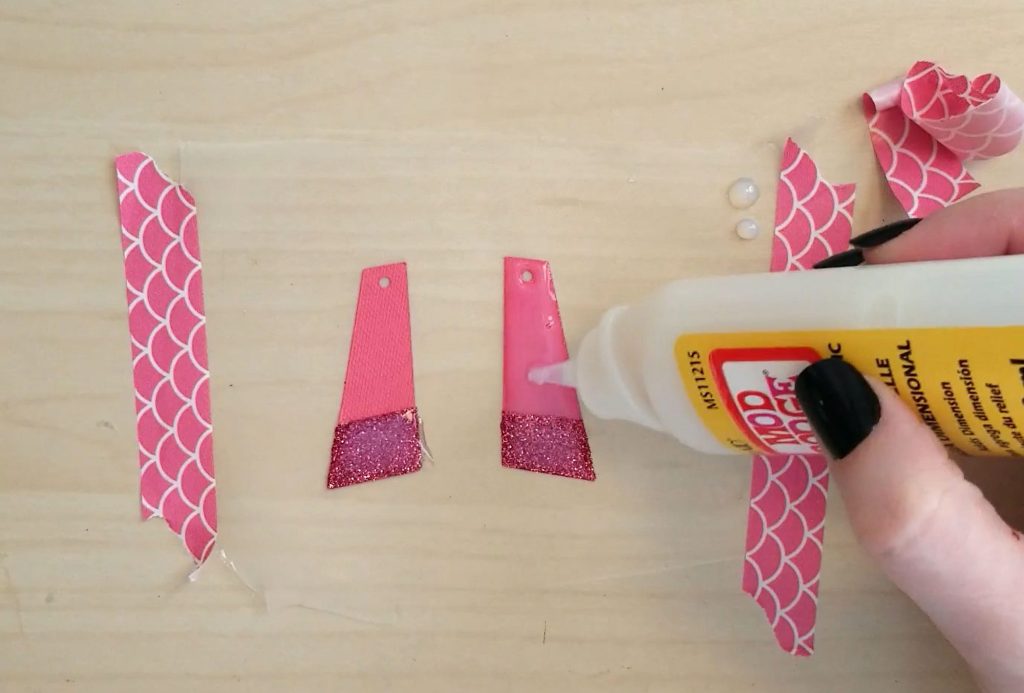

Dry 24 hours without moving. The transfer tape will help the earrings stay flat as they dry.

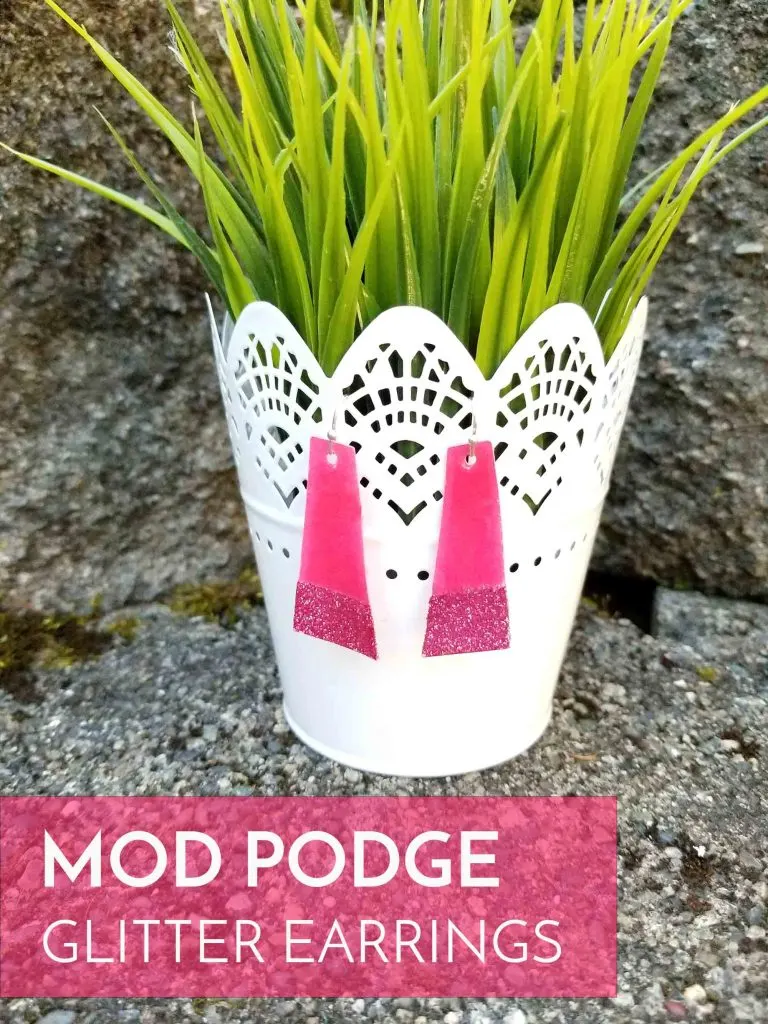
Add through the hole and the Mod Podge glitter earrings are ready to wear. Since the glitter is completely sealed, it won’t flake off!
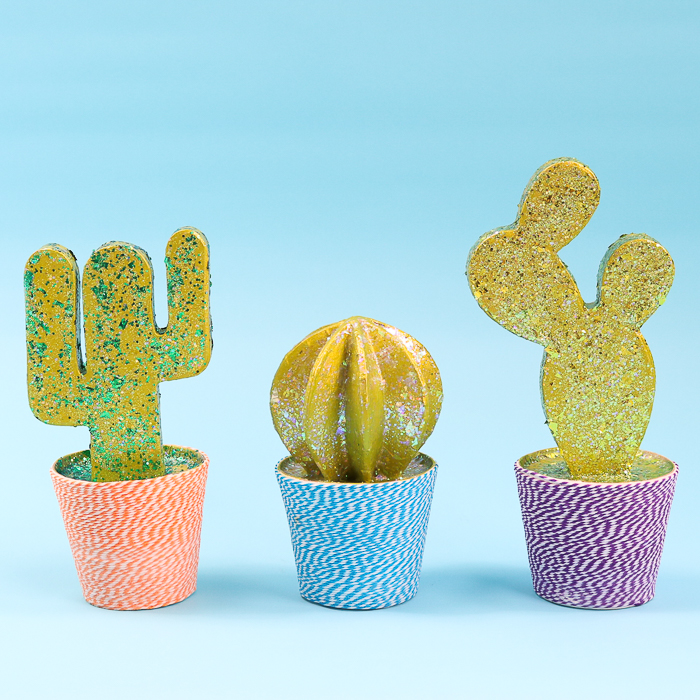
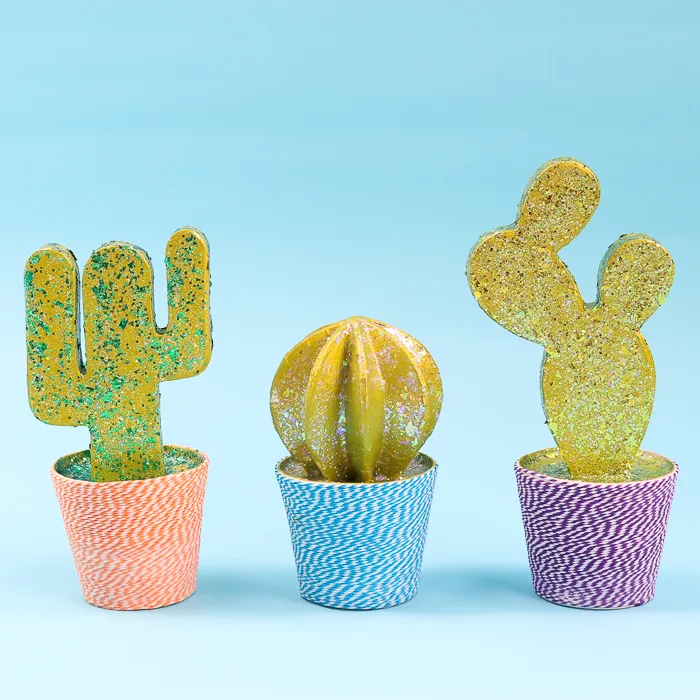
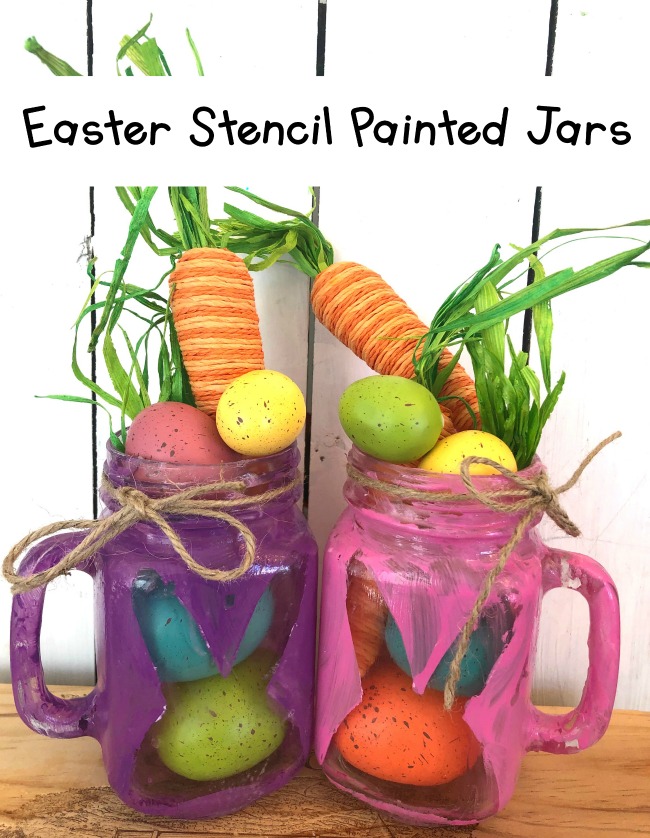
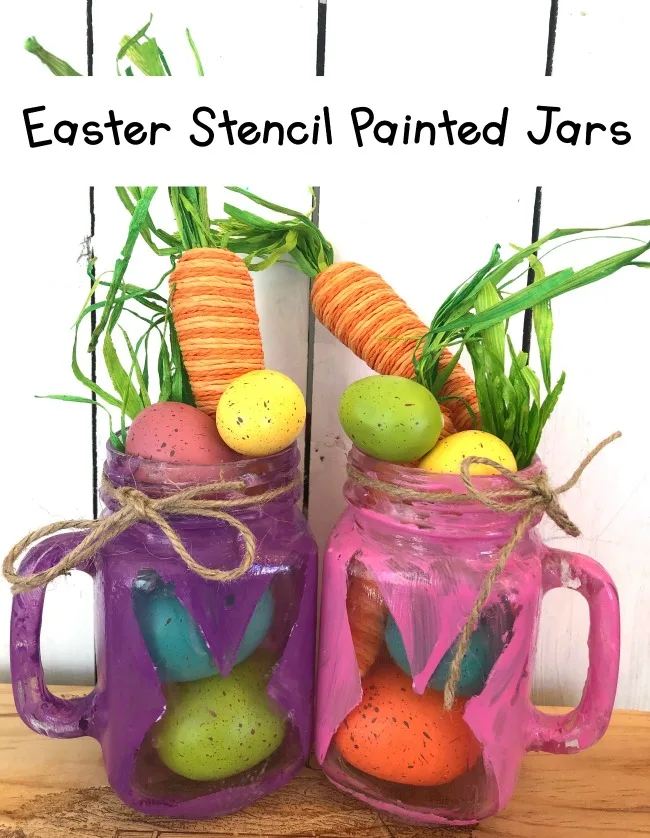
Don’t miss these cute Mod Podge crafts from yesterday! Fabric Bunny – Polka Dot PoplarsGlitter Cactus – The Country Chic CottageBunny Stencil Jars – Me and My Inklings

Mod Podge Cardstock DIY: Custom Monogram Letter Decor - Angie Holden The Country Chic Cottage
Friday 26th of September 2025
[…] Mod Podge Glitter Earrings […]
25 Fun & Unique Decoupage Ideas | The Country Chic Cottage
Tuesday 8th of July 2025
[…] of glitter in your projects, then these simple decoupage glitter earrings are perfect for you! READ MORE Glitter Dipped Wine Glasses and Wine Gift Tags It doesn't need to be New Year's or a special […]
Fabric Plant Pots with Mod Podge Ultra | The Country Chic Cottage
Wednesday 23rd of April 2025
[…] the Rain. She is sharing how to make these decoupage glitter earrings that are so quick and easy! READ MORE Framed Mod Podge Bunnies Want some cute Easter decor for your home? Try this framed bunny art […]
Decoupage earrings how to make - Jewelry Directory
Friday 28th of January 2022
[…] Mod Podge Glitter Earrings – Crafting in the Rain […]