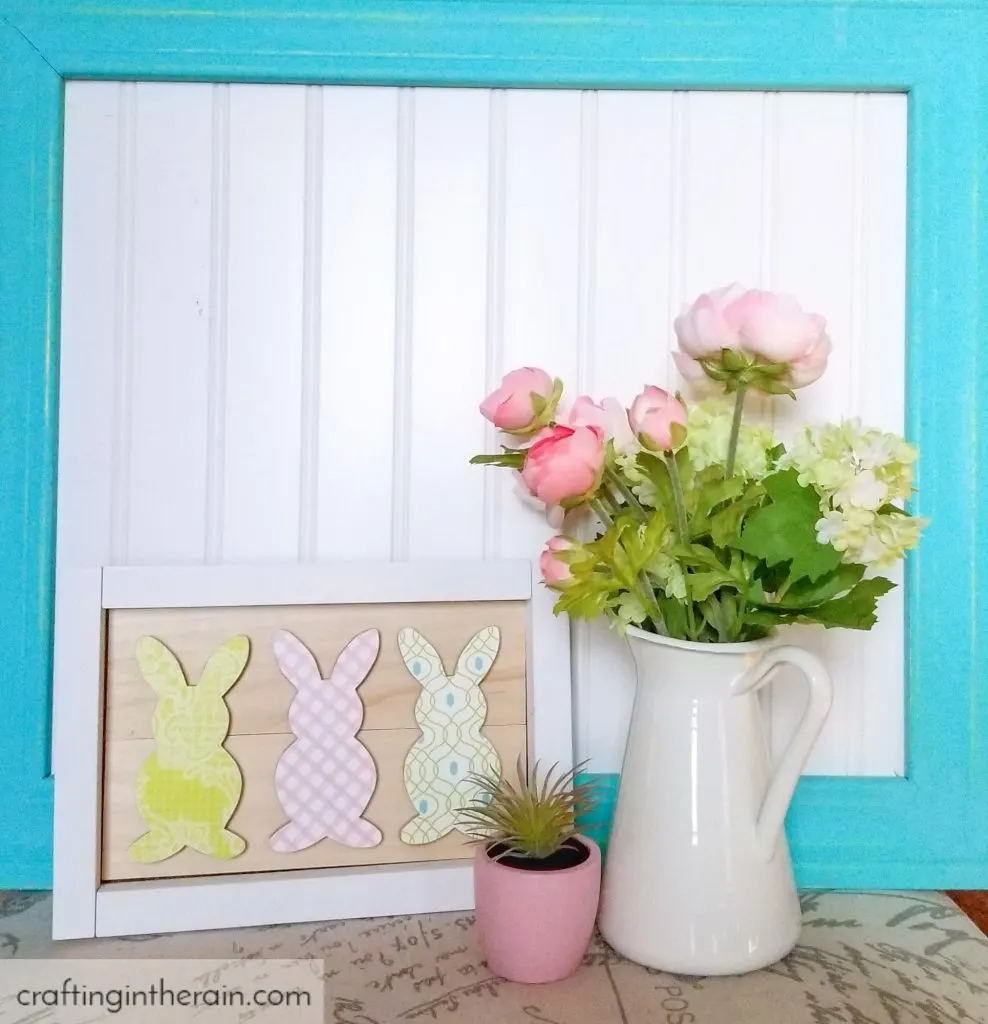
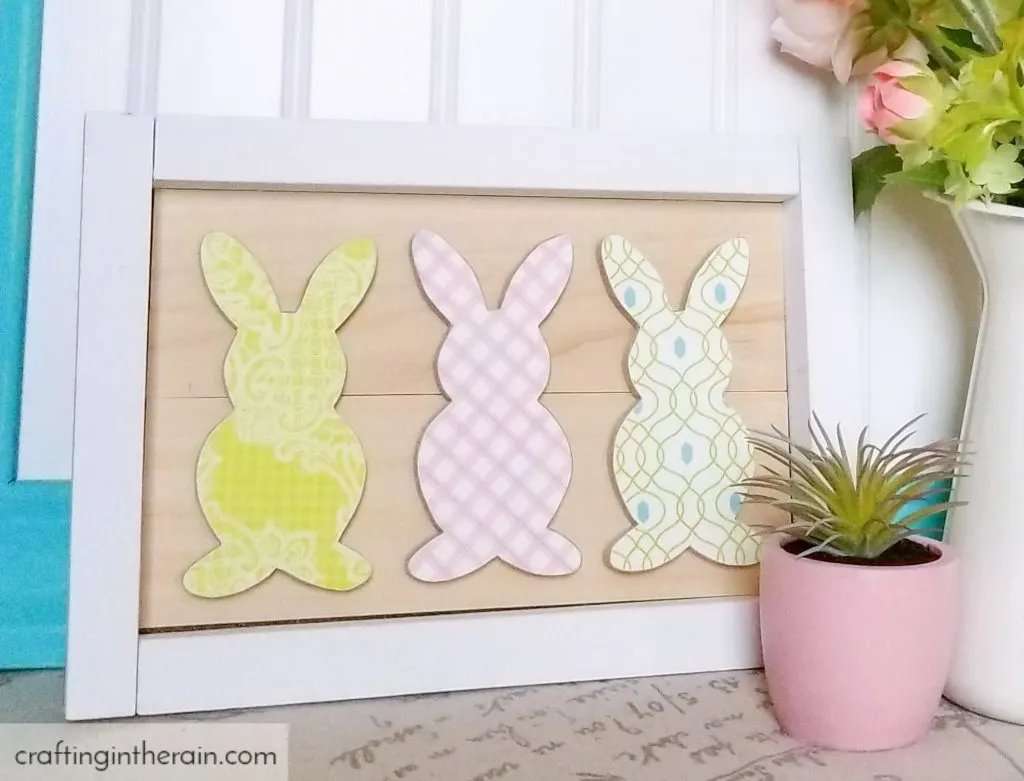
I’m excited to be joining Craft Lightning as a guest host this week with The Country Chic Cottage and 30 Minute Crafts. Our theme is decoupage, so check back in every day for a new decoupage project I’ve made, plus features from all the other bloggers participating this week. I’m starting out with a project perfect for Easter and Spring – framed Mod Podge bunnies.

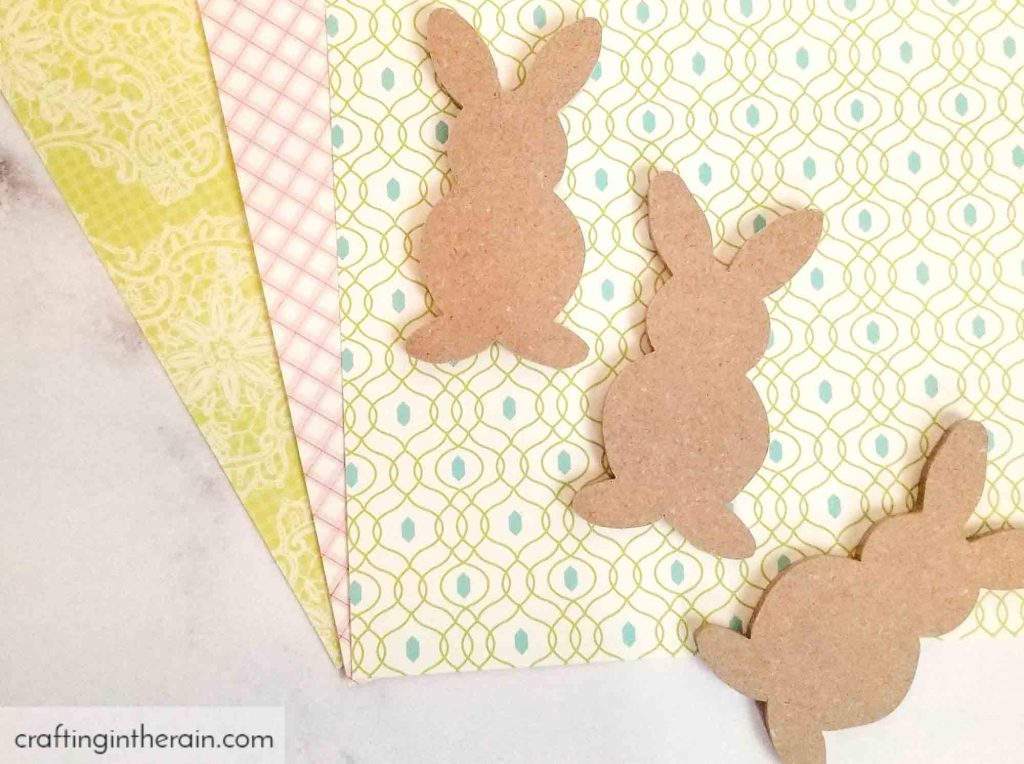
I first cut these bunny shapes out of MDF with my scroll saw. You can likely find some blank wood bunnies at your craft store this time of year.
Next, I chose 3 pretty, spring-y patterns of scrapbook paper from my collection.

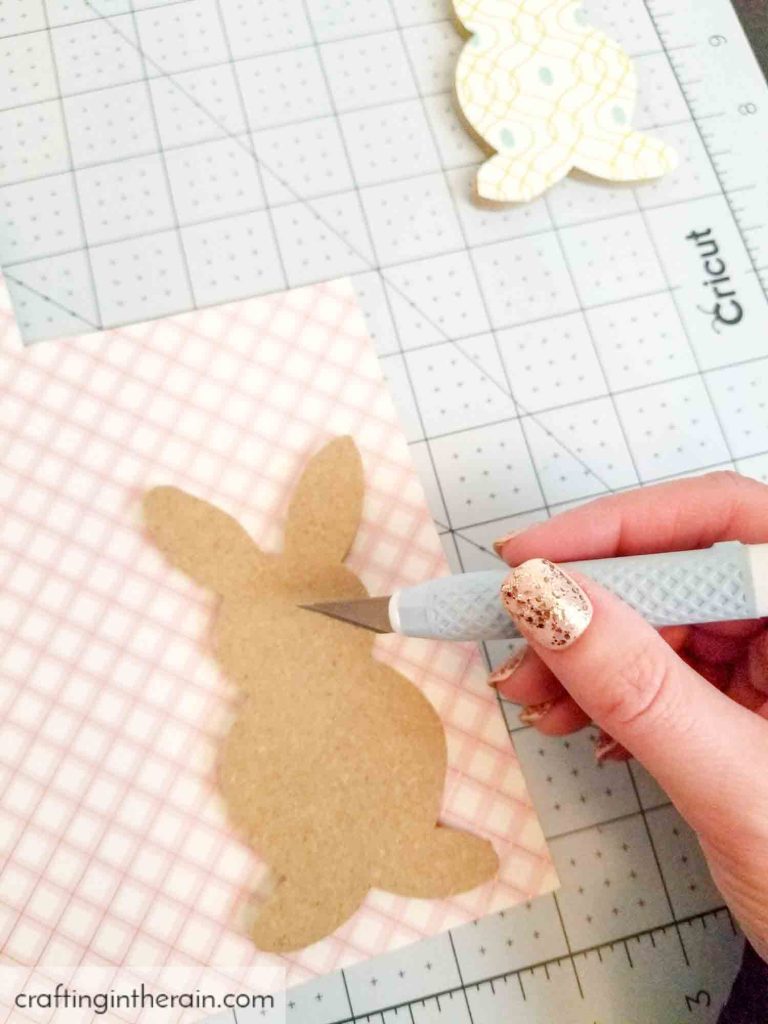
Before gluing, I wanted the paper to be as close to the right shape as possible. I placed the MDF on the paper and traced around with my Cricut True Control knife. You could also trace and cut with scissors.

Once the bunny papers are cut, spread a layer of Mod Podge with a foam brush and glue down the paper, making sure to line up the edges. Press down from the center to remove any possible wrinkles.

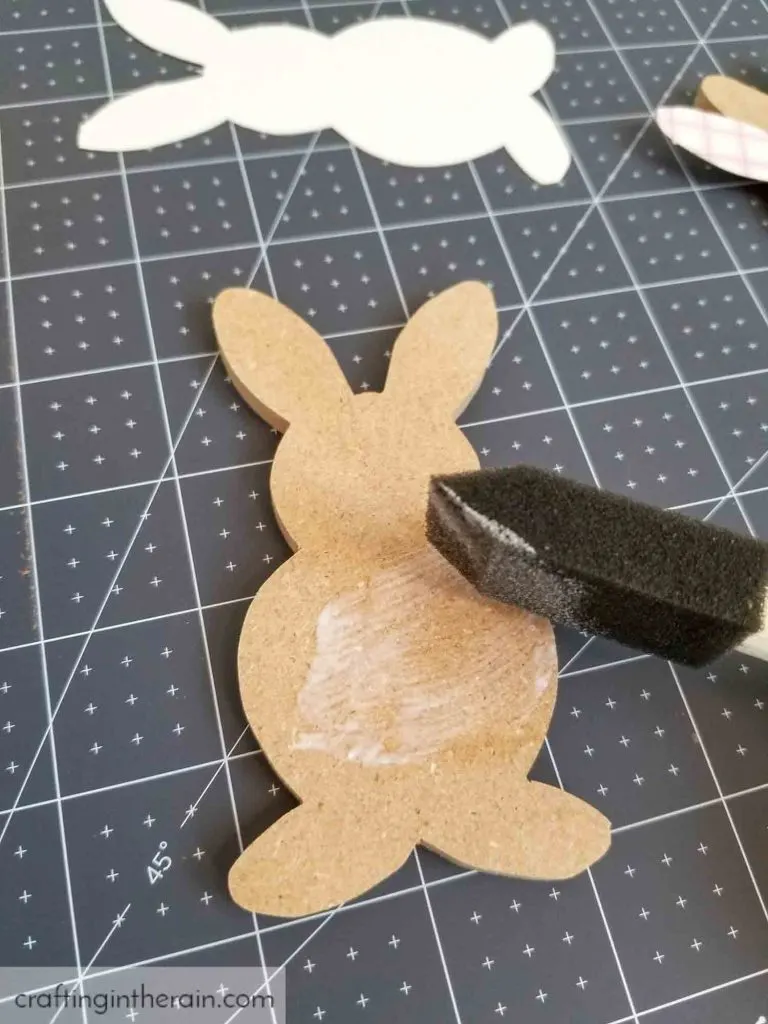
I also set a couple of heavy books on top to make sure the paper didn’t curl up at all while drying. Wait for it to dry completely and use sandpaper to get rid of any paper overhang. Rub the sandpaper down against the wood, not up to reduce the risk of tearing the paper off the bunny.
Seal with another layer of Mod Podge and glue them into a frame when dry.


You could also lightly rub the edges with an ink pad to give a distressed, rustic look.

If you’re looking for more bunny decor ideas, you might like this moss bunny I made few years ago. Check the links below and get inspired with more decoupage!
Fabric Plant Pots with Mod Podge Ultra | The Country Chic Cottage
Tuesday 8th of July 2025
[…] Make Decoupage Custom Candles in minutes! Decoupage napkins onto candles like these from Tried and True Blog! READ MORE Easy Clipboard Makeover Create a custom clipboard with Mod Podge in minutes with the instructions from Ginger Snap Crafts! READ MORE Fun & Inexpensive Decoupage Easter Eggs With Napkins Make some decoupage napkin Easter eggs like these from Our Crafty Mom! READ MORE Mod Podge Glitter Earrings Finally, our co-hostess this time around is Crafting in the Rain. She is sharing how to make these decoupage glitter earrings that are so quick and easy! READ MORE Framed Mod Podge Bunnies Want some cute Easter decor for your home? Try this framed bunny art that is also from Crafting in the Rain. READ MORE […]
25 Fun & Unique Decoupage Ideas | The Country Chic Cottage
Tuesday 8th of July 2025
[…] or even a baby's nursery! All you need is some Mod Podge, scrapbook paper, and a wood sign! READ MORE Wood Hooks with Decoupage Create some decoupage decor that is both fun and functional by making […]