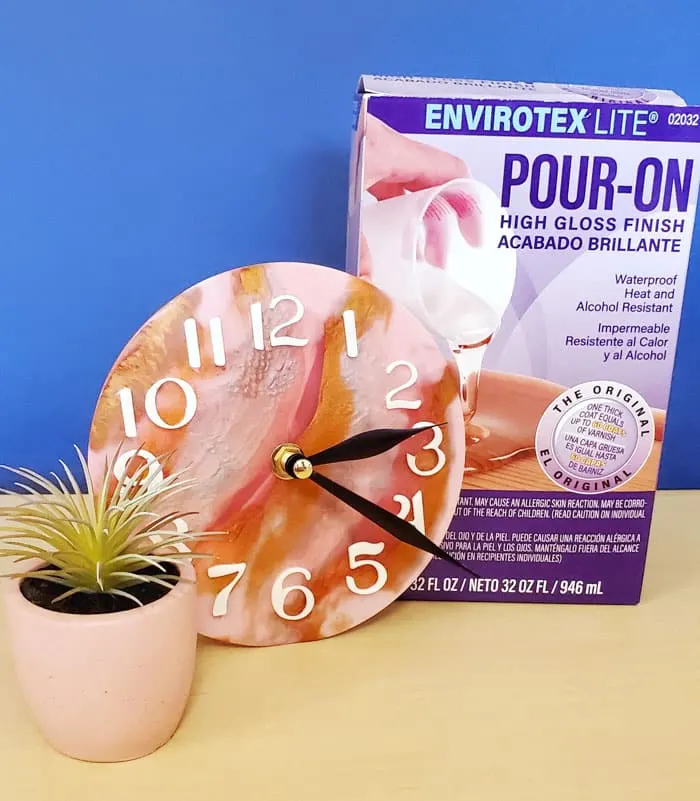
Do you have any favorite resin molds? What about one that’s been on your list to try? A clock mold is a really fun one to try – I made a marbled resin clock with pink and gold colors.

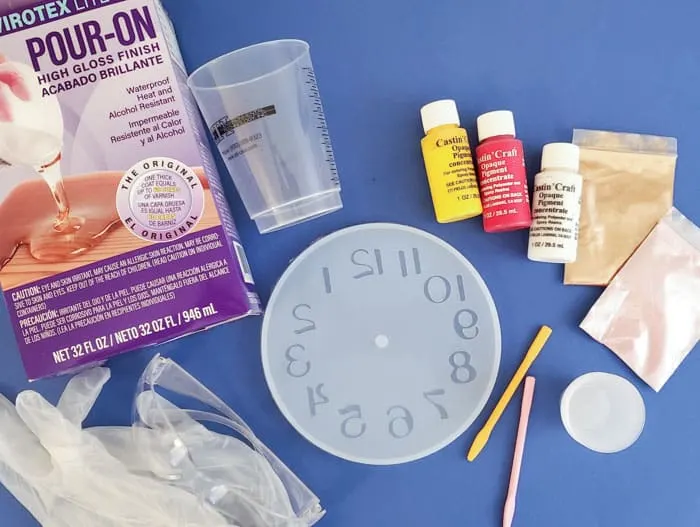
SUPPLIES TO MAKE A RESIN CLOCK
- Resin
- Clock mold (and a separate clock mechanism if it didn’t come included)
- Mixing cups and sticks
- Yellow, Red and White Castin’ Craft Opaque Pigments and resin powder
- Gloves and glasses
- Toothpicks
- Heat gun

FILL THE CLOCK NUMBERS
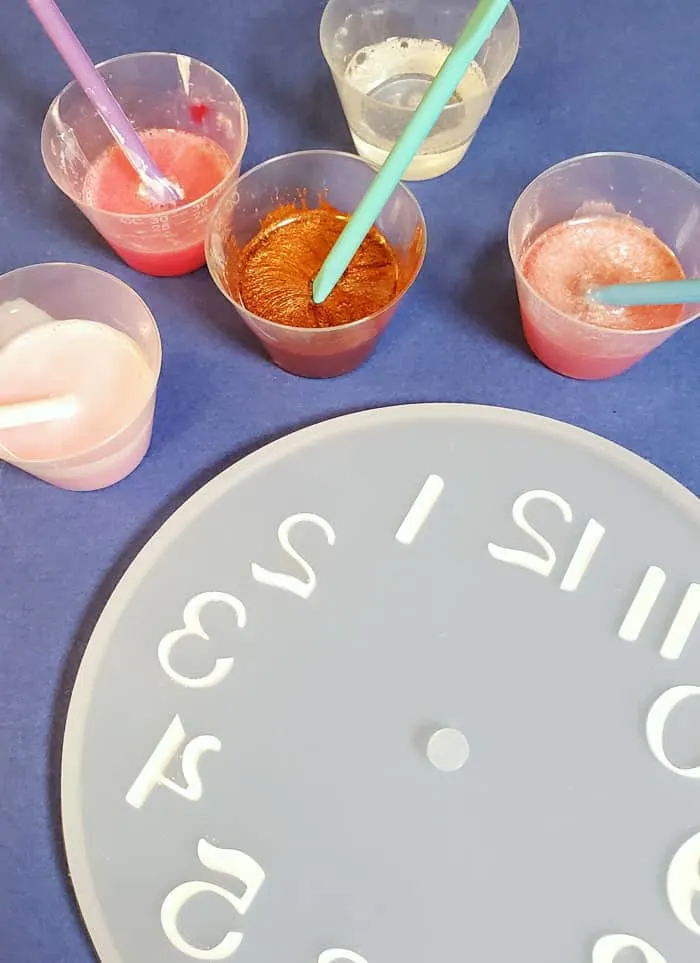
Mix a small amount of resin. I made 15 ml total, and it was plenty. Then add in some color. Make sure to choose a color that will stand out from the colors you use for the rest of the clock.
I used opaque white dye.

Use an eye dropper or drops from the stir stick into large parts of the numbers and use the toothpick to drag resin into the skinny parts of the numbers.
The edges are where air bubbles are most likely to get trapped, so if you can, fill a very shallow layer, check for bubbles, and add a bit more. Wipe away any resin that got outside the number as that will show on the clock face.
Let the numbers cure 4-5 hours so the other colors don’t run in and mix.
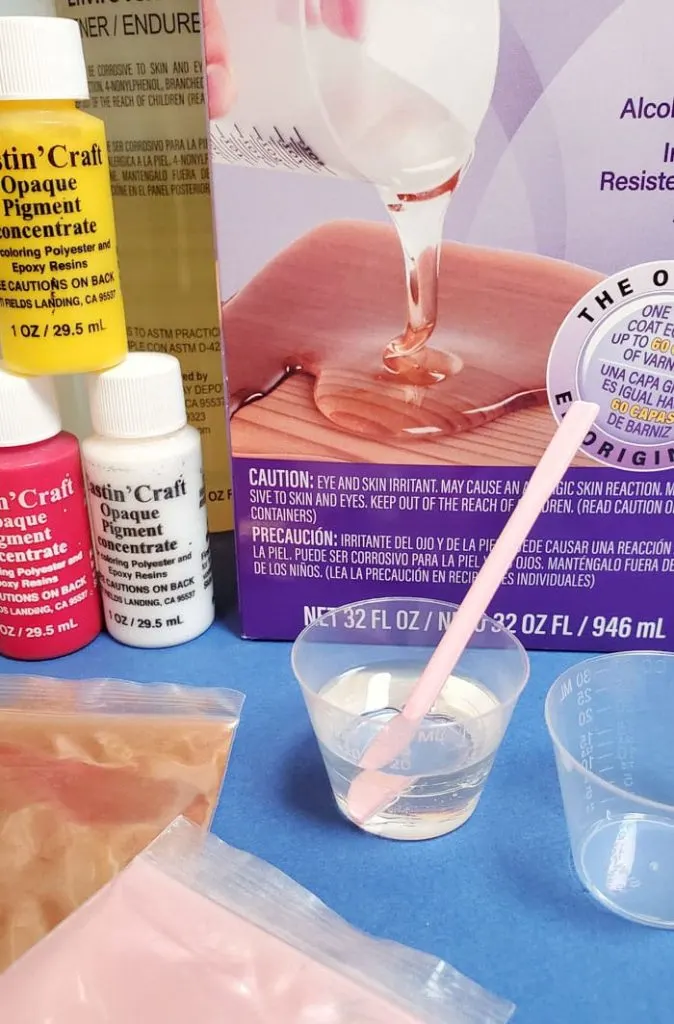
Mix new resin- I did 3 ounces. So remember that’s 1.5 ounce resin and 1.5 ounce hardener. Stir for 2 minutes then pour to a new cup and mix one more minute. Then pour into smaller cups for coloring.

FILL THE CLOCK MOLD
I used red and white opaque to make 2 shades of pink. Remember the red goes a long way, so start with a tiny bit on a toothpick. I also used bronze and pink mica powder.
Pour a few lines of color, then use a heat gun to push the colors around a bit. This way you’ll create a more interesting pattern on the bottom of the mold, which will end up being what we see later.
Then add in more lines to fill in the mold evenly. I noticed that the heat gun was starting to warp the blue paper under my mold and causing it to not lay flat. So once I put it just on the flat table, the mold was flat again.
Use the heat gun some more to release any bubbles and spread the resin. Then walk away and let it cure for 48 hours.
It’s not a very deep mold, so you want it to harden completely before removing it from the mold so it doesn’t lose its shape during assembly, or when it is displayed
ASSEMBLE THE CLOCK
When the resin is finished, it’s time to put the clock together. Most mechanisms will be very similar to this.

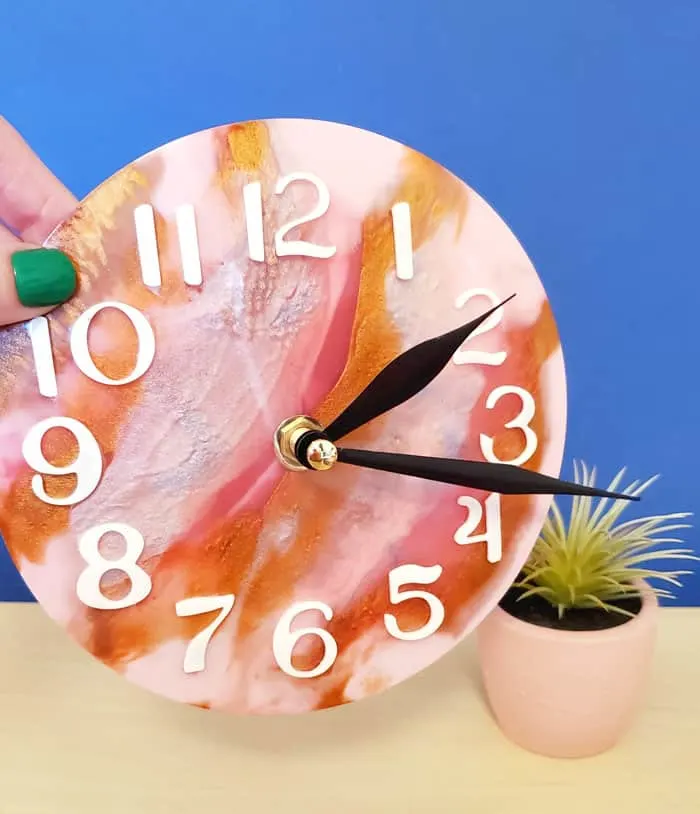
Put the post through the hole and place the washer then tighten the nut. Find the shorter hour hand and press down onto the plastic post.
Then find the minute hand and press it down – it won’t go as far because the hole is smaller.
Finally, the second hand will go on top. Insert a battery and set the correct time.
Word to the wise – most clock kits like this will make a quiet, but audible ticking sound. So keep that in mind when deciding where the clock will live.
To hang, you could add a command strip to the battery box (don’t cover the battery or the gear to adjust the time.) Or, wrap a wire around the whole box and make a twist at the top to hang from a nail.
What color combination would you try?