I think that making cards can unfairly get grouped into either a “too easy” or “too hard” category. But in reality, you can make cards with Cricut at ANY skill level. Let me show you how!
This post is brought to you in partnership with Cricut. All thoughts and opinions are my own.

Click here to enroll in a 30 minute card class over at Creative Fabrica – you’ll keep learning more about card making!
What do I need to make cards with Cricut?
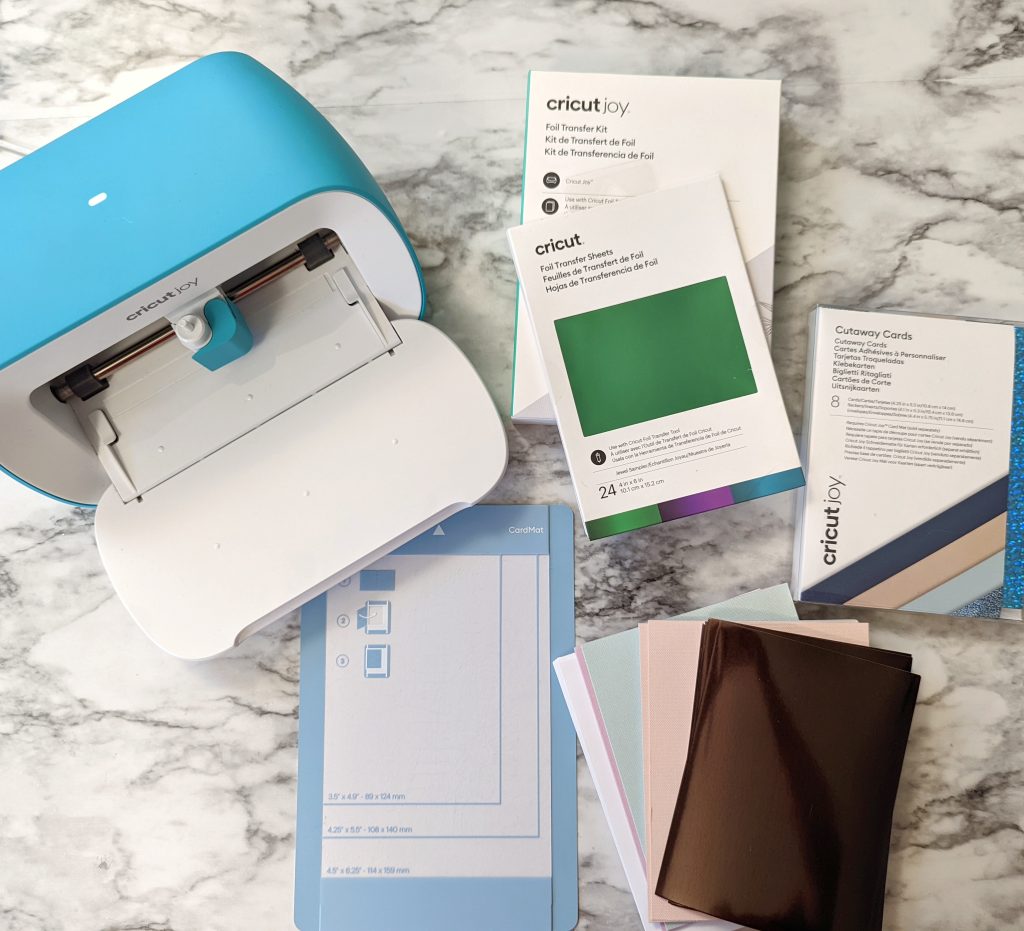
To start with basic Cricut cards, all you need is a Cricut machine, some cardstock, and a mat (Blue or Green). You’ll also need adhesive – a good quality liquid glue like this one, or a tape runner.
As you work on more advanced cards, or want to acquire more tools or supplies, you may want:
- Scoring wheel
- Cricut pens
- Cricut foil and foil tool (for the JOY) (for the larger machines)
- Adhesive vinyl
Links to the Design Space Projects for each design I used:
Cards with Cricut Joy
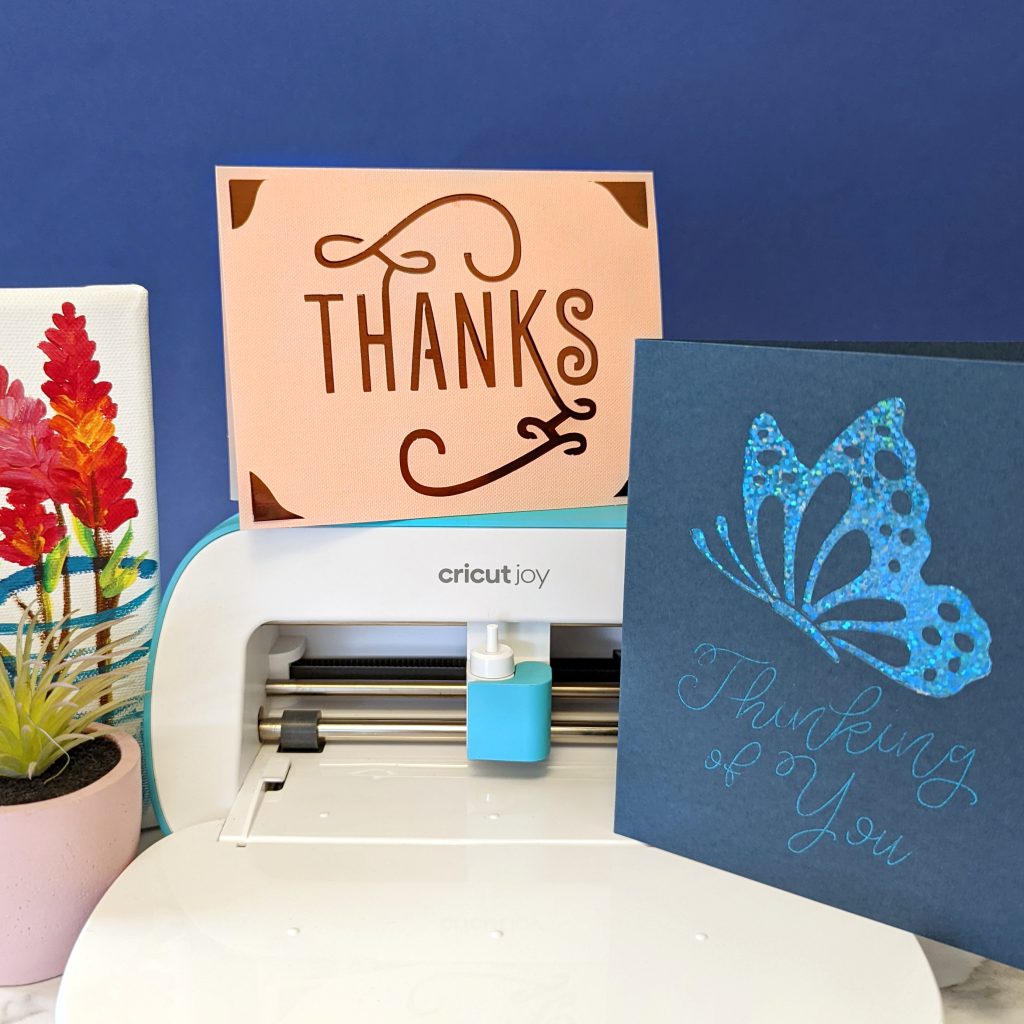
If you see yourself mainly making cards and organizational labels, Cricut Joy is the perfect machine for you! I wrote more details about Cricut Joy here. But to summarize, it’s compact, lightweight, cuts cards easily, and can cut smaller-size vinyl projects, or continuous long cuts with Smart Materials.
Beginner level card
The introduction of the card mat was really a game changer in making Cricut cards. You can cut the front only of a pre-folded card, tuck in the corners of a colored insert, and the card is done!
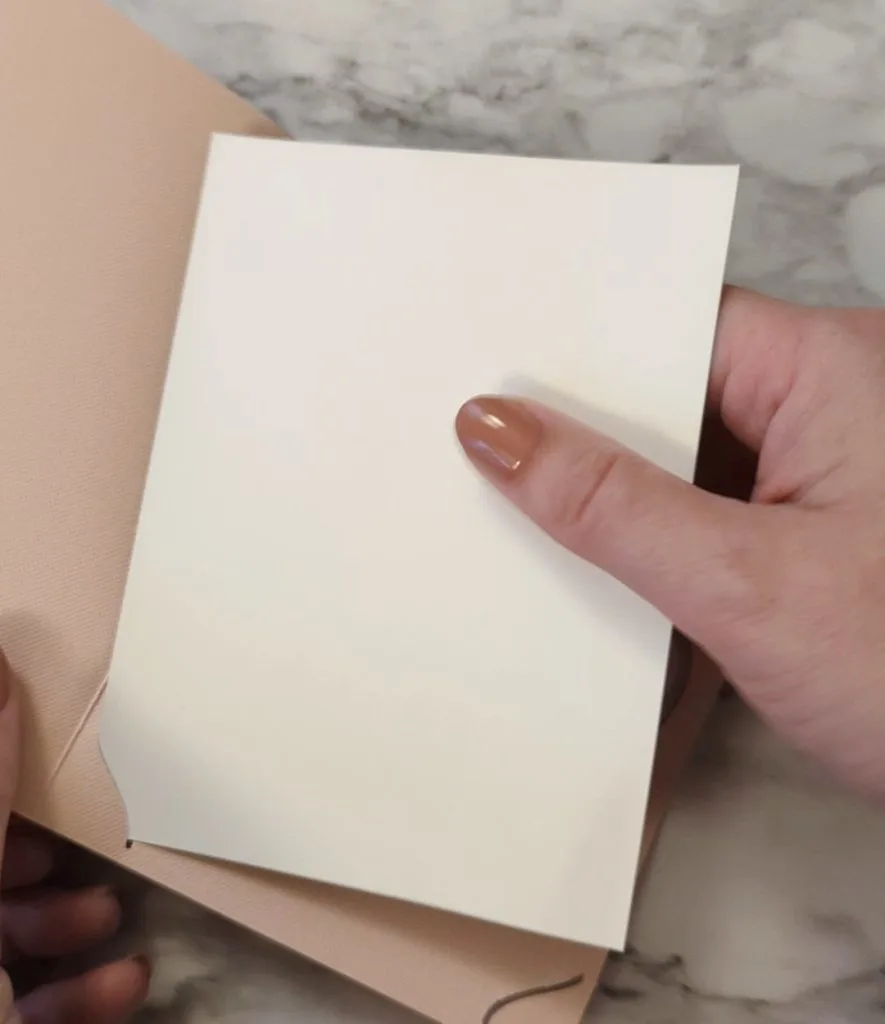
I like to use the Insert Card material setting and add More pressure. In my experience, this gives the cleanest cuts.
It’s perfect for making several cards in a short period of time, or when you need something fast at the last minute.
Intermediate level card
The newer cutaway cards have an adhesive inside the card already. You peel away the backing and stick the insert to it.
Then you cut the card on the card mat like normal, and peel away the cardstock pieces to reveal the slick-surfaced insert underneath.
You also want to make sure that you DO use the insert that comes in the kit, and not another piece of cardstock, because the adhesive won’t release from regular cardstock.
I classified it as intermediate, because it takes some time and can be a little finicky to get the cardstock and sticky layer off of the insert.
I also added a foil design to this card. The card design I chose had a cut layer and a pen layer, so I changed the pen action to foil.
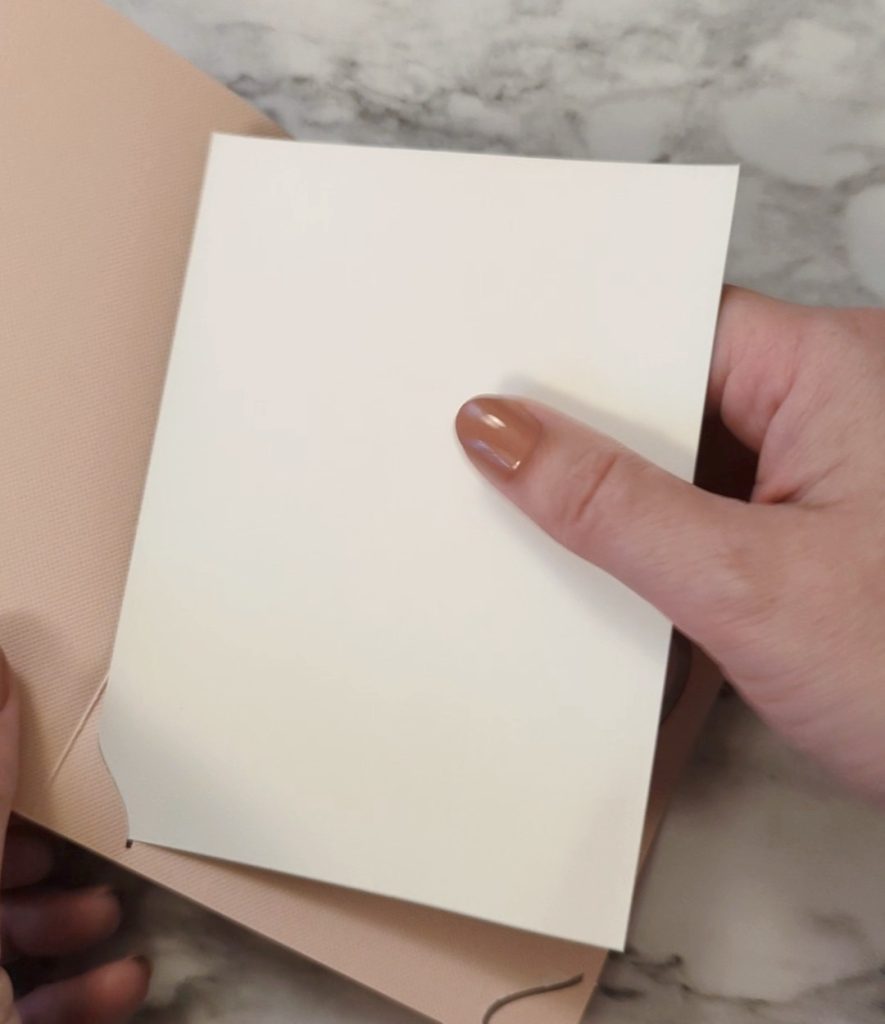
Prep a cutaway card
Choose a card base and insert. Peel away the paper from the adhesive. Lay the colored side of the insert on the adhesive and press down to secure.

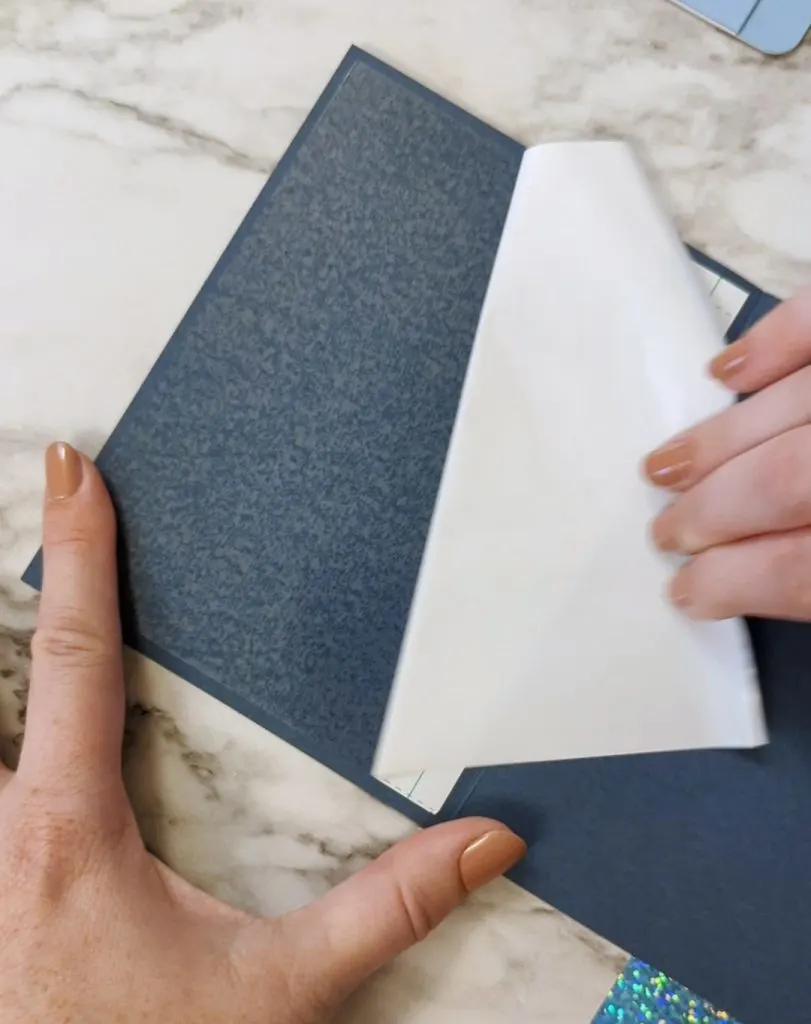
Position the card on the card mat.
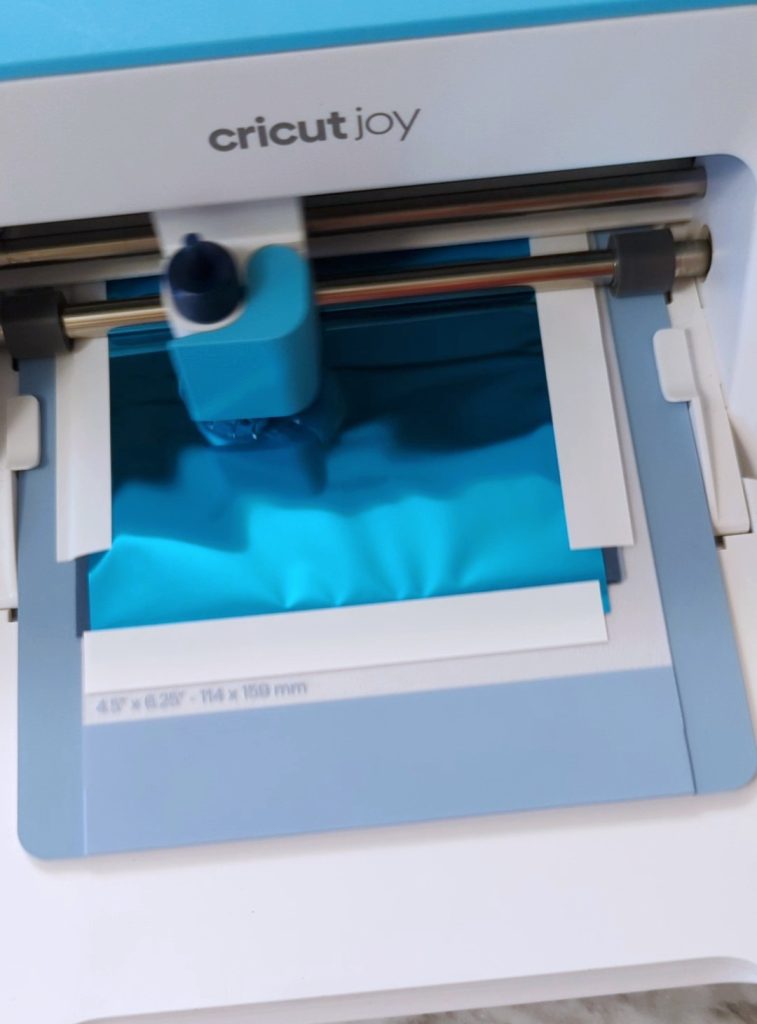
Use foil in Cricut Joy
Design Space will instruct you to tape on the foil and put the foil tool in the Joy. Load the mat into the machine and press go on your computer.

When the foil design is finished, leave the mat in the machine, but remove the tape and foil. You’ll get prompts in Design Space. Put the cutting blade back in the Joy and click Go. Then the design will be cut. When it’s finished, click Unload.
Remove the card from the mat and then work on peeling away the unwanted parts of the design. You’ll be taking off the cardstock and the adhesive layer.
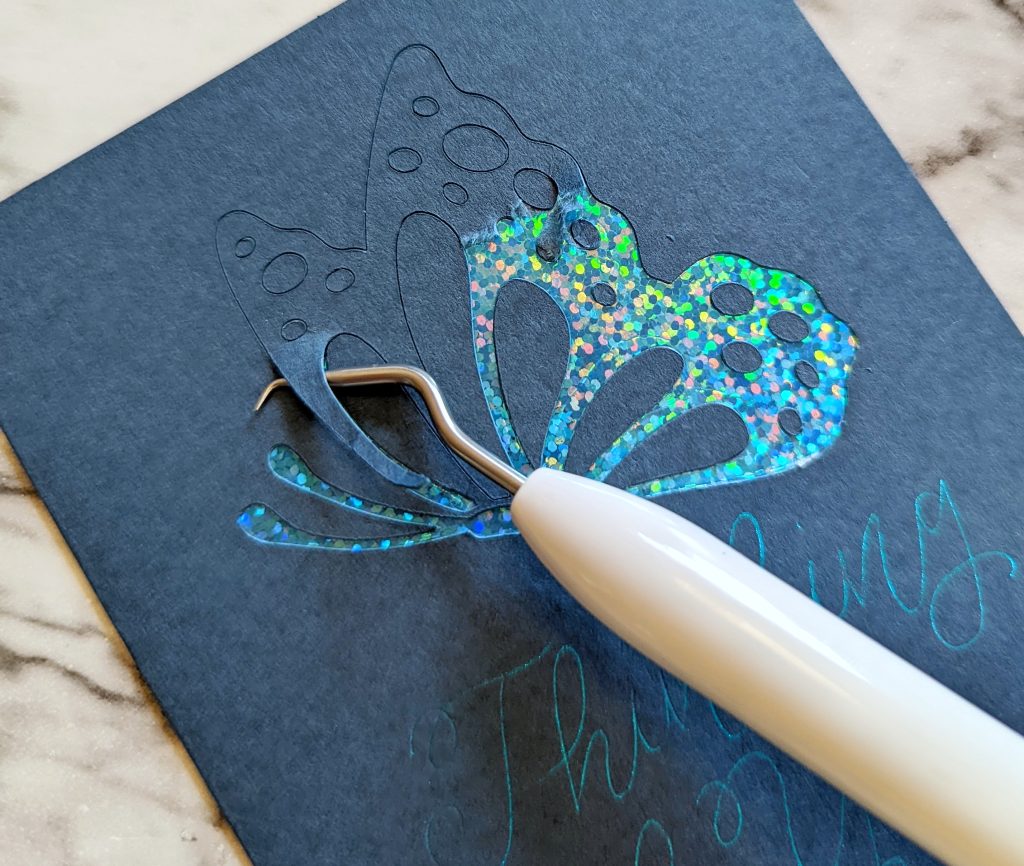

I had to use my weeding hook in several places, so it took a bit of time. Just be patient and try to not scrape into the insert layer so you don’t damage it.
Cards with Cricut Maker
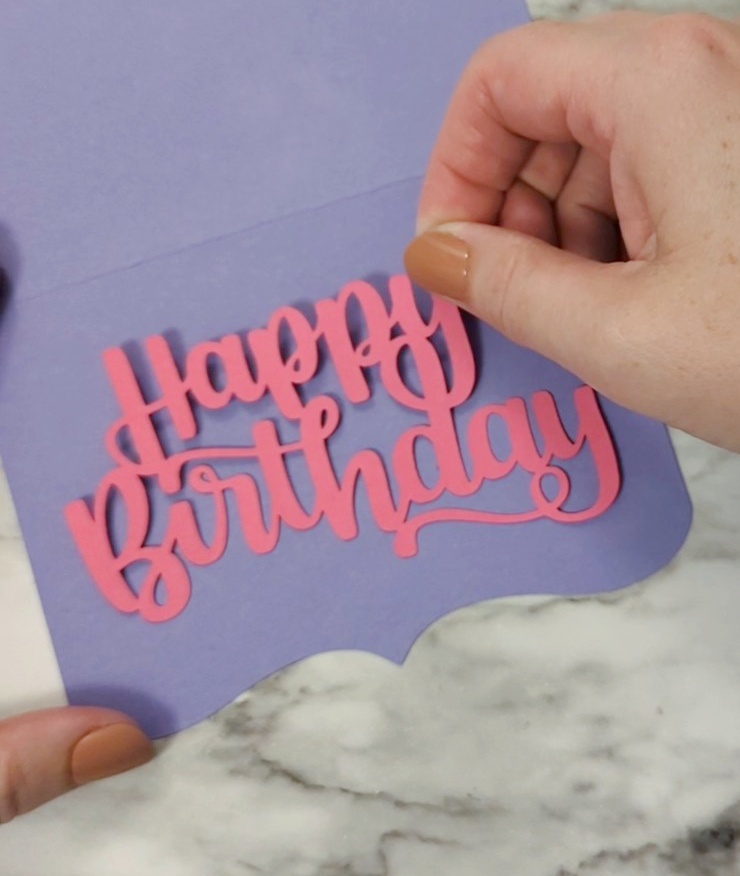
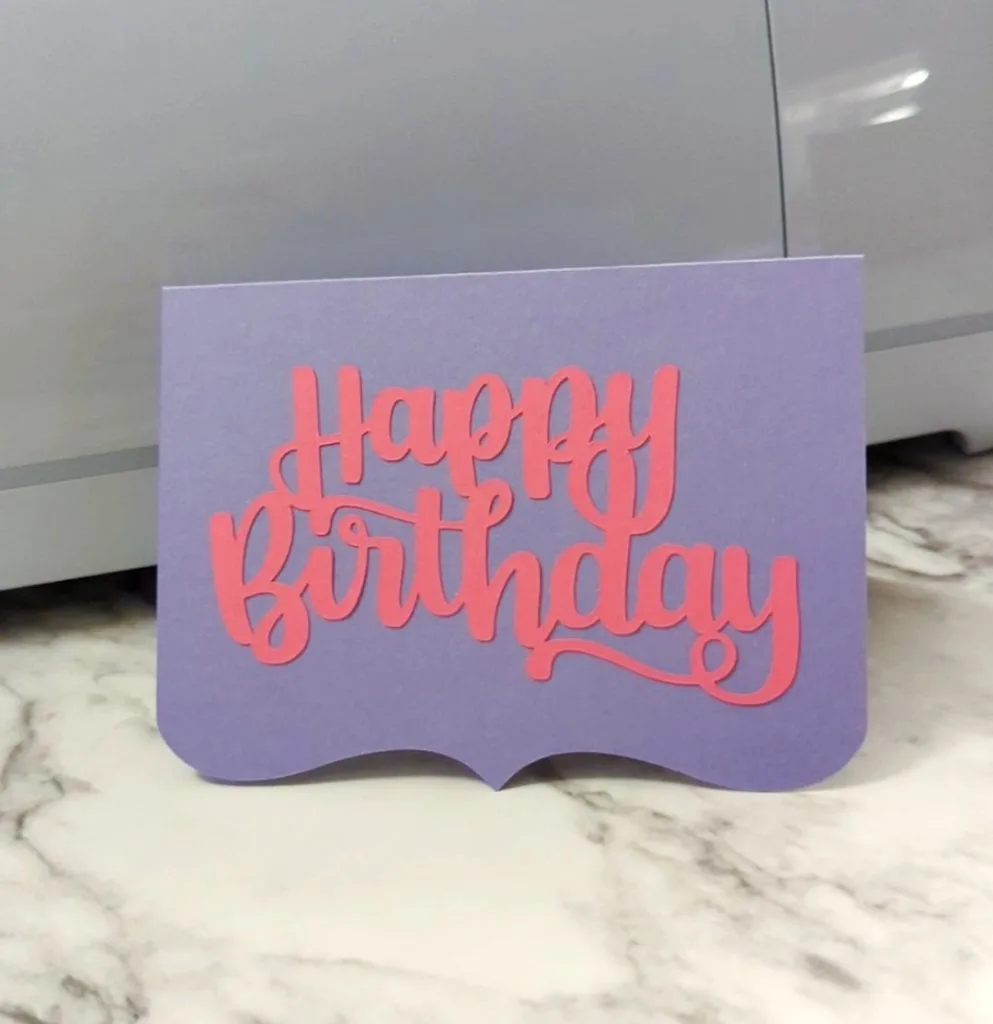
Beginner Card
If you have a Cricut, two pieces of cardstock, and some glue, you can make adorable cards! You can search for card images and find cards with rounded corners, simple cutouts, and decorative edges, like the one I’m using. Then find a phrase or image (look for ones that cut out in one attached piece, like this Happy Birthday I’m using.)

If you have a scoring tool or a scoring wheel (for the Maker) the machine will make the fold line for you. Otherwise, you can delete the score line in Design Space and fold the card on your own.
Cut the two pieces of cardstock, fold the card base, and use glue to attach the front of your card. Voila!

Intermediate Card
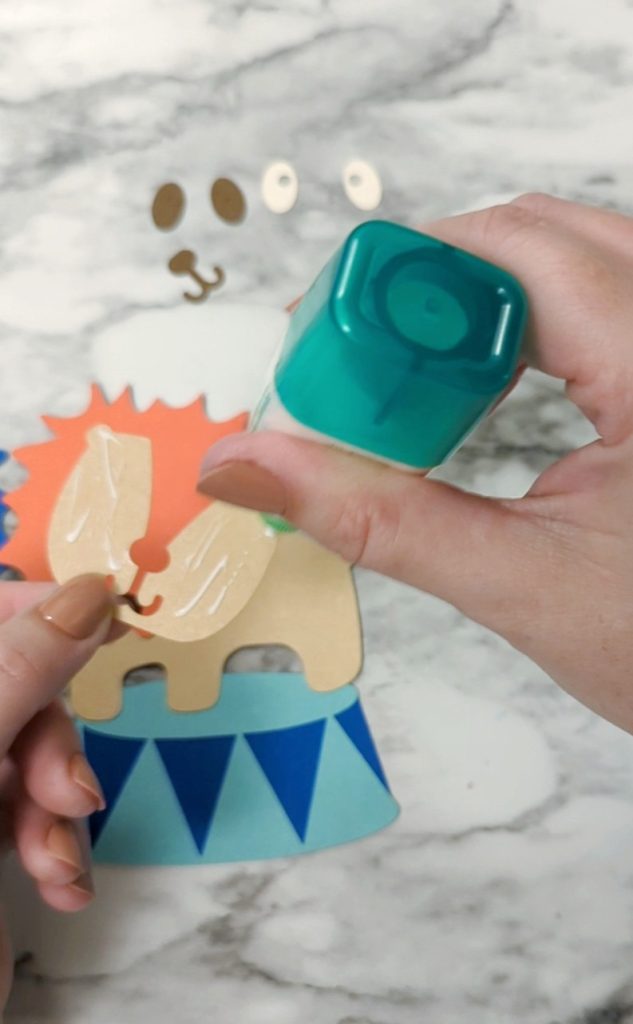
This card is a really cute lion cut-out. The card base is a mirrored shape of the lion, and there are several layers of cardstock to assemble.
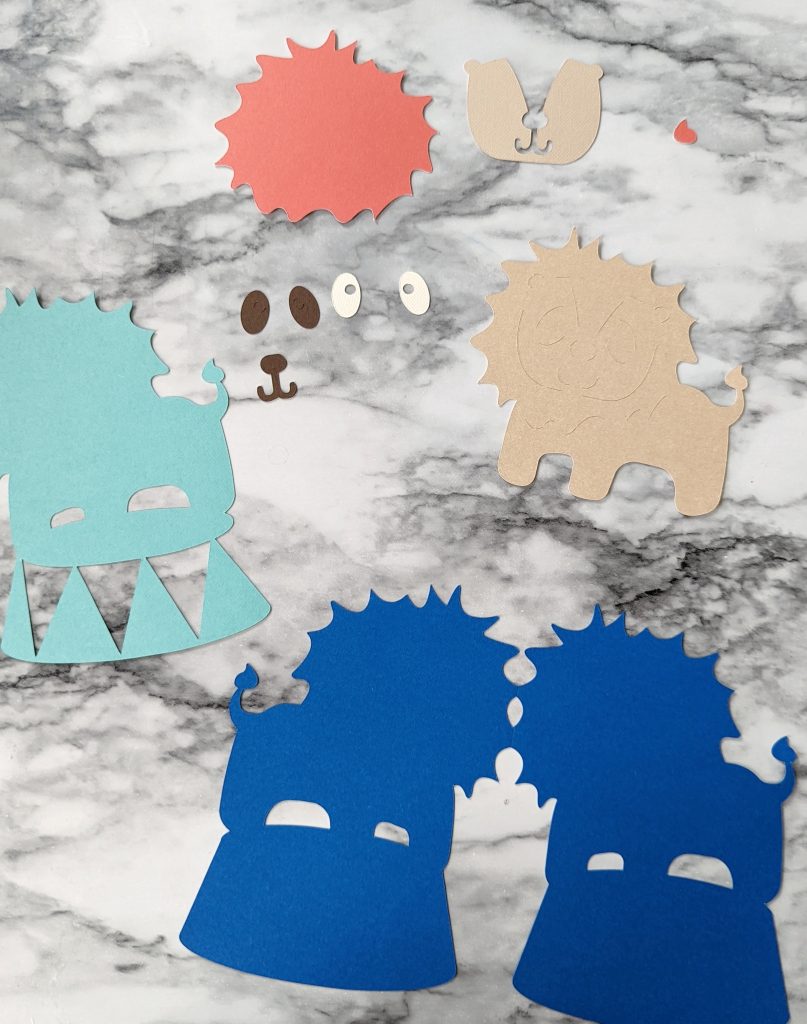
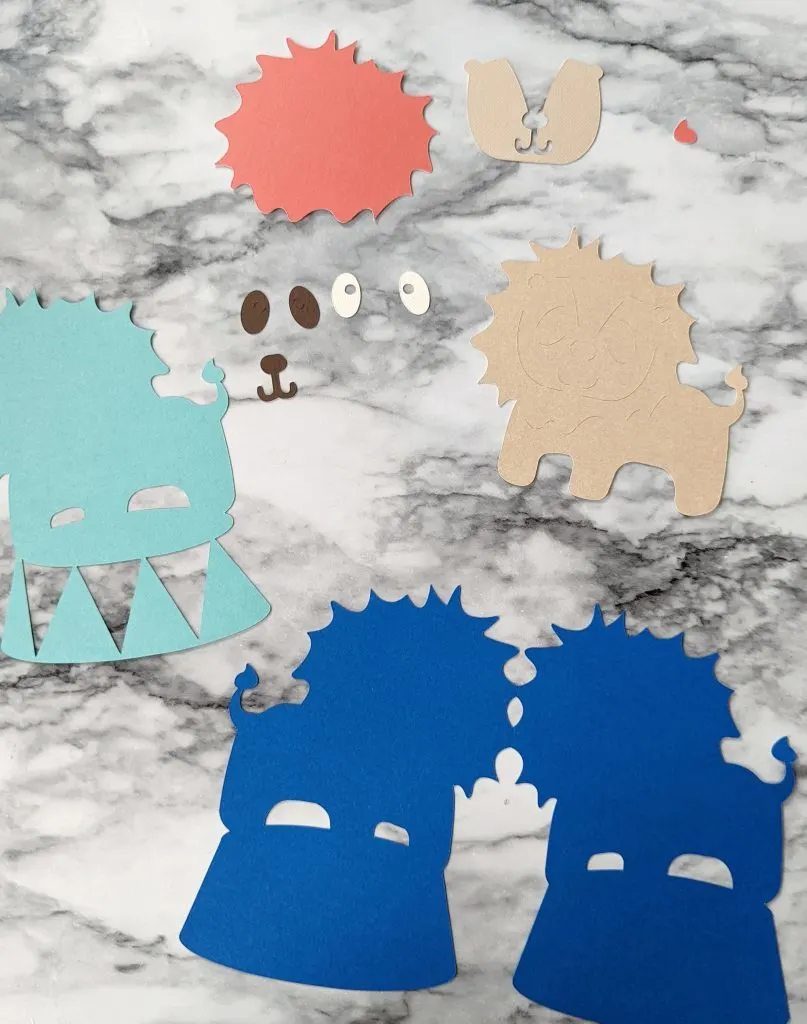
Tips for making layered cards
When making a layered card like this, I find 3 things to be really helpful.
- Change the colors in Design Space to the actual colors of cardstock you’ll be using. Making a layer purple instead of blue? Change it so it’s easy to organize the mats.
- Stack cardstock colors in order. After you click Make It, scroll down the left and look at the order that Design Space will be cutting the mats and line up cardstock accordingly.
- Open the project on your Canvas again when assembling the card to make sure you get the placement right and don’t forget any pieces.

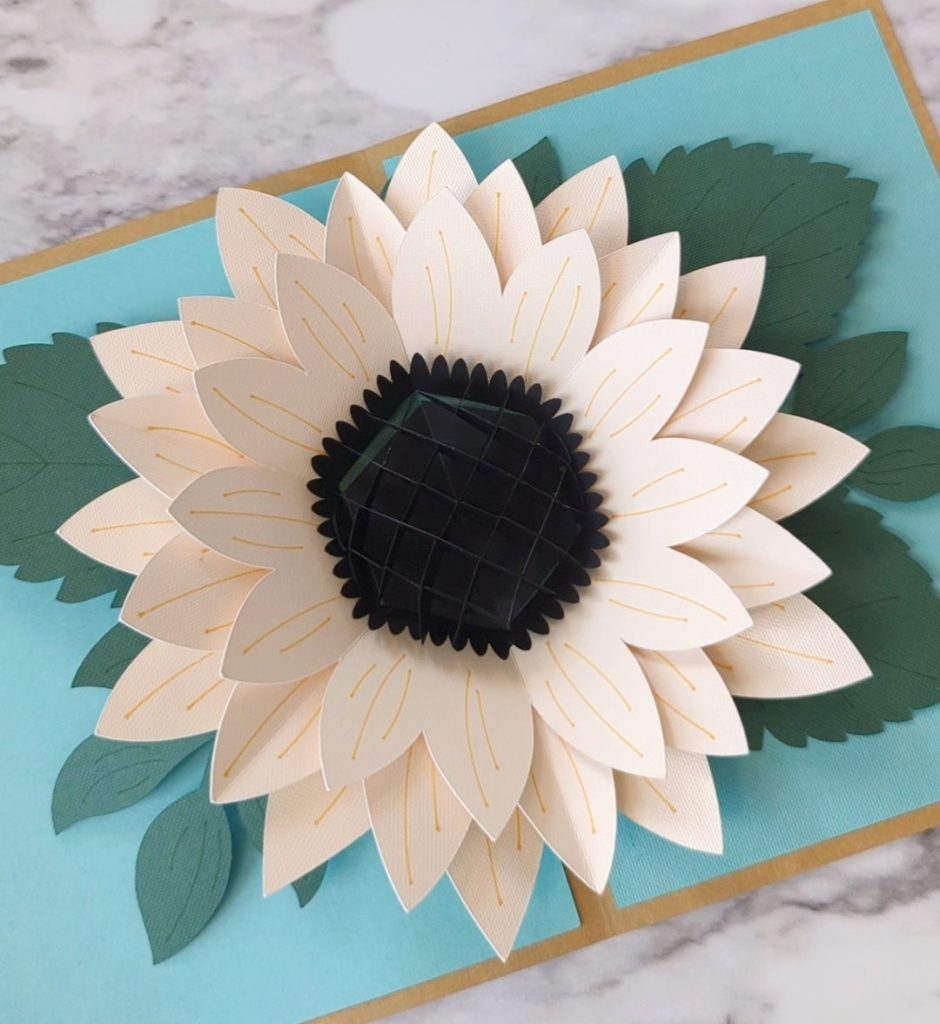
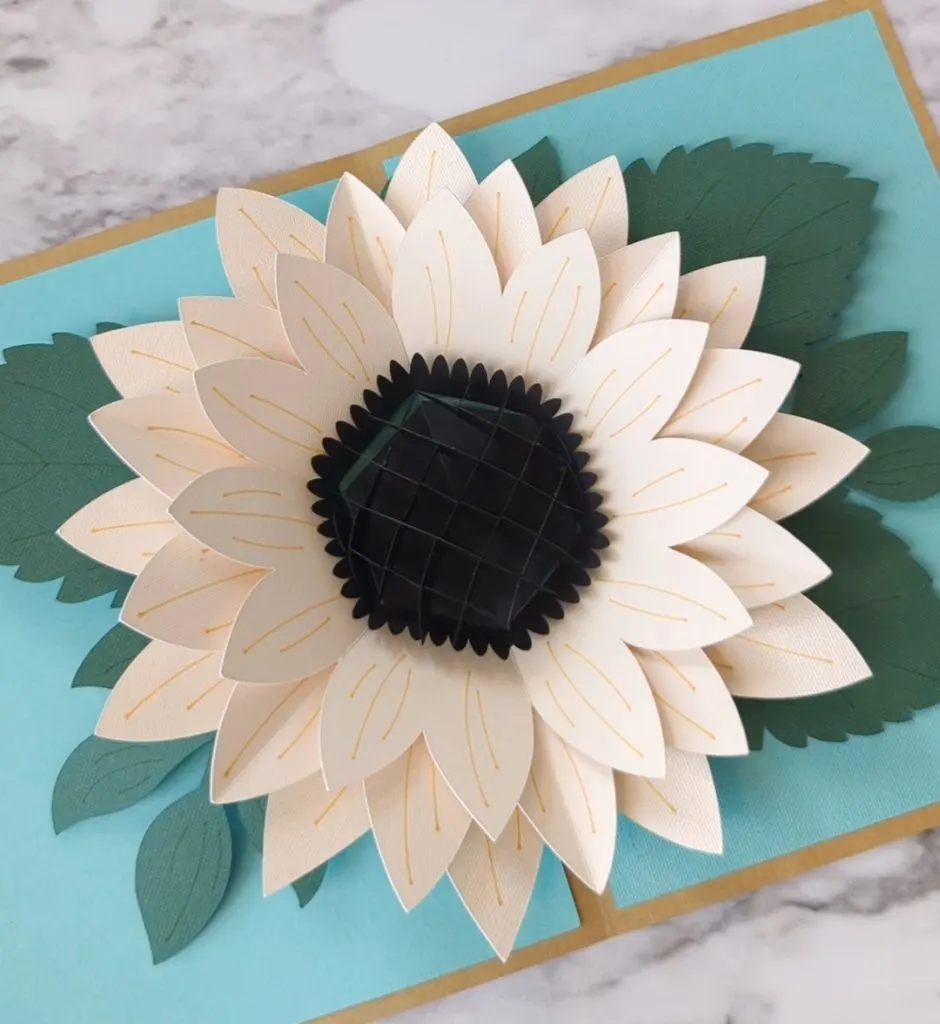
Advanced Card
When you are ready to really up your card-making game, check out the pop-up cards in Design Space! Search the projects section, or in the images for “pop up.”
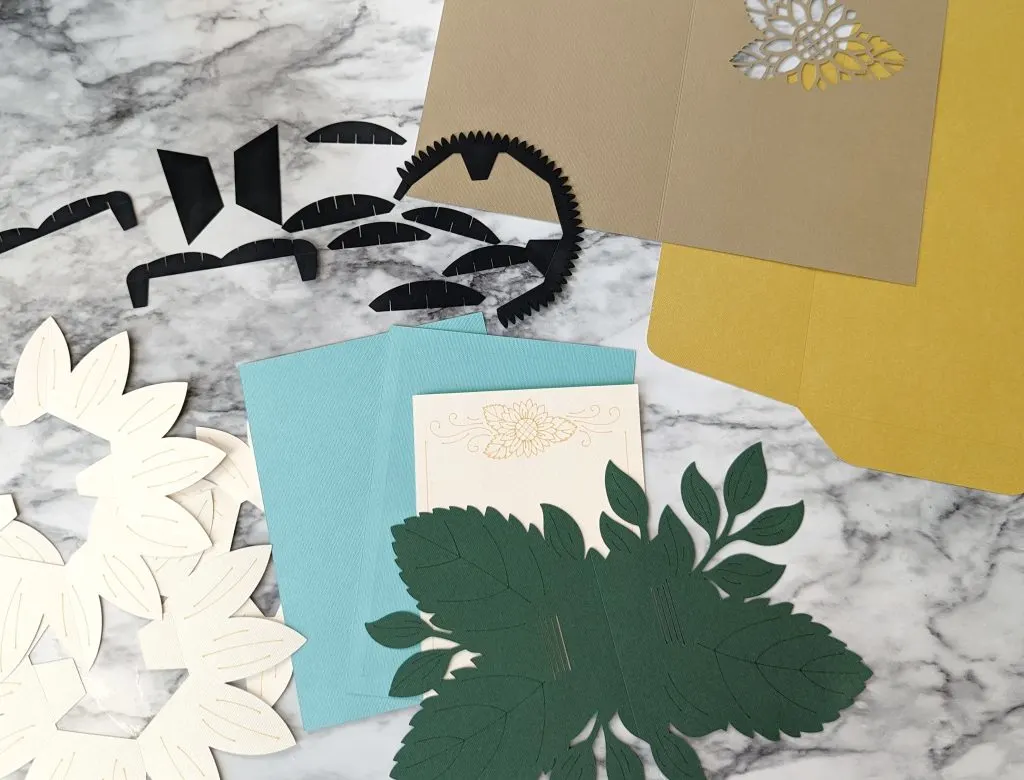
I chose to make the sunflower pop-up, and often these large cards come with a custom envelope cut out too.
After picking my cardstock and pen colors, I began loading mats into the machine to cut. Again, I used my tips for cutting layered cards, and set the piece off to the side of my work space.
When it comes to assembly, honestly the best tip is to find someone making it on YouTube! Once you have done a couple of this style of card, you get the hang of it. But the first time through, just looking at all the pieces, it can be very confusing.

The extra advice I would give specifically for this pop-up sunflower card, is to use tiny amounts of glue on the slits of the center criss-cross piece.

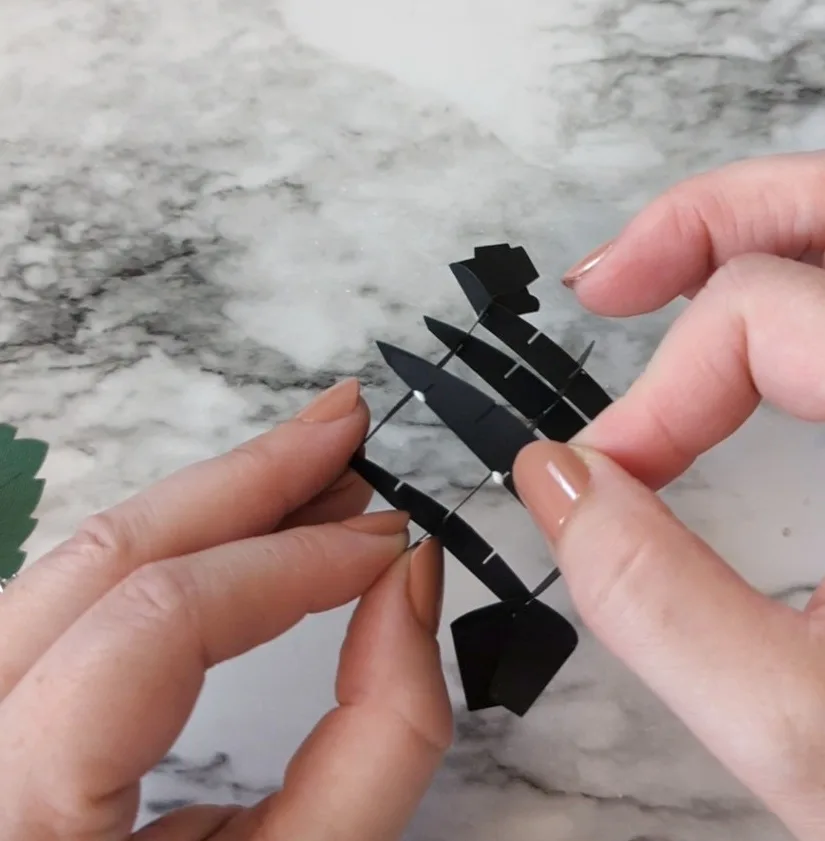
Part of my problem was probably that I used a thinner black cardstock than normal, so perhaps a regular thickness would hold together better. But mine kept slipping out of place until I added some tiny bits of glue.
So have you been inspired to make cards with your Cricut?I hope so! Which level of card do you feel like you’re at now? What would you like to try next? Let me know, or share it on Instagram and tag me!