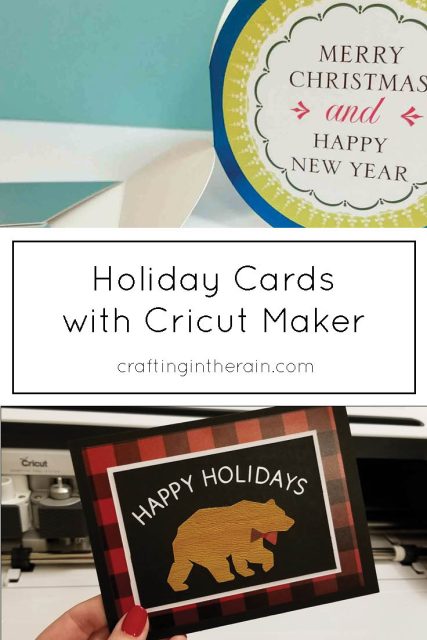
It’s time to turn on your holiday playlists and make cards! Whether you handmake all your holiday cards, or just a few special ones each season, the Cricut Maker is like your magic wand to get it all done. I have designed 3 different cards that I hope will inspire you. For these handmade holiday cards I mixed several materials, so they are truly unique and a great way to show off your talent and personal style. (some links affiliate)
Plaid Holiday Card
Supplies
Cardstock (black and white)
Vinyl (plaid and white)
Faux leather wood grain
Transfer tape
Adhesive
Open this Design Space file.
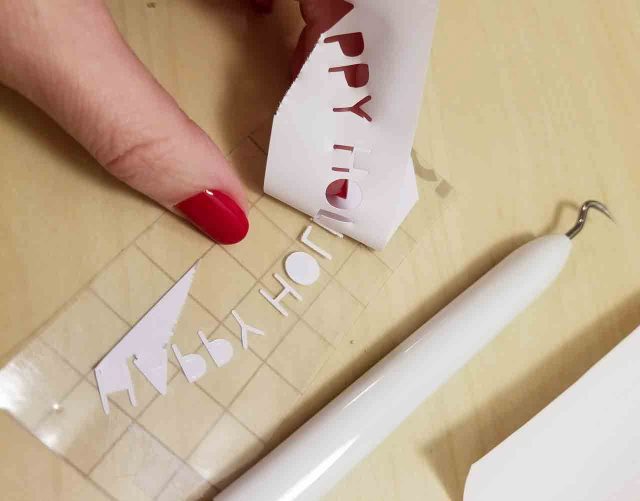
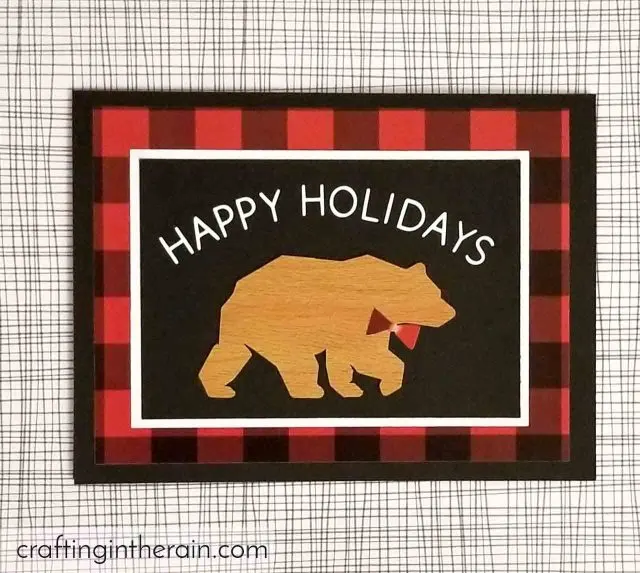
Cut all shapes as shown in the project. For the large black rectangle, use the Scoring Wheel if you have it. (If you don’t yet, you can buy the Scoring Wheel here, or edit the tools to change it back to the scoring stylus.) The bear is the wood grain faux vinyl, and the letters are white vinyl.

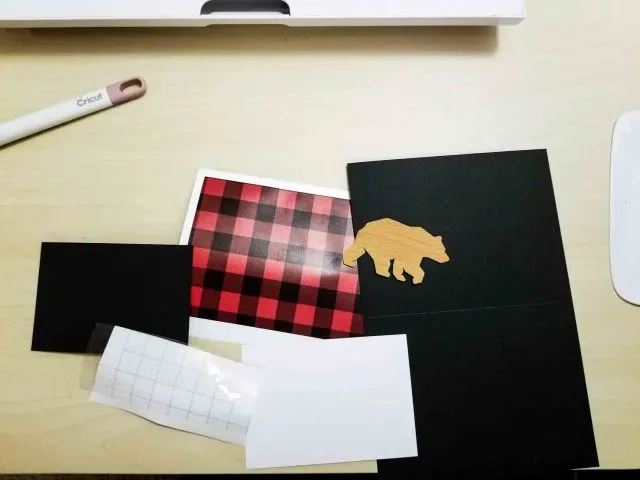
Fold the card base along the score line. Tape the black rectangle to the white rectangle. Weed the vinyl and apply to the small black rectangle with transfer tape.

Add the bear under the words and place the small bow under his chin.

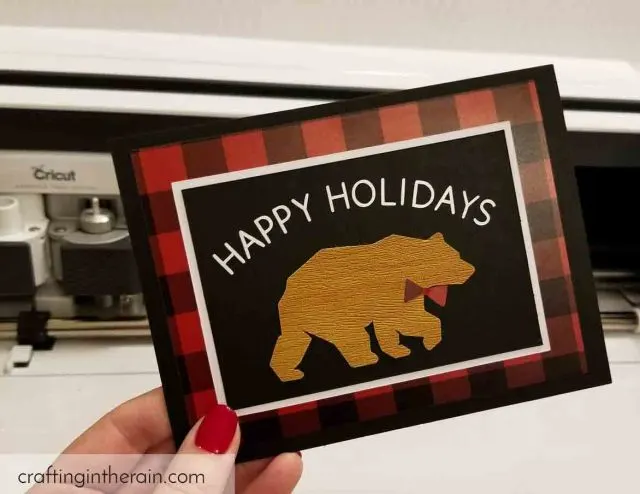
Apply the plaid vinyl to the front of the card and center the rest of the design to it.

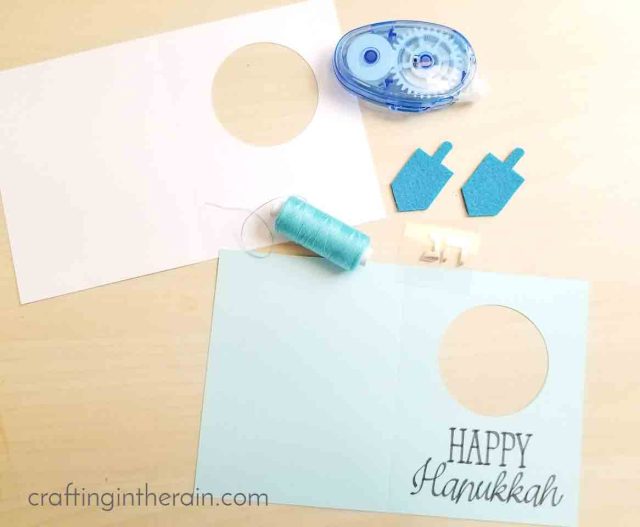
Spinning Dreidel Hanukkah Card
Supplies
Cardstock (light blue, dark blue and white)
Blue felt
Silver foil iron-on
Cricut calligraphy pen
String
Adhesive
EasyPress
Open this Design Space file. Cut the pieces as shown, matching the colors. Large card pieces are cut from white and light blue cardstock.
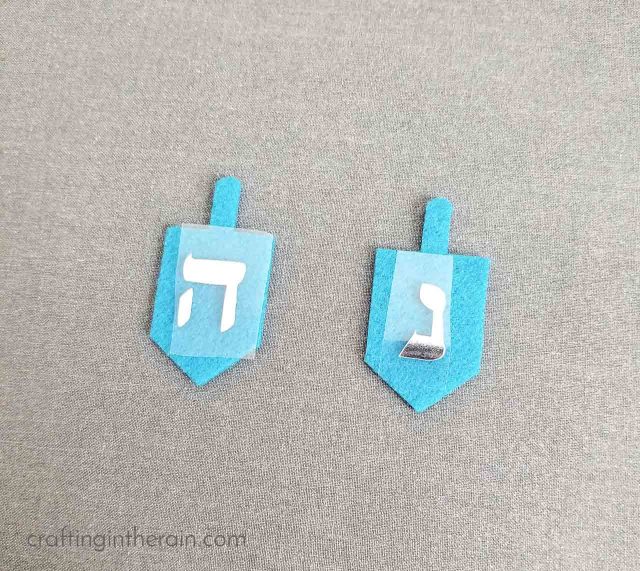
Be sure to insert the pen when cutting the blue piece – it will write “Happy Hanukkah,” If you don’t have the calligraphy set, any Cricut pen will work great and write the letters. The dreidel is felt and is cut with the Rotary Blade. The symbols are silver iron-on. The words will be drawn with the pen. Watch the instructions in Design Space – it will tell you when to insert the pen!

Position iron-on to the centers of the dreidel shapes. Set the EasyPress to 280 and heat for 30 seconds.


Let cool for about 10 seconds, then remove the plastic carrier sheet.

Fold the blue and white cardstock along the score line. Tape the bottom of the white piece inside the blue card. Fold the white piece over and glue a piece of string onto the top of the white piece, going right across the circle. Then fold the front of the blue piece over and glue. This traps the string inside the card.
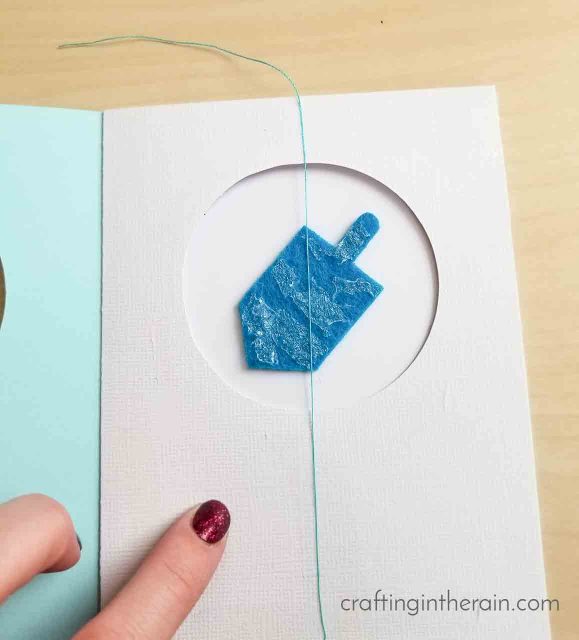

Sandwich the dreidels around the string and glue them together. Twist several times and close the card. When the card is opened, the string untwists and the dreidel spins around!


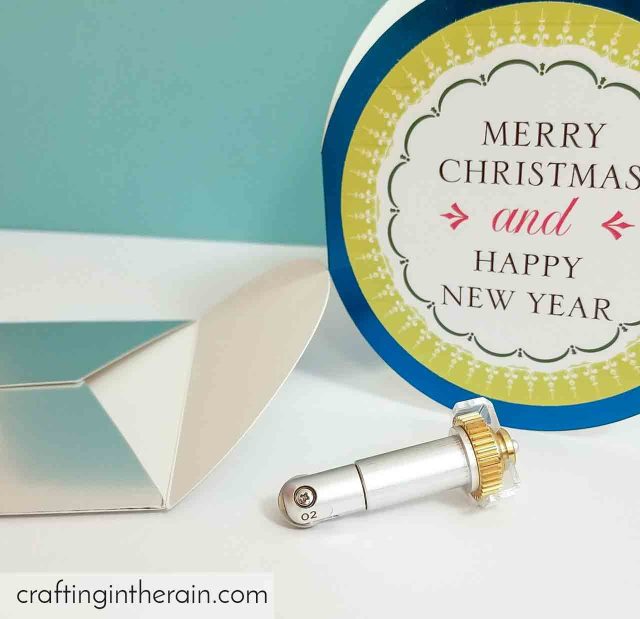
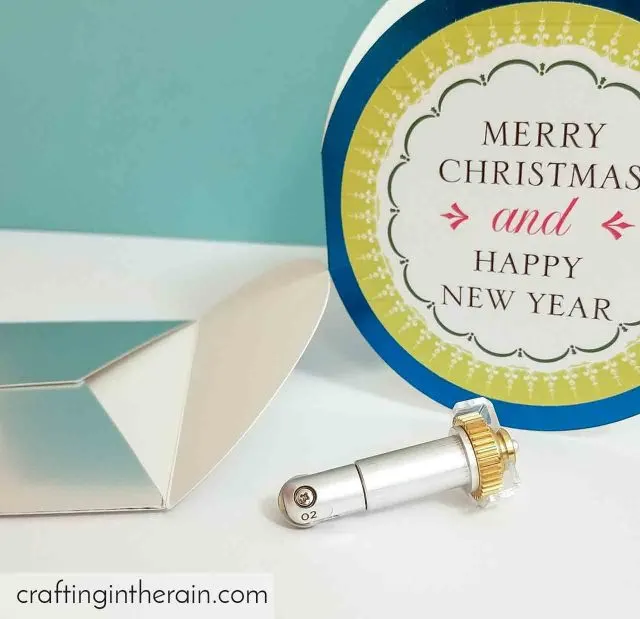
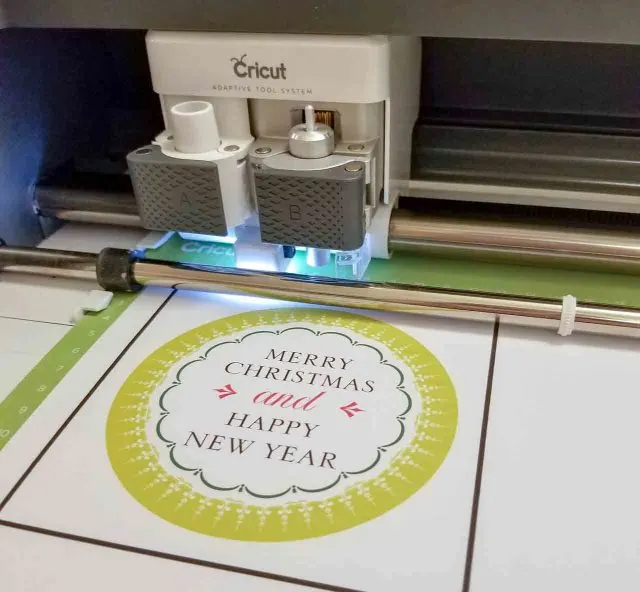
Print then Cut Christmas Card
Supplies
Foil poster board (teal and silver)
Printable vinyl
Cardstock (pink)
Cricut paper crafting set
Hot glue
Open this Design Space file. This was the easiest card because I took advantage of the print then cut feature. I found an image that I just loved. So I created a card base to fit around it. The foil posterboard gives it an extra fancy look.
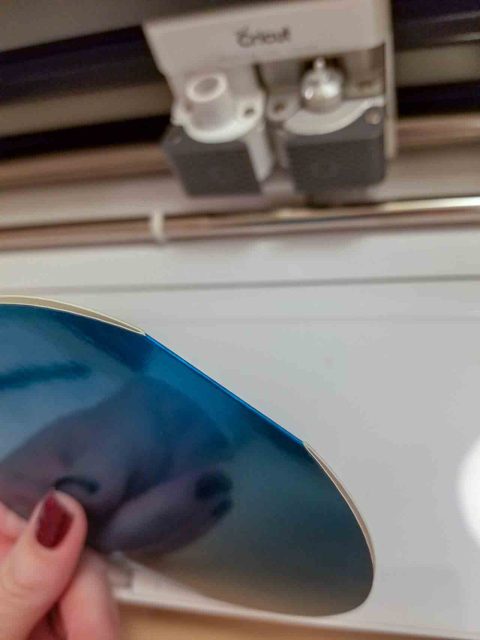
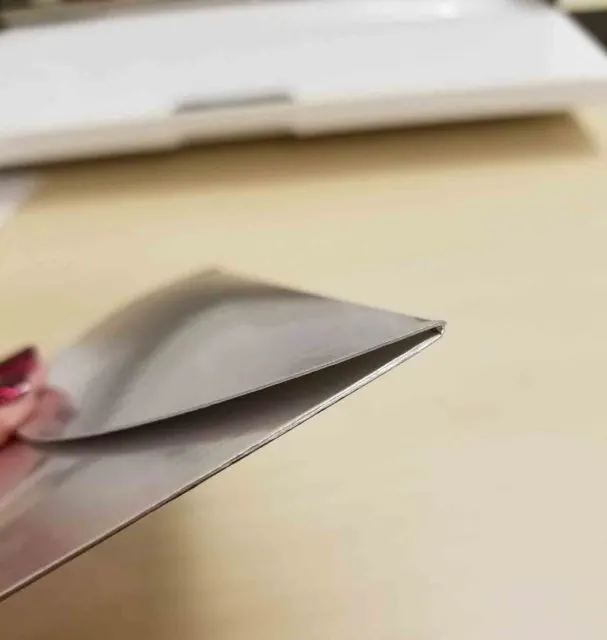
Cut and score the posterboard for the card and envelope with the scoring wheel and the fine point blade. For foil posterboard, use the double scoring wheel. It gives a score line that doesn’t crack any of the pretty shiny coating.

Print the card image onto printable vinyl (or white cardstock if you don’t have the vinyl.) Center it on the card.

Assemble the envelope with hot glue.
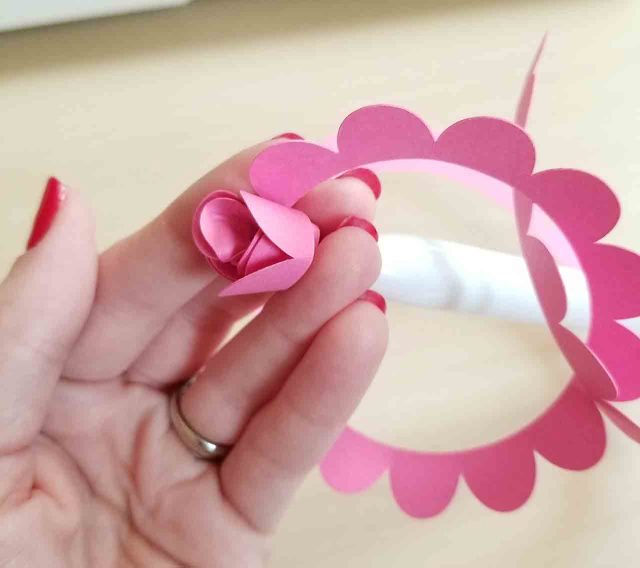
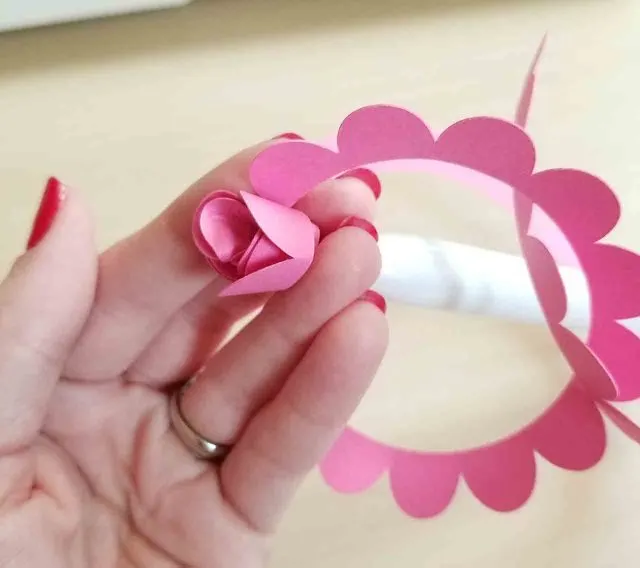
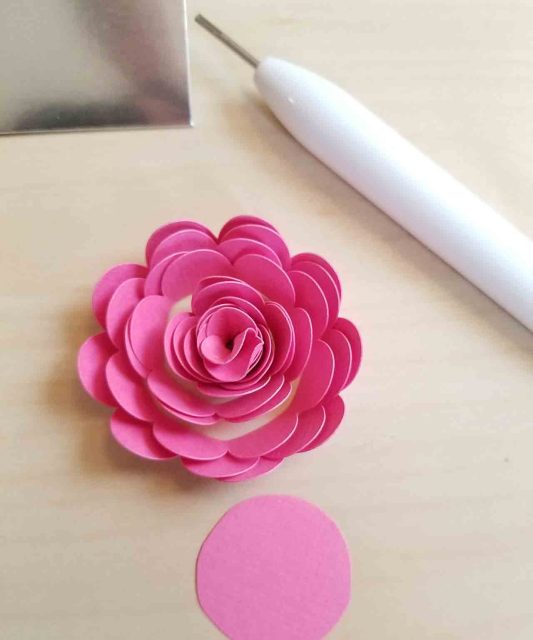
I also decided to dress up the envelope a little with a rolled paper flower.
Use the tool in the paper crafting kit that has a slot in the metal tip. It holds the center of the flower while you roll it up.
To secure the flower, hot glue it to a cardstock circle, then hot glue to the envelope with a leaf.

I used the same teal poster board that makes the card!
The Cricut Maker will score even thicker cards beautifully, and adding felt and other materials make them extra special. With these 3 different handmade holiday card designs, change up the colors to your favorites, and have a happy holiday season!
This is a sponsored conversation written by me on behalf of Cricut. The opinions and text are all mine.