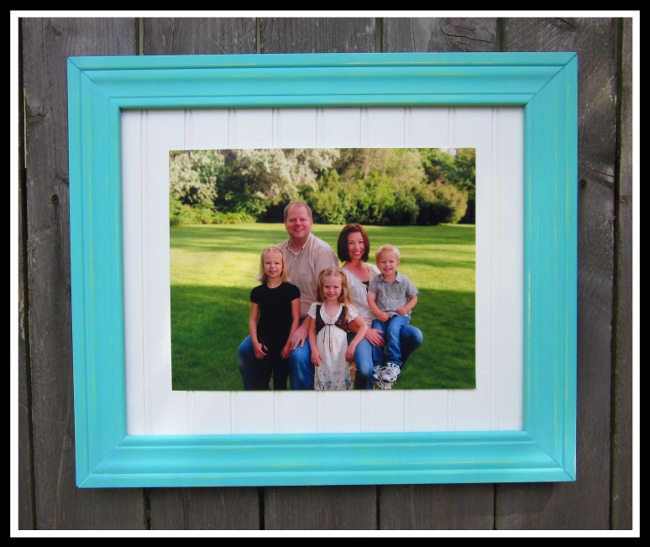
Are you one of those lucky folks who manages to stumble across huge frames for cheap at thrift stores or garage sales? I am not that person, so when I wanted to frame our family picture from last summer, I got to work.
Ok, I know it looks like a long list, but it’s not too bad. And don’t be afraid of the miter box either.
I had never used one before this project, and it’s a piece of cake! Decide how big you want your frame to be. It helps to have your photo available, then cut out a large piece of paper around it to get a visual on the sizing.
I had an 11×14 picture I wanted to display, so here are my measurements:
- 2 boards (measuring longest points)– 23 inches
- 2 boards– 19.5 inches
- Beadboard (you want it a little smaller that your outer frame measurement)– 21.5 inches x 18 inches
Cut moulding pieces using saw and miter box. You will be cutting at a 45 degree angle, with the longest side being the outside edge of the frame.

Sand any rough bits of the cut.

And be sure to do it over a black table so your kids can come along later and write you messages in the dust.

Paint frame pieces. TIP: rest boards on top of plastic caps to keep them off the table while you paint the edges.
I painted each one yellow (using just regular craft paint–DecoArt Lemon Yellow) and when they were dry I added a coat of this cool coastal-blue (DecoArt Bahama Blue).
When the blue was dry I lightly sanded with a fine grit sandpaper to faintly distress it and let some yellow show through.This would look really cool layering another color or two in there as well for a more dramatically distressed look.

Paint beadboard piece. I painted two coats of high gloss white trim paint that we had from painting new baseboards all through our house.
When everything is thoroughly dried, spread a line of the liquid nails around the edge of the beadboard and press down your frame pieces, clamping or covering with books to ensure a good bond. Let it dry for a day–you want it to be solidly secure.

If the joints at the corners seem obvious, fill them in with a little wood filler, smooth out and paint when dry.

Find the center of the top back and hammer in the sawtooth hanger, then hang on your wall.
Attach your picture to the center of the beadboard using small pieces of double sided tape.
And there you have it. There’s so much potential with this process.I hope you’ve been inspired to try it out on your own–I’d love to see!
