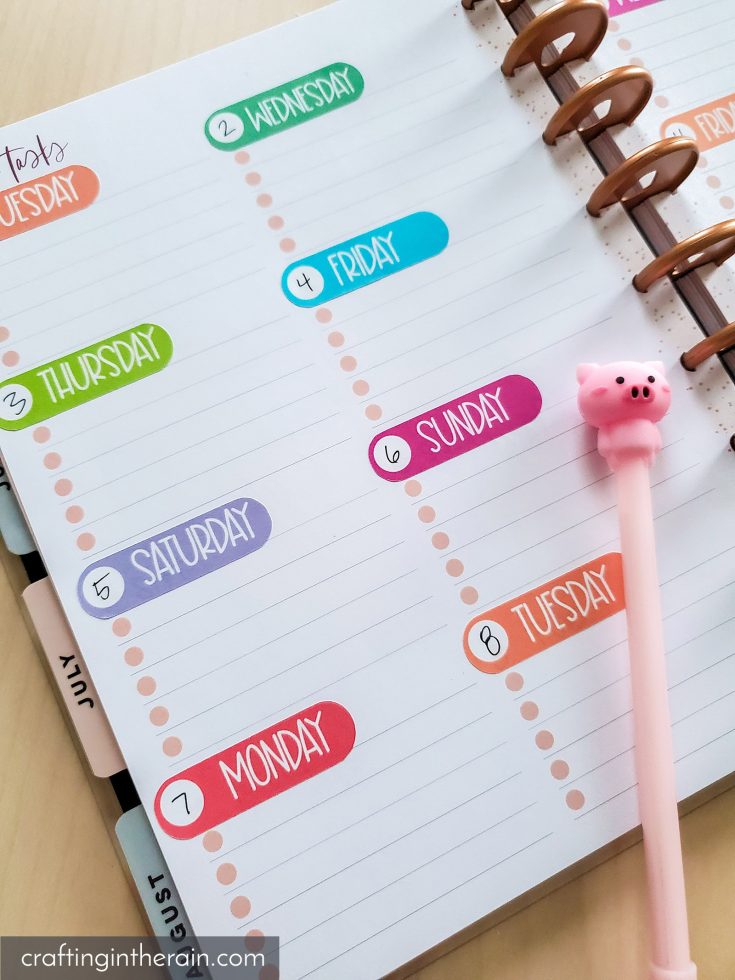
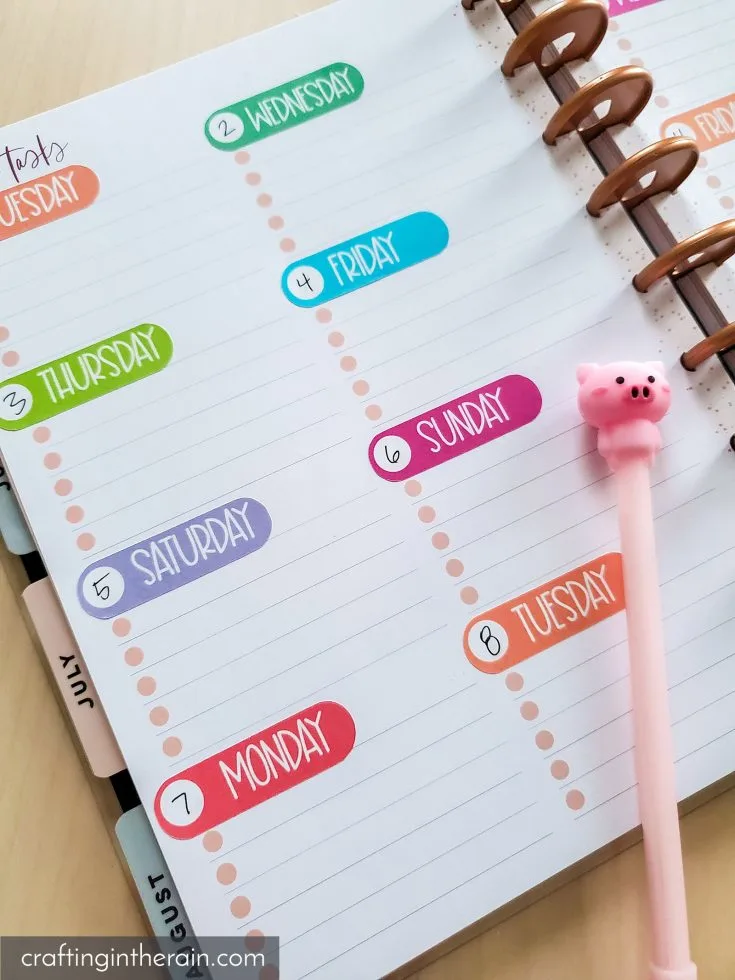
Do you love adding stickers to your planner, calendar or journal? I do, and I’m having a lot of fun starting to design a few of my own stickers too, like these day of the week planner stickers.


Day Planner Stickers
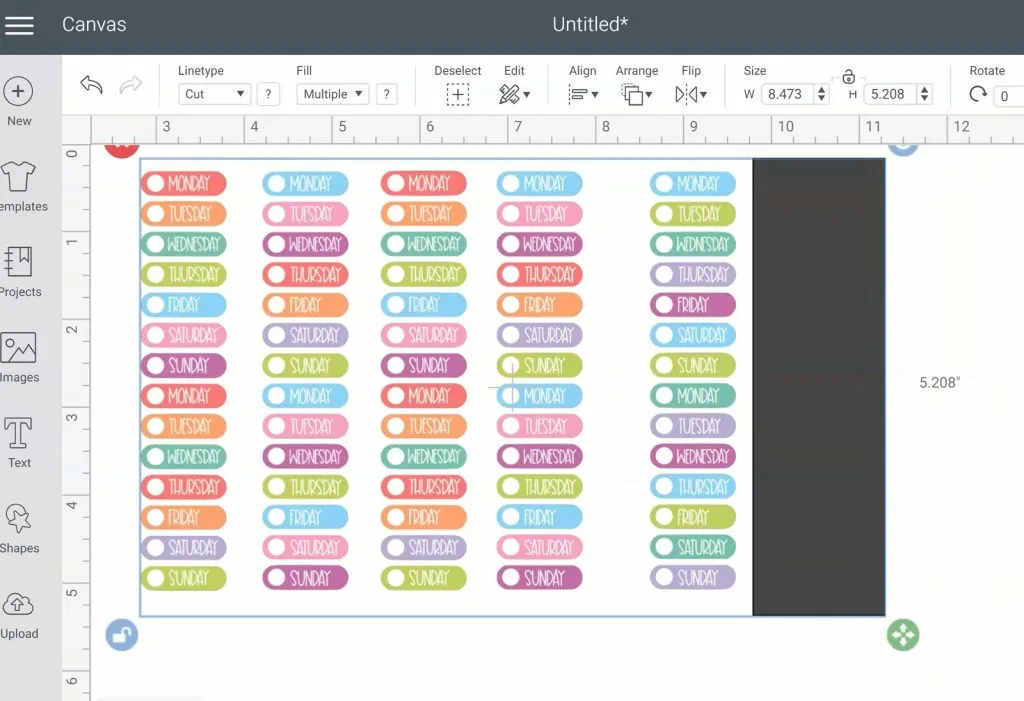
My current planner has daily sections that are blank. There is a full month calendar with days and dates, but the section with more room is date-less.
Instead of just writing it in every month, I made these colorful stickers that I can use, including a space to write in the date.
If you also have a date-less planner, you might get a lot of use out of these stickers too!
I designed the whole set as a transparent PNG so when you load it into Design Space it is ready to print and cut.
Watch the video to learn how to print out just the color sets you want and not waste your sticker paper.
Start by downloading the Day Stickers PNG using this form.
This printable is for Personal Use only.
Print PNG Stickers with Cricut
Upload it into Design Space and resize the image so that each individual sticker is the size you want.
Create a rectangle to fit around the stickers you want to use. Select everything and click slice. Repeat if you want to keep any other sticker colors.

Delete the extra layers.
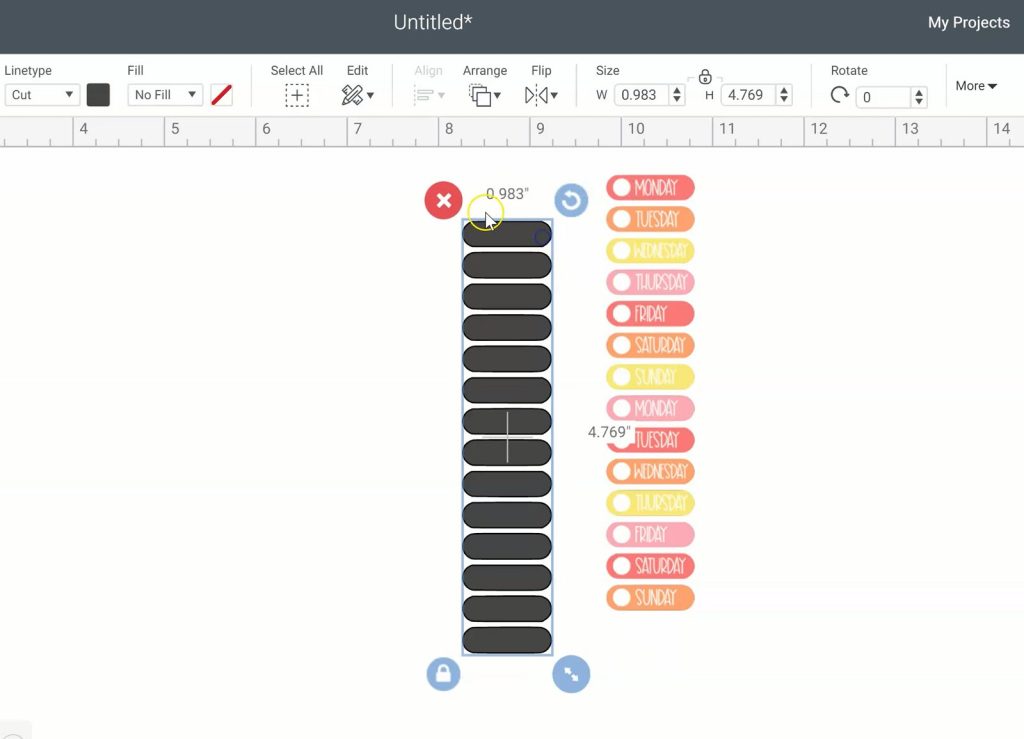
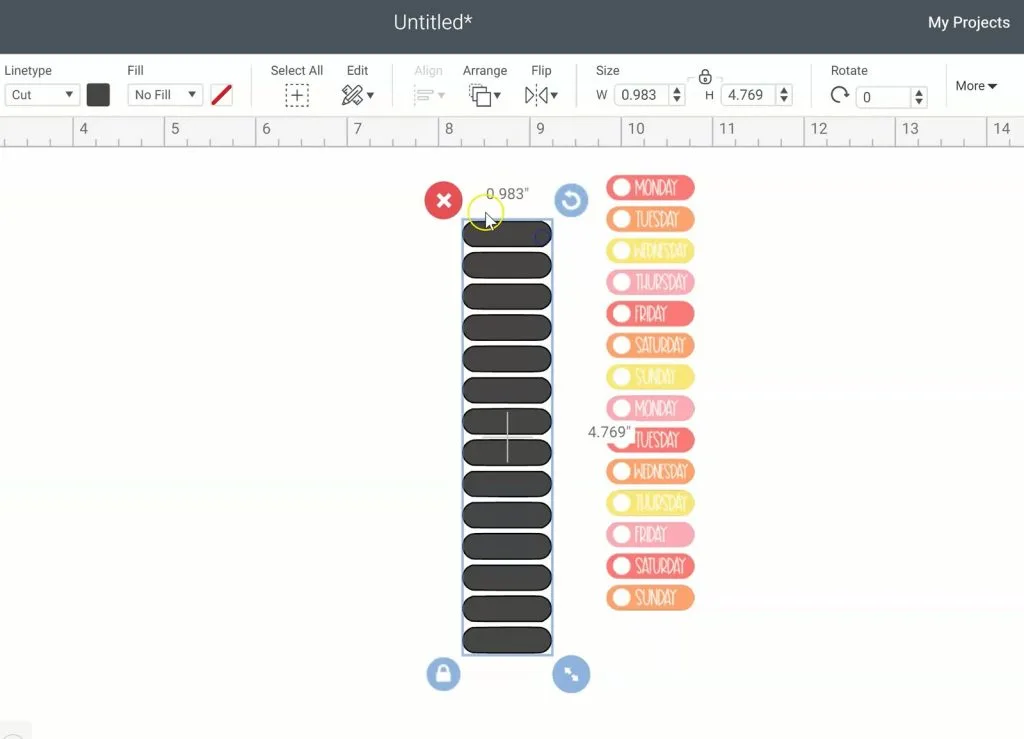
Make a new rectangle that matches the print size 6.75 x 9.25 inches. Send it to the back and place the stickers on it so they fit. Duplicate stickers to fill the space or add more stickers to maximize the print area.

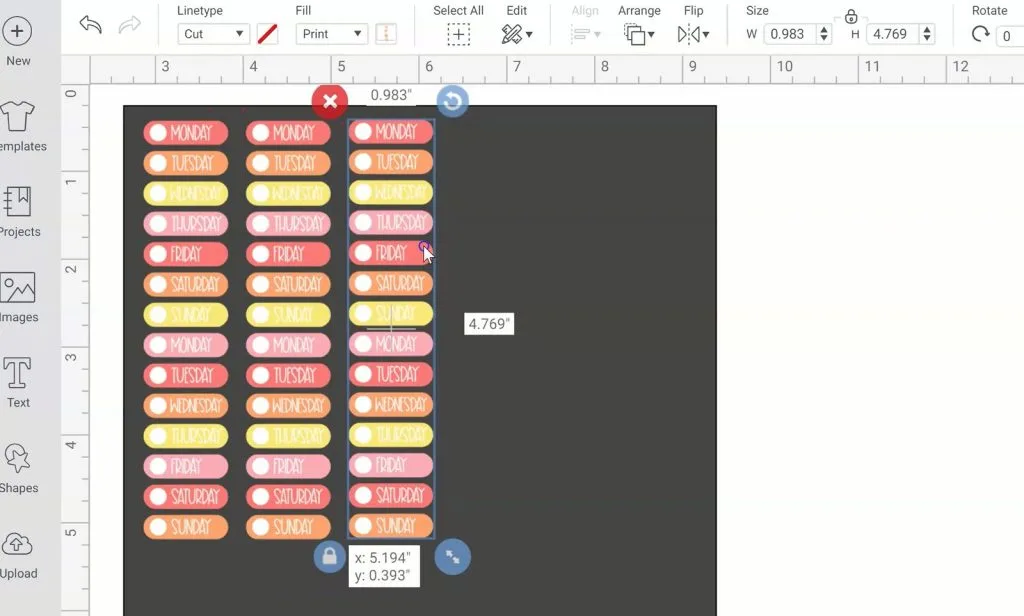
Delete the background rectangle and send the design to your printer then cut on your Explore or Maker.
Slice a Print Image in Design Space
Don't waste sticker paper by printing stickers you won't use. Learn how to select just the ones you want by using the slice tool.
Materials
Tools
Instructions
1. Upload the sticker PNG to Design Space
2. Create a rectangle that matches the size of sticker you want
to make
3. Resize the sticker image until they match
4. Add a new square and size it to fit behind the set of
stickers you want to use
5. Select both images and slice
6. Delete the extra layers
7. Create a rectangle to represent the print area (6.75 x 9.25
inches)
8. Duplicate the stickers and fill the sheet or add extra
stickers repeating the process
9. This way you only print what you want and don’t waste
sticker paper
Notes
I have found that full sheet labels or printable vinyl work much better than Cricut Sticker Paper
If you have any questions about how to change up an image with slicing, or making your own stickers, please let me know!
I made a set of grunge stickers too with this same color palette.
anya
Tuesday 15th of August 2023
there is no way to download this.