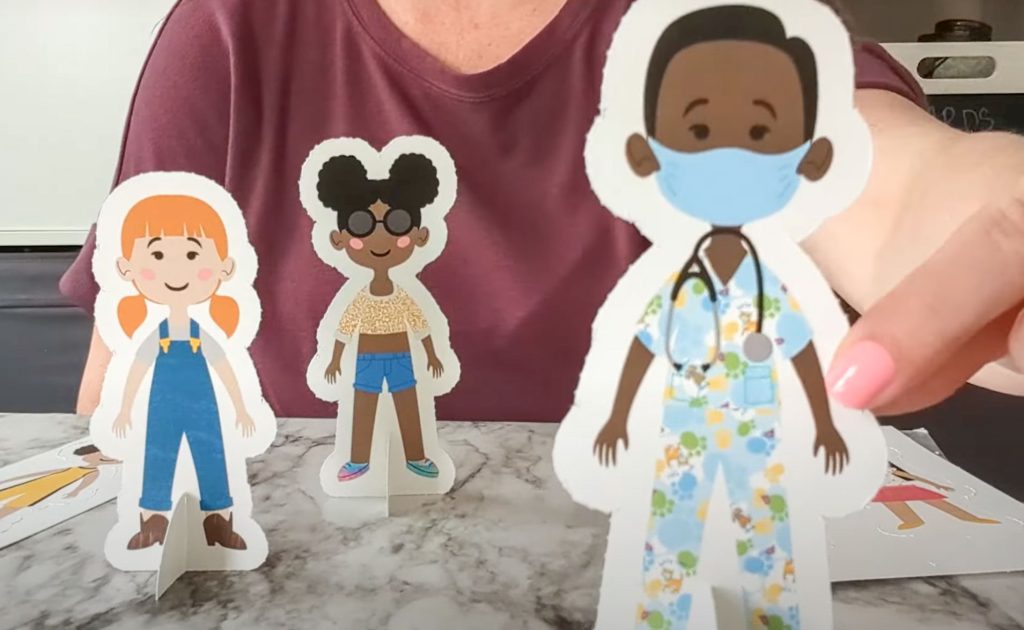
Cricut paper dolls make a really cute gift or kids activity. I’ll show you how to customize dolls that are already in Design Space, and how to use the Perforation Blade to create punchable sheets.

I have a YouTube video where you can watch the process as well. This way you can see me work through the project, but then here also have all the written instructions and measurements.
Supplies for Cricut Paper Dolls
- Cricut Maker or Maker 3
- Perforation Blade
- Cardstock
- Blue or green mat
- Printer
In Design Space, search images for Paper Doll. You can click the 3 dots on one of them and open up the whole image set – there are dolls in costume, in regular clothes, lots of hair and gender options – plus you can customize further before printing.
Check this YouTube video if you want to follow along while I Design and Make the paper dolls
Steps for Designing the paper doll in cricut
Change doll size to about 4.6 inches tall
If you want to swap clothes or accessories with any of the dolls, ungroup the doll, make the change, and then continue with the following steps after grouping again.
Change doll operation to Print then Cut.
Click on individual layers on the side panel to change hair or skin color, change clothing color, or even fill shapes with a pattern instead of a solid color.

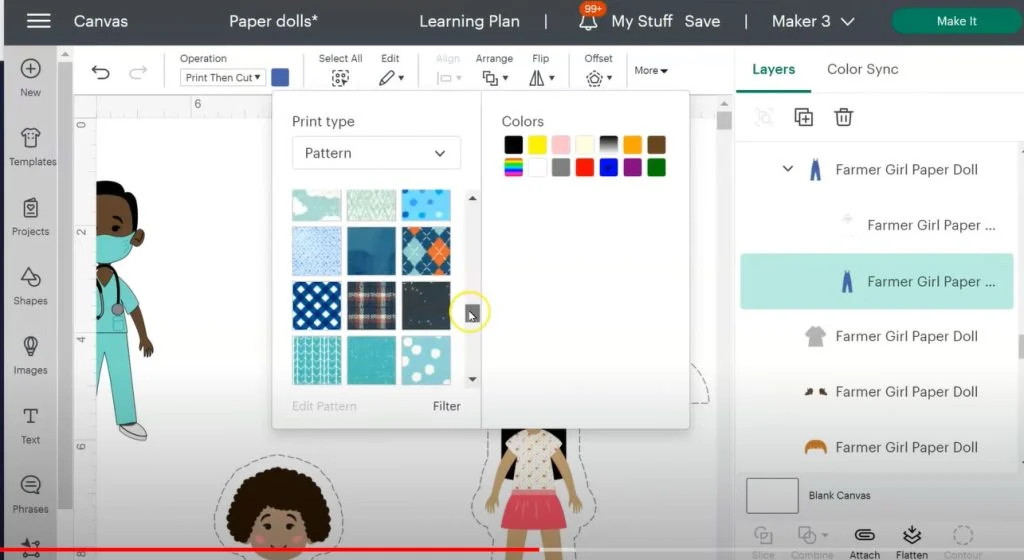
I changed the doctor to a vet by picking a dog and cat pattern for his scrubs.
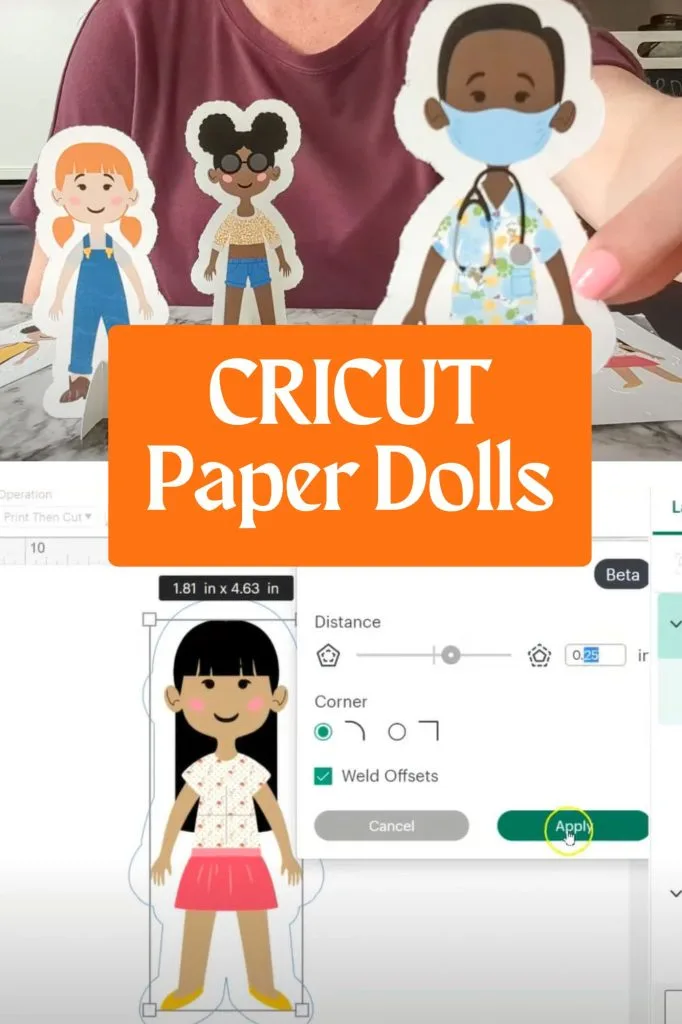
When the doll is colored how you like, select and click Flatten. The doll is now one flattened layer.

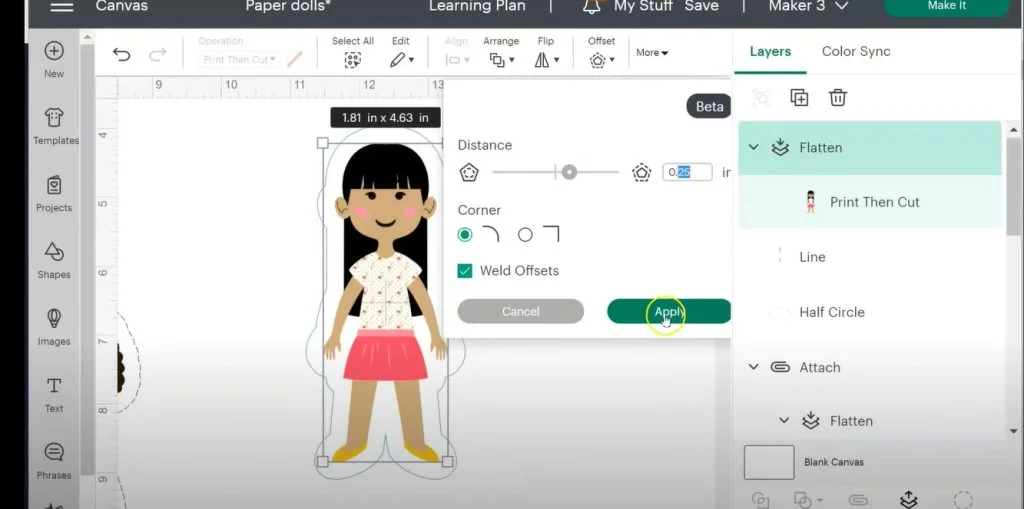
Add an offset of 0.25 inches. We need to flatten the bottom of the layer between the feet, so add a half circle shape and adjust it to fill in the gaps. Align to the bottom of the offset, select the half circle and the offset and click Combine > Weld.
Now click on the offset and change the color to white. Then change the operation type to Perforate.
Center the perforation shape around the doll, select both, and click Attach.
Repeat with as many dolls as you want to make.
Make Paper doll stands in cricut
From the shapes panel, bring in a single line, and a half circle. Resize the half circle to be 1 inch tall and 2 inches wide, and the line to be 0.5 inches tall.
Change the operation of the shape and the line to perforate. Duplicate the line a few times.
Align 1 line and one semicircle to the top and the center, then attach. Duplicate for each doll.
To add a slit to the bottom of each doll so the stand can slide on, align a perforated line to the center and bottom of each doll, then attach to the doll.
Printing the paper dolls
I fit 3 dolls and stands in the Cricut print then cut area (6.75 x 9.25). Spread them out so have some distance between them.
Click make and send to printer – turn OFF bleed and turn ON use system dialog. Then you can choose BEST quality. Print on plain white cardstock.
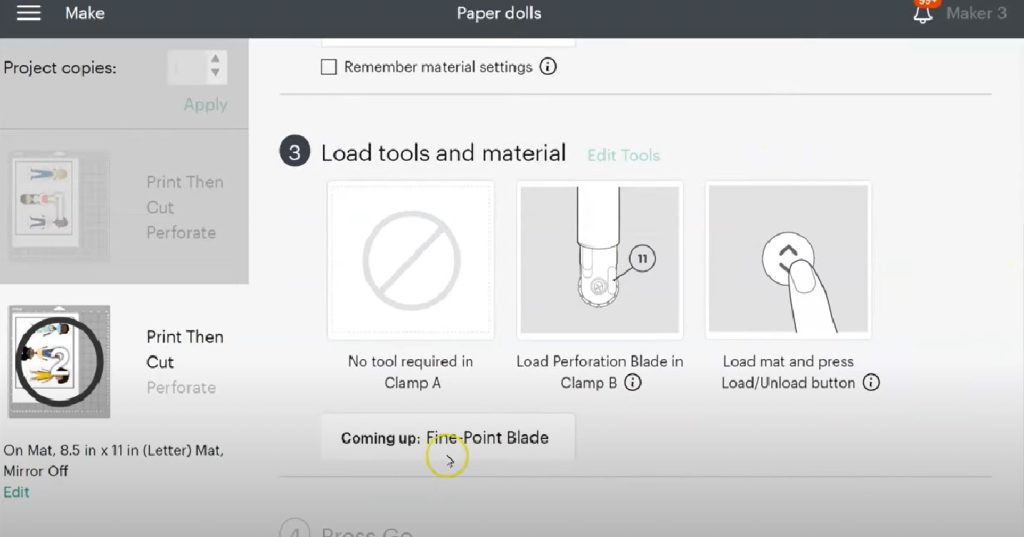
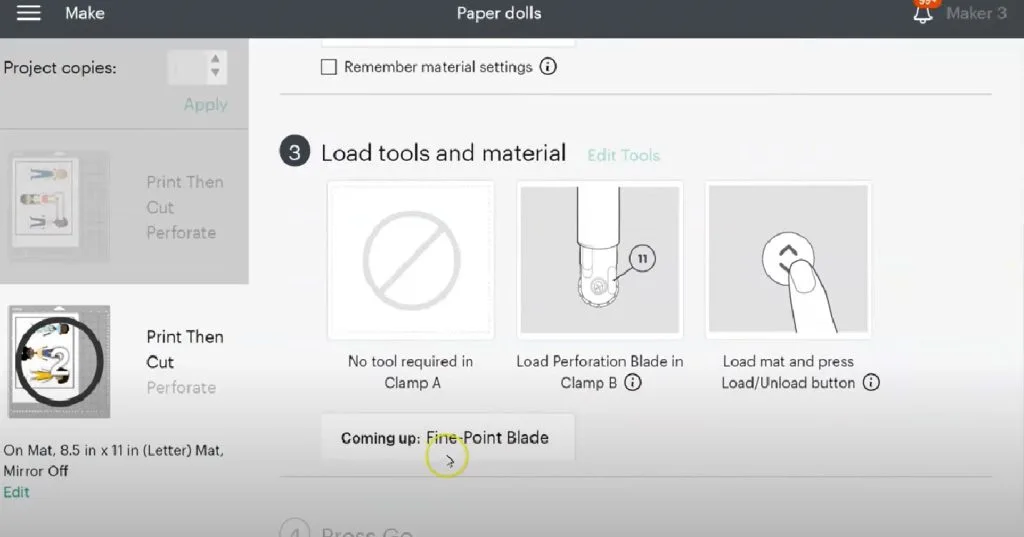
After printing, press onto a blue mat and load into the machine. Install the Perforation Wheel.

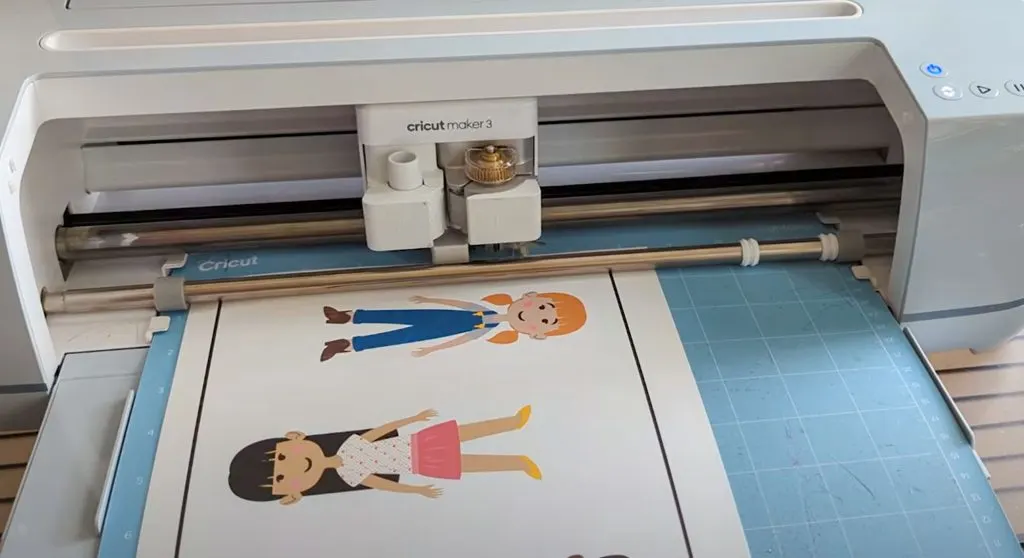
Cutting Cricut Paper Dolls
Cricut will cut the perforated outline around each doll, the stand piece, and the slits in each.
Design Space will then tell you to put the fine point blade back in so it can cut directly around each printed doll. We don’t want this off course, so unload the mat instead and cancel the cut in Designs Space.
Repeat with each sheet of paper dolls.
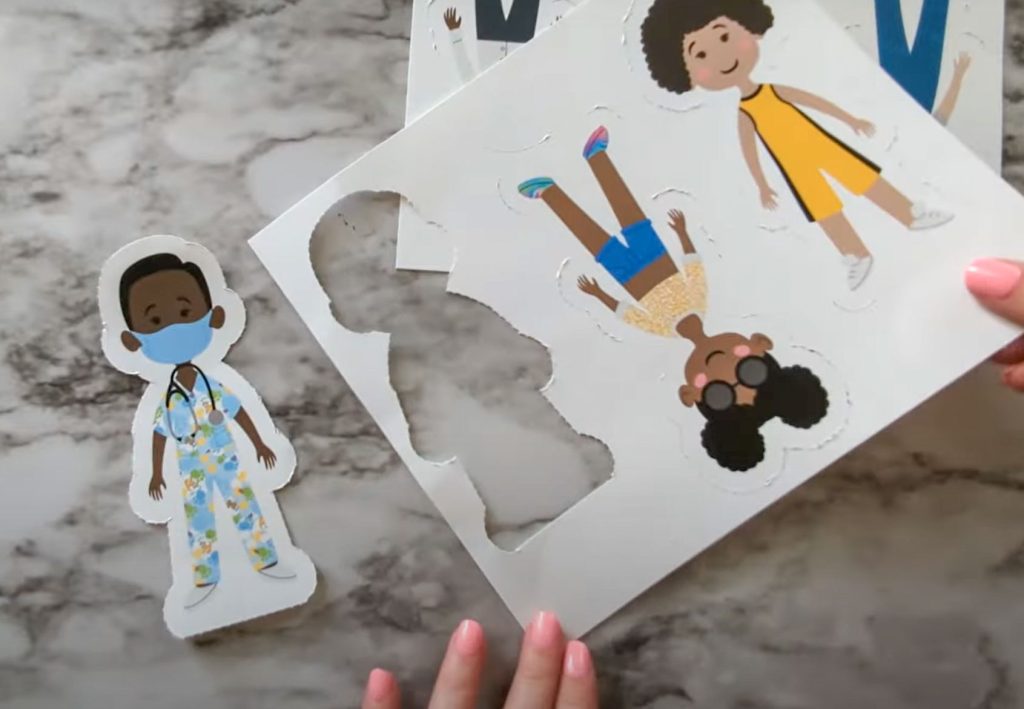

Then use a paper trimmer to cut off the black rectangle and the dolls are ready to punch out, or give as a gift.

lynn
Wednesday 4th of June 2025
adorable paper dolls--brings back memories of McCall's magazine with the dolls in the middle.
Mona
Wednesday 4th of June 2025
What a cute idea! I was wondering, since I don't have the perforation blade, can you just print then cut instead?