Since there are so many pieces in this design, I knew I wanted to use several colors and different types of iron-on.

Later this week I’m heading out to Salt Lake City for Snap Conference. Thursday night is a PJ crafting party, so of course, I had to a bit of pre-party-PJ-crafting. (some links affiliate)
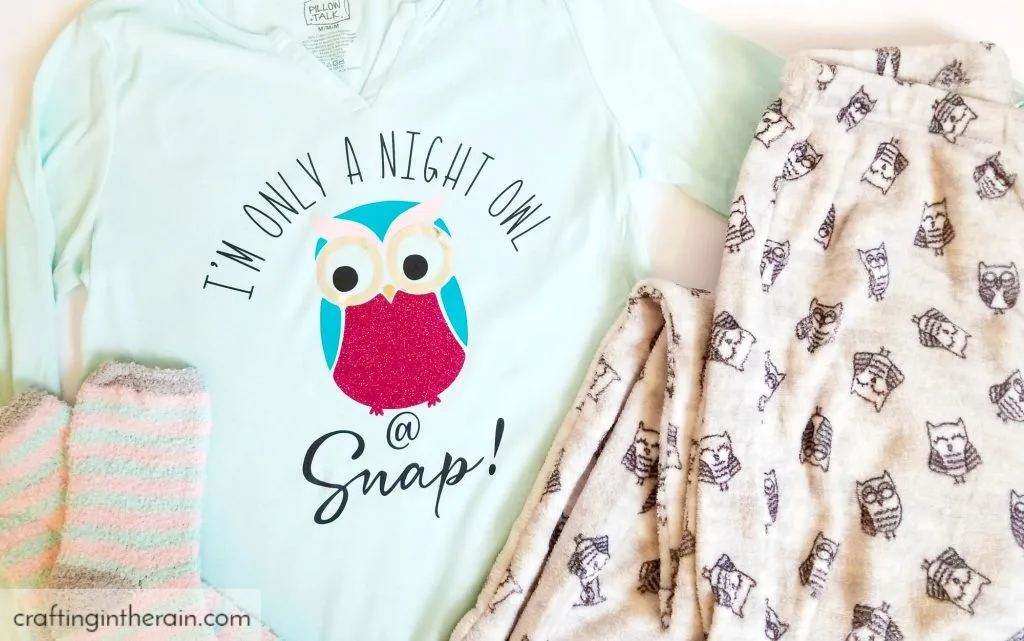
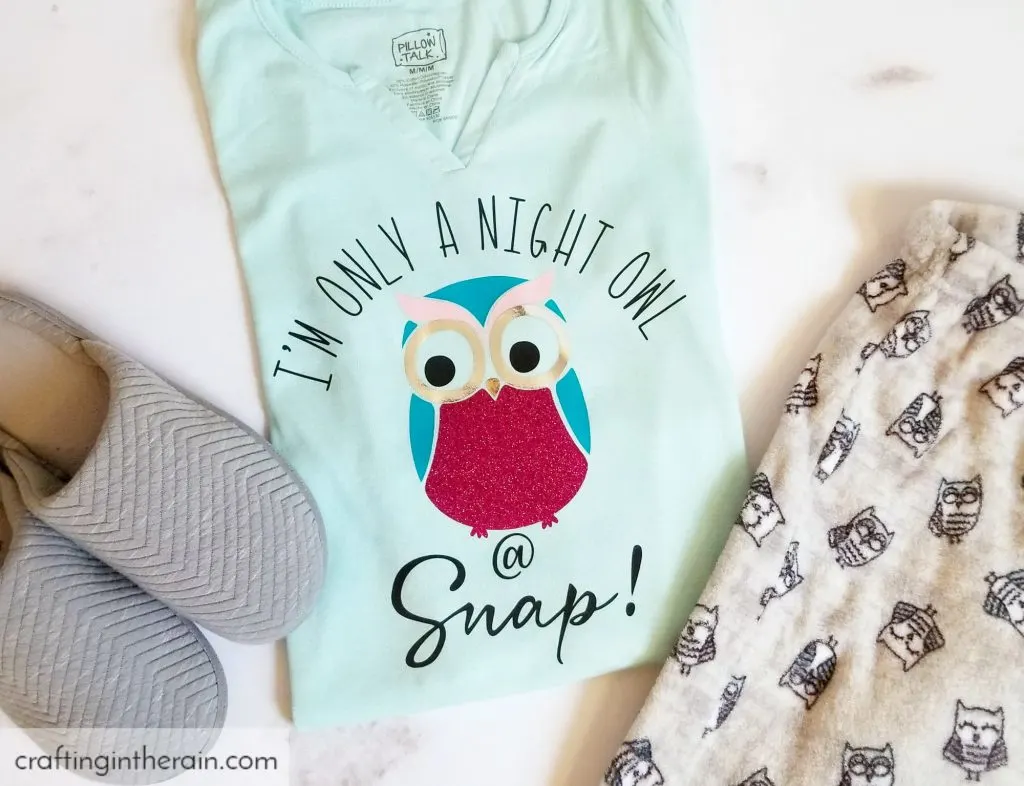
I bought this owl pajama set from Amazon since it had owl pajama bottoms and a blank shirt.
When the shirt arrived, I created this Design Space project. It says “I’m only a Night Owl @ Snap!” Which is pretty much true. I like, and need, my sleep. The font I used is called Kyden, and you can learn here about curving text in Design Space.
Types of iron-on vinyl used:
Glitter (pink)
EasyWeed (black, teal and blush)
Foil (silver and rose gold)
Send all the pieces to cut through Design Space, making sure to mirror each mat because it’s iron-on.
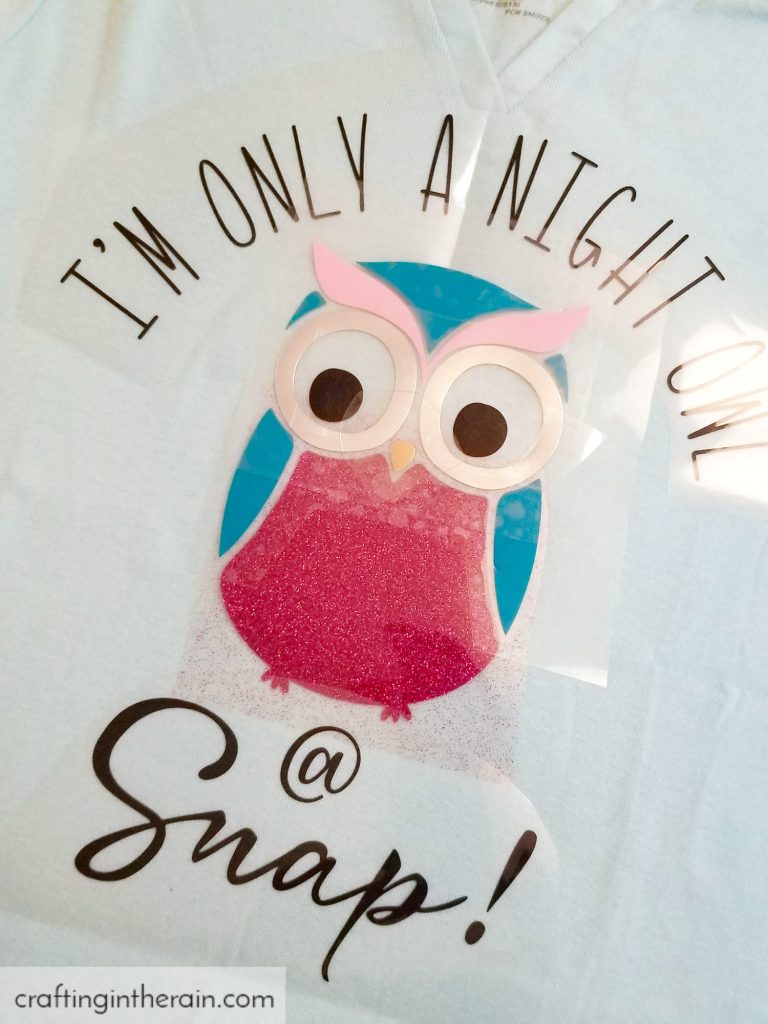
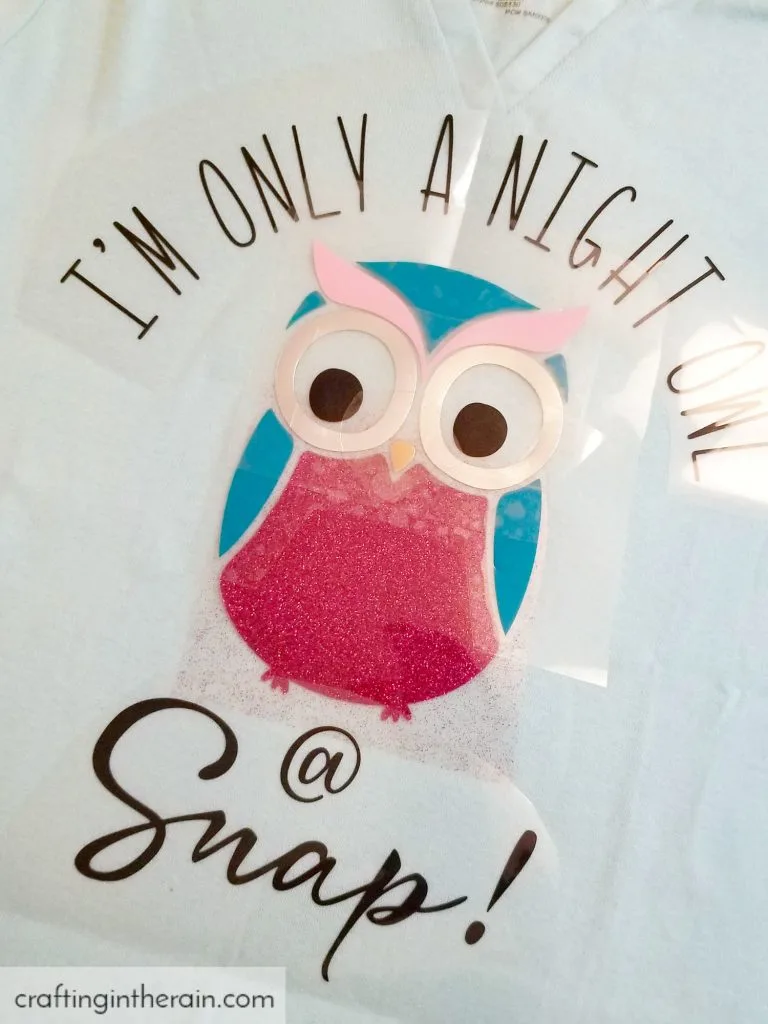
When all the pieces are weeded, it’s time to plan out the assembly.
The pieces need to be added to the shirt in the order from highest heat to lowest heat to avoid damaging the more heat-sensitive vinyls.
READ THIS POST for a review of how to work with iron-on vinylIn this case, we will start with Glitter, then move to Everyday and finish with the Foil. So without ironing anything yet, I layered all the pieces starting with the Glitter on the bottom to make sure that everything gets the right spacing around all the parts. Then I could lay the entire design to get the position right on the shirt.
**Do not attempt to iron the design like this. All the vinyl will just stick to the carrier sheet that’s layered under it.
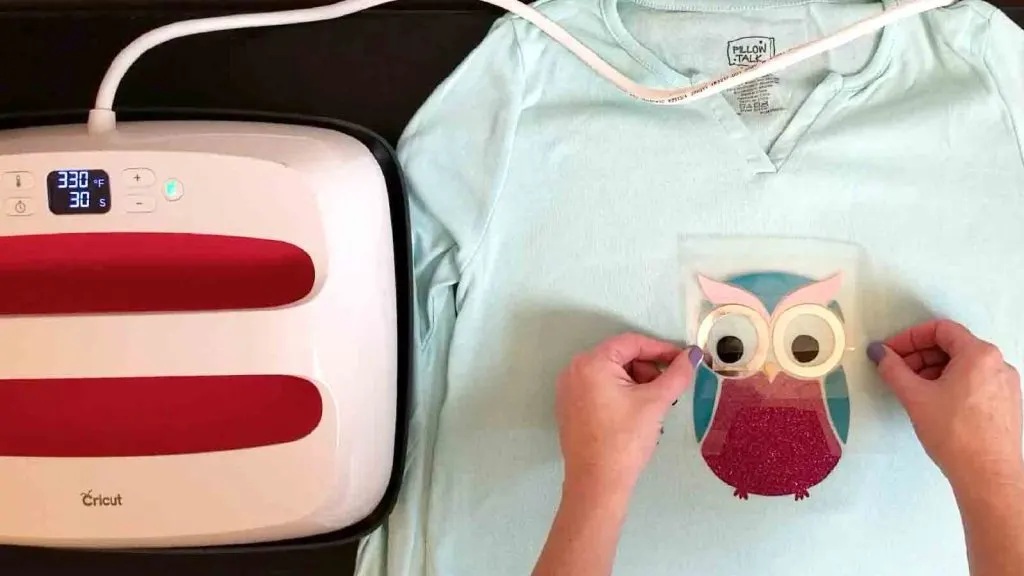
Then I peeled away everything off of the single Glitter iron-on piece and used the EasyPress at 330 for 30 seconds. Next, I could position the teal iron-on and press at 315 for 30 seconds. Wait until the plastic has cooled before removing.
READ THIS POST about EasyPress 2 features

Then I repeated the process for all the other Everyday iron-on pieces – the blush, the letters, etc. Cover everything with a protective sheet so the EasyPress can’t damage any exposed vinyl.
The last two pieces are the Foil iron-on. They only need a temperature of 295 on the EasyPress. To finish everything off, I pressed from the back of the shirt for 10 seconds at 295 to make sure everything adheres well.

Check your iron-on settings here.
Now my PJ party attire is complete and I hope you learned some tricks about using multiple types of iron-on vinyl in the same project.
ALL I WANT FOR CHRISTMAS IS EWE - FREE SVG FILE Christmas Mad in Crafts
Monday 10th of May 2021
[…] Combining Different Types of Iron-On Vinyl […]