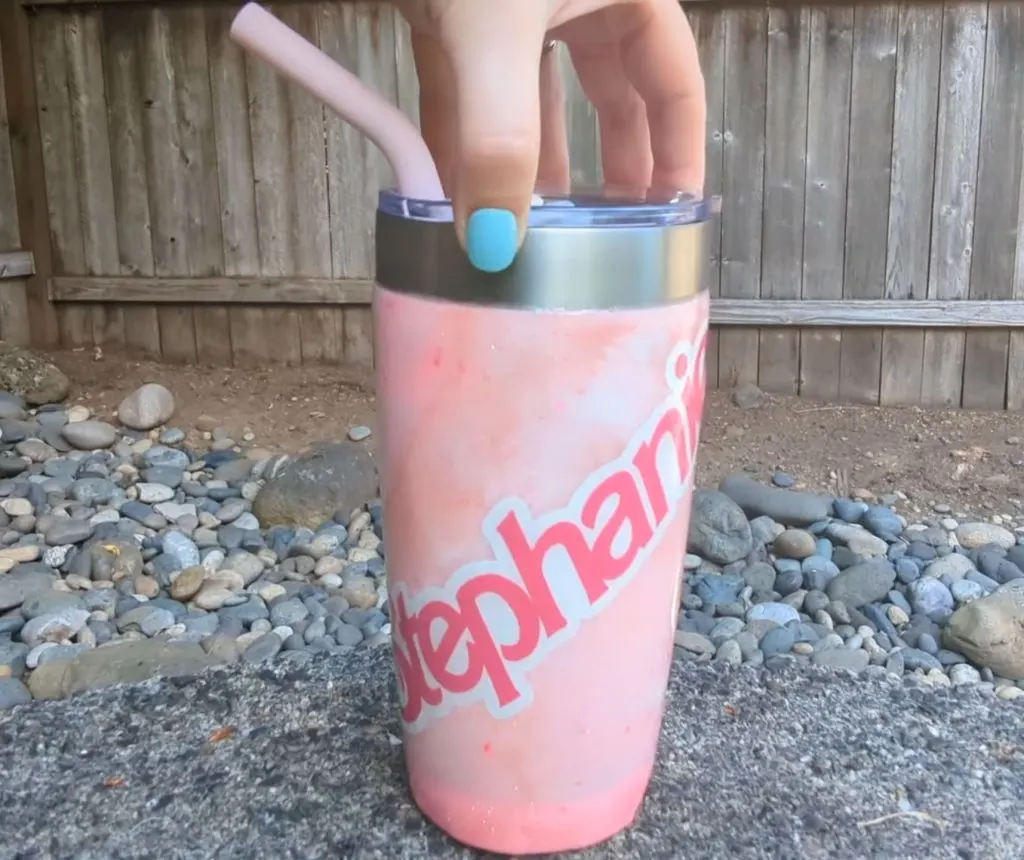
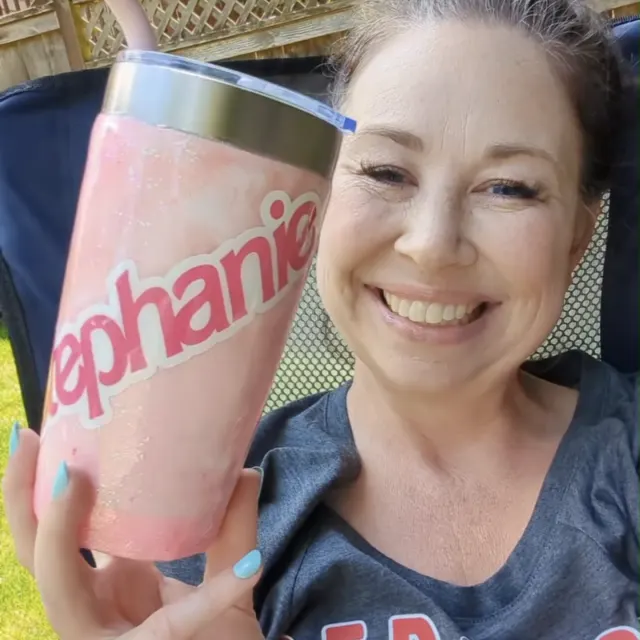
Would you believe that in all the time I’ve worked with resin, and been a crafter in general, I had never made an epoxy cup before? I decided now would be the perfect time to try it out and make a Barbie resin tumbler.

Watch Video tutorial here … Resiners provided the tumbler dryer. All thoughts and opinions are my own.
Supplies for making a Barbie resin tumbler
- Alumilite Clear Cast Plus epoxy
- Stir sticks and mixin cups
- Pink glitters and mica powders
- White opaque resin dye
- Spray paint
- Tumbler
- Painters tape
- Cup spinner
- Resiners Tumbler dryer
- Silicone mat
- Alcohol
- Cricut and vinyl to customize
- Sand paper / orbital sander
- Amazing sealer and paint brush
Prep tumbler for resin
Clean the outside of the cup with alcohol and a paper towel. Tape off the top rim with painters tape.

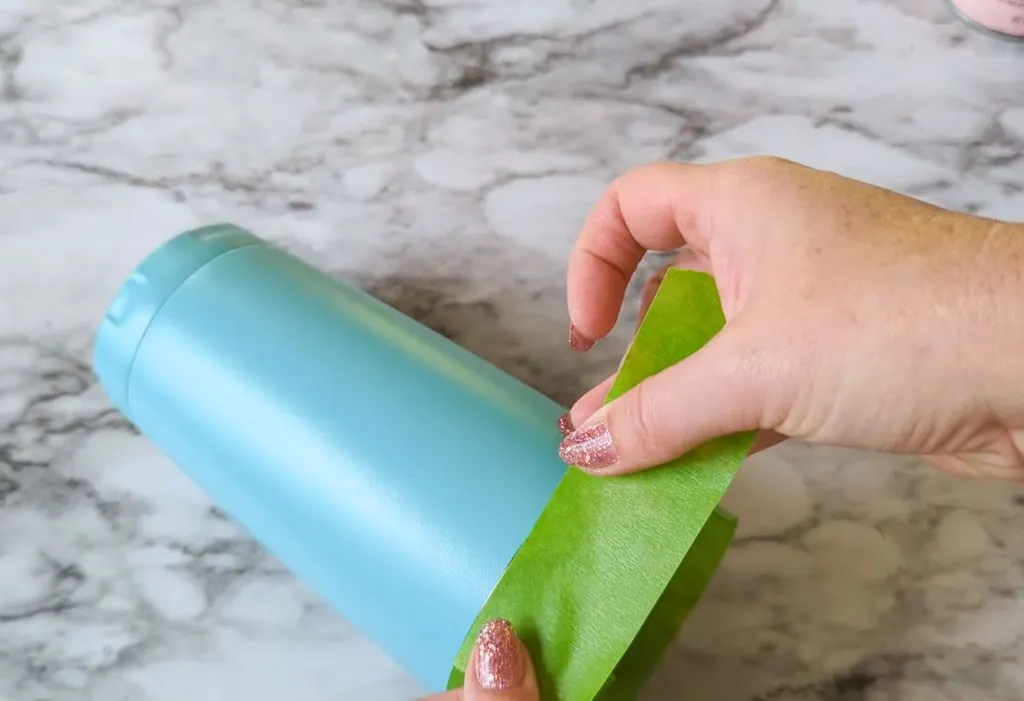
Spray paint at least 2 light coats, with just a few minutes between coats. Remove painters tape and let dry completely.
Add glitter to tumbler
There are a few different methods that people have used to sticker glitter to their cups. The consensus seems to be that Mod Podge dries too fast to get an even coating of glitter.
If you have a strong spray adhesive you can use that, but make sure to spray it outside.
Since I was already set up to do resin anyway, that’s the method I chose.
Mix Resin
This resin is 1:1, so I mixed up 15 mL of A and 15 mL of B – but just 10 of each would have been fine. You want to coat the tumbler evenly, but not have so much that it’s running too much as the cup spins.


With a coating of resin on the cup, I sprinkled on some directional lines with the glitter. I used bright pink, pink flakes, and a shimmer white.

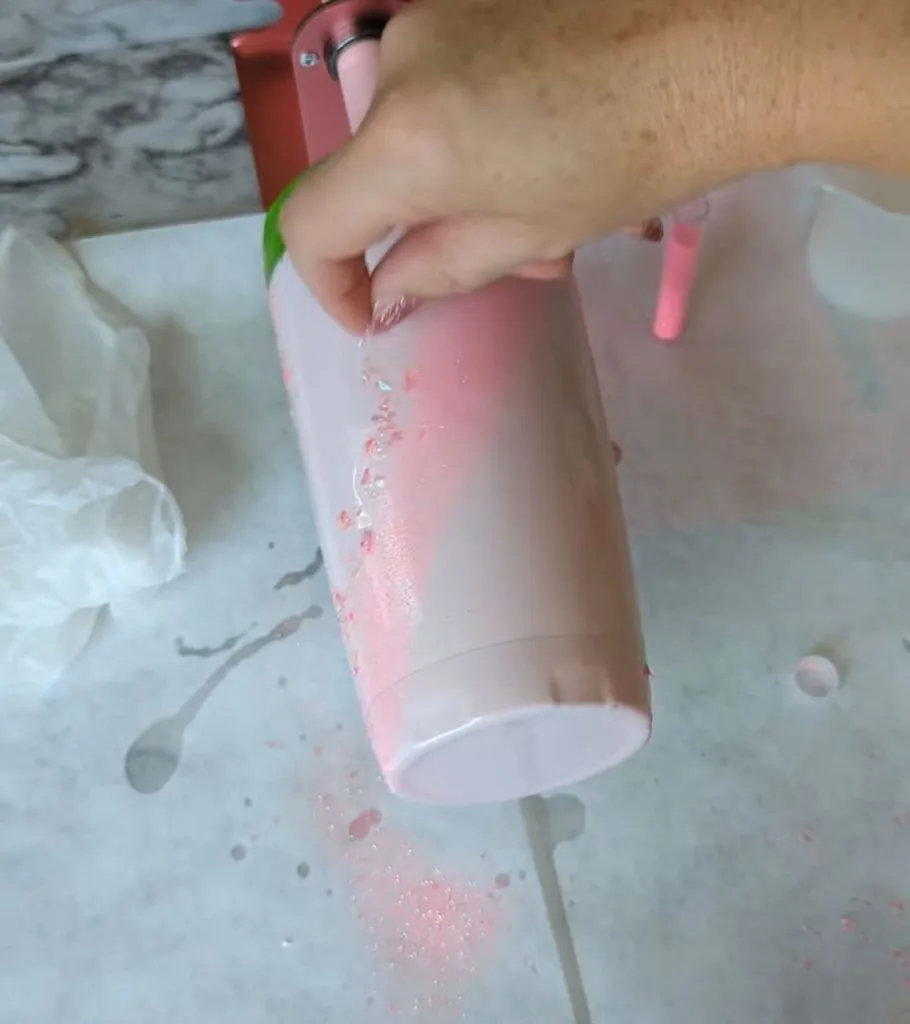
This is where I should have stopped for this step – I added some colored resin and it caused everything to kind of drip and spread.
TIP: Use just enough resin to get the glitter to stick, then let this layer cure
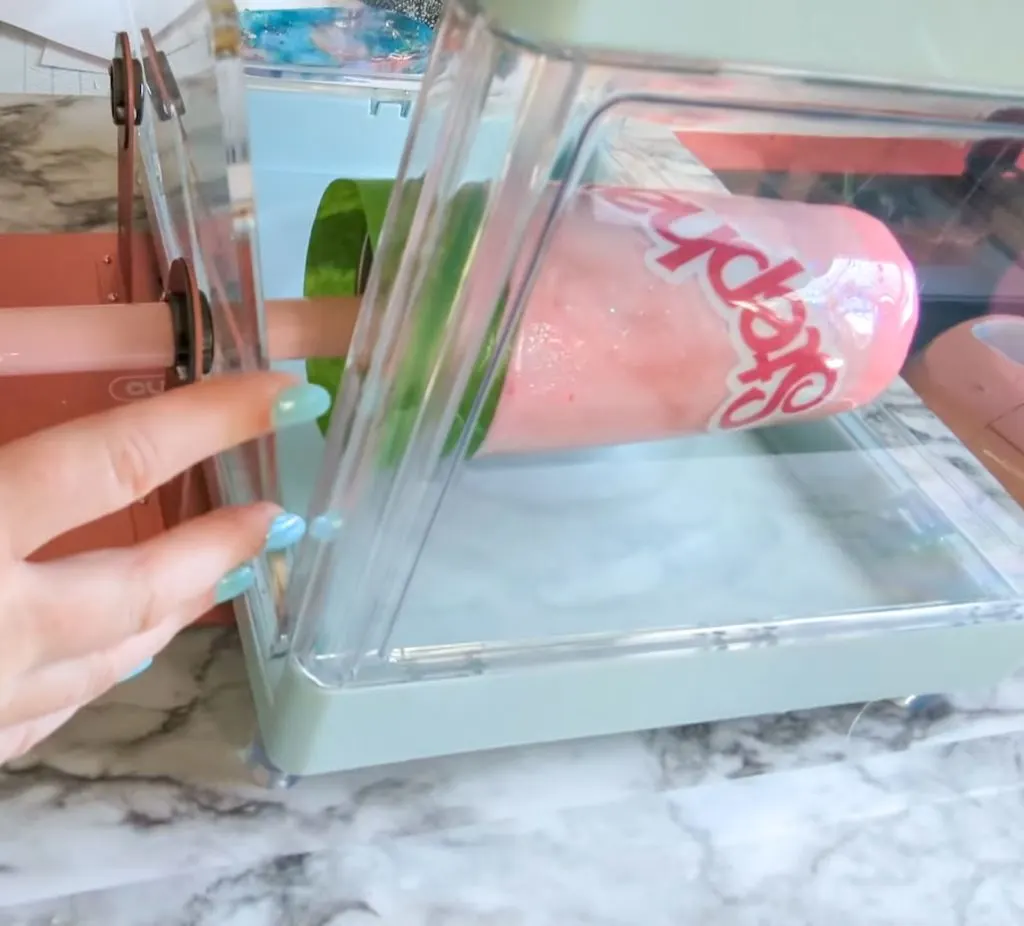
Assemble the Tumbler Dryer
I got to try out this tumbler dryer from Resiners, and since it speeds up the curing process, it only took me 2 days to make this cup, when I thought it might take a week!
Fold up each wall from the base and snap the corners together.
Remove the protective paper from the clear acrlic.
The “lid” of the dryer fits over the walls, and contains the heating element and fans, the power cord, and the power button.
Slide the spinning tumbler into the dryer, then slide the cover on, lining up the cutouts with the post of the resin turner.
Magnets in the top two corners hold it into place.

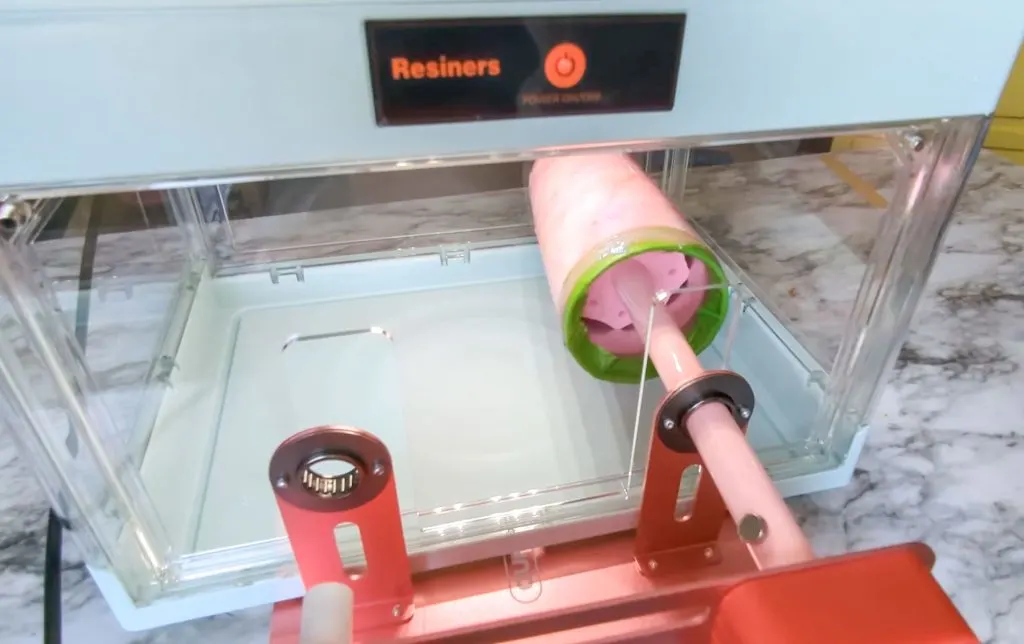
TIP 2: Set the little rubber feet under the dryer so the base of the resin spinner can slip right under the dryer.
TIP 3: The heat brings out the resin smell a little more, so make sure the room is well-ventilated, or use it in the garage.
BONUS: The enclosed dryer keeps dust and pet hair away from the cups, and it could be used in the garage in cooler weather too to speed up curing.
Remove tape from tumbler
Somewhere after 30-60 minutes it will probably be time to remove the painters tape. Check the resin that has traveled onto the tape to see if it is still really runny, or if it’s getting a little tacky.
Still runny? Check in 15 more minutes. Getting tacky? Remove the tape. If you wait too long, run a craft knife along the seam before removing.
Any resin on the stainless steel can be rubbed off with alcohol and a paper towel.
Go carefully with these steps – the cup has to keep spinning so you don’t get drips.
TIP 4: Take the tumbler spinner out of the dryer for easier access to the cup.
Cut vinyl decal for cup
At any time when the resin is curing, it’s a good time to cut and prep the vinyl. I used this Barbie name generator to create my name, but it only saved as a PNG, so I had to do a lot of fixing in Illustrator before it was ready to cut.
Here is a good Barbie font that you could use instead.
Create an offset / outline layer if you want the name to really stand out against the resin cup.

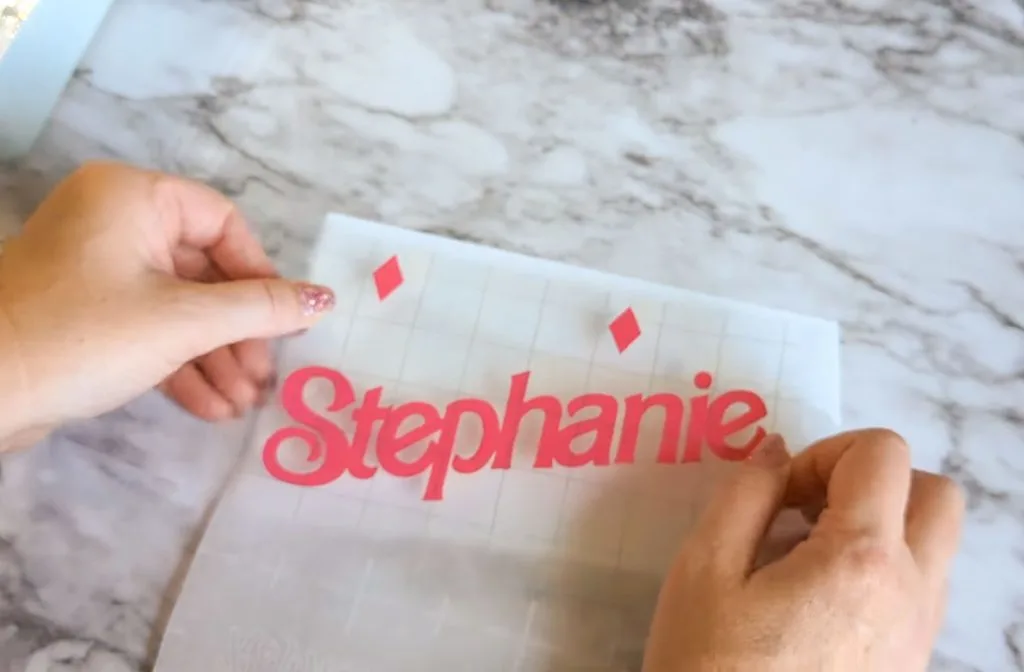
TIP 5: Remove any inside cuts from the offset layer so you just have a solid background of the name.
Sand and resin next layer
After the glitter layer of resin has cured, which will take a few hours, take it to the garage for sanding. This has two functions.
First, it roughs up the surface of the resin so that the next layer will have no trouble bonding. Second, we have to smooth down a bit of dripping and the glitter flakes.
I had to use my orbital palm sander to really get it smoothed down. * Make sure to wear a mask while sanding the resin *
Wipe away all the dust with alcohol on a paper towel, and tape off the rim again.
TIP 6: Sand away too much on the bottom? Tape off a ring a give it a full glitter base! I used Amazing Sealer (since it’s the Alumilite brand I knew it wouldn’t react funny with their resin at all.) Run it in the dryer to make sure it’s dry before the next step.
Mix 10 mL and parts A and B. I poured a little out so I could mix in pink mica powder and white opaque dye.

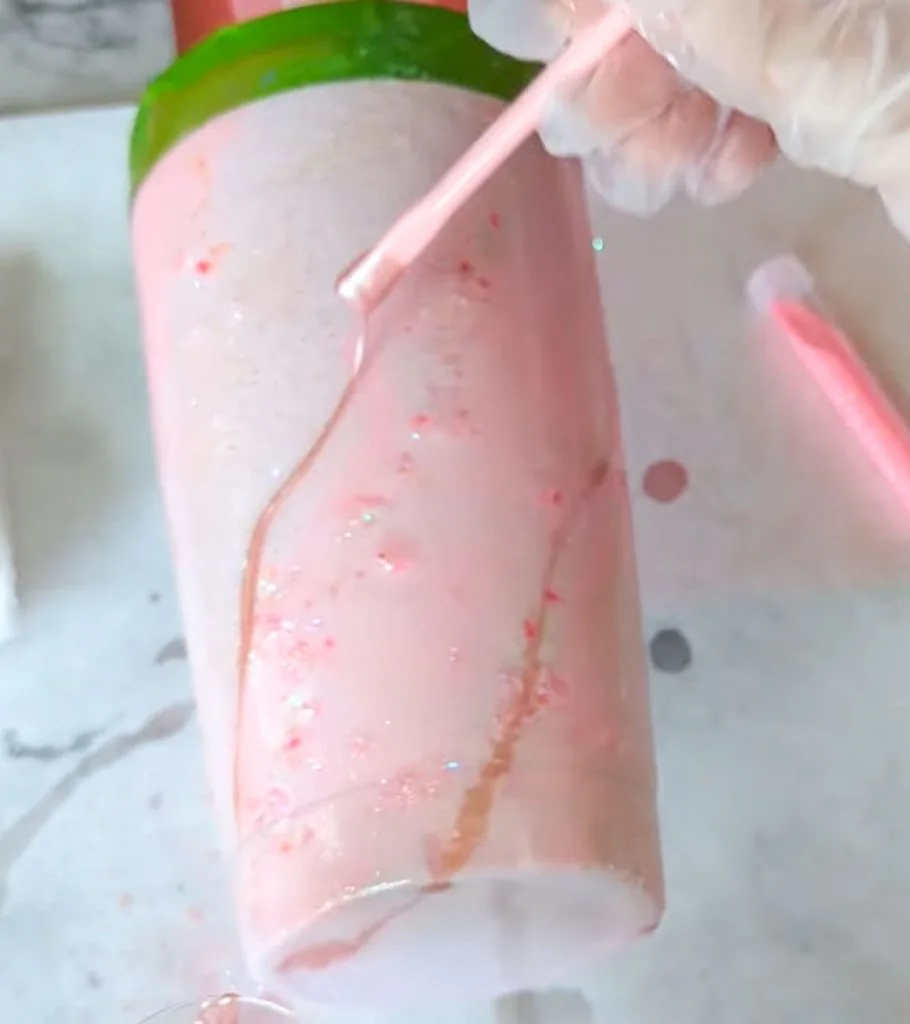
Spread a thin layer over the cup and smooth it while turning. Then add some lines of the colored resin.
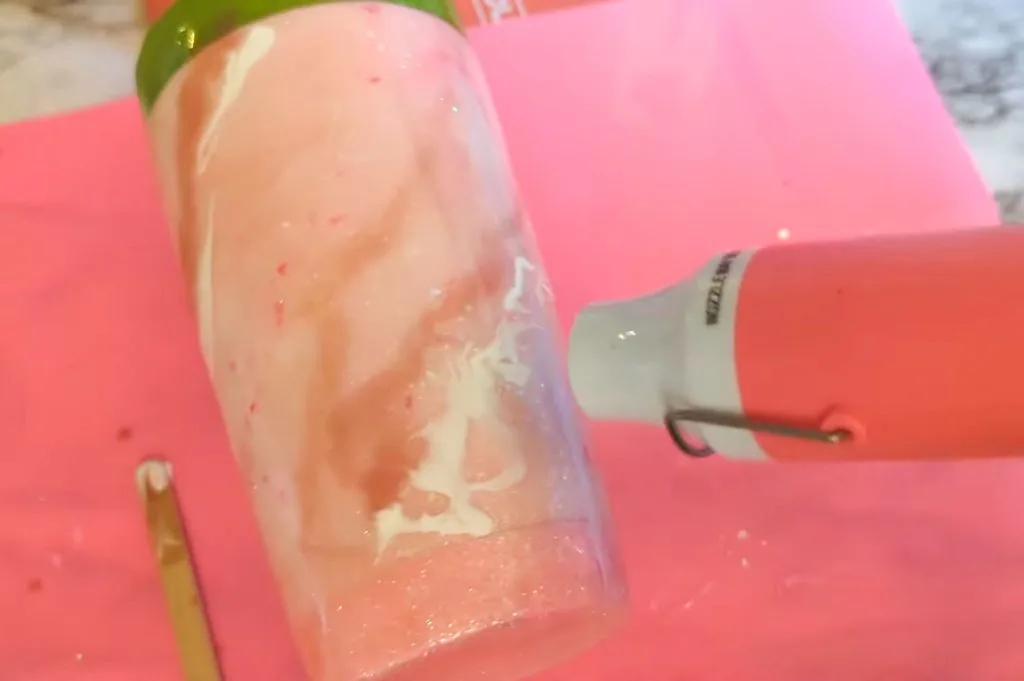
I used my heat gun to spread the color a bit and give a marbled look. It also makes the white opaque dye get a bit of lacing in it.

Then set it back in the dryer – same as before, check for when it’s time to take off the tape.
Add vinyl and seal
When that layer is cured dry, sand again.
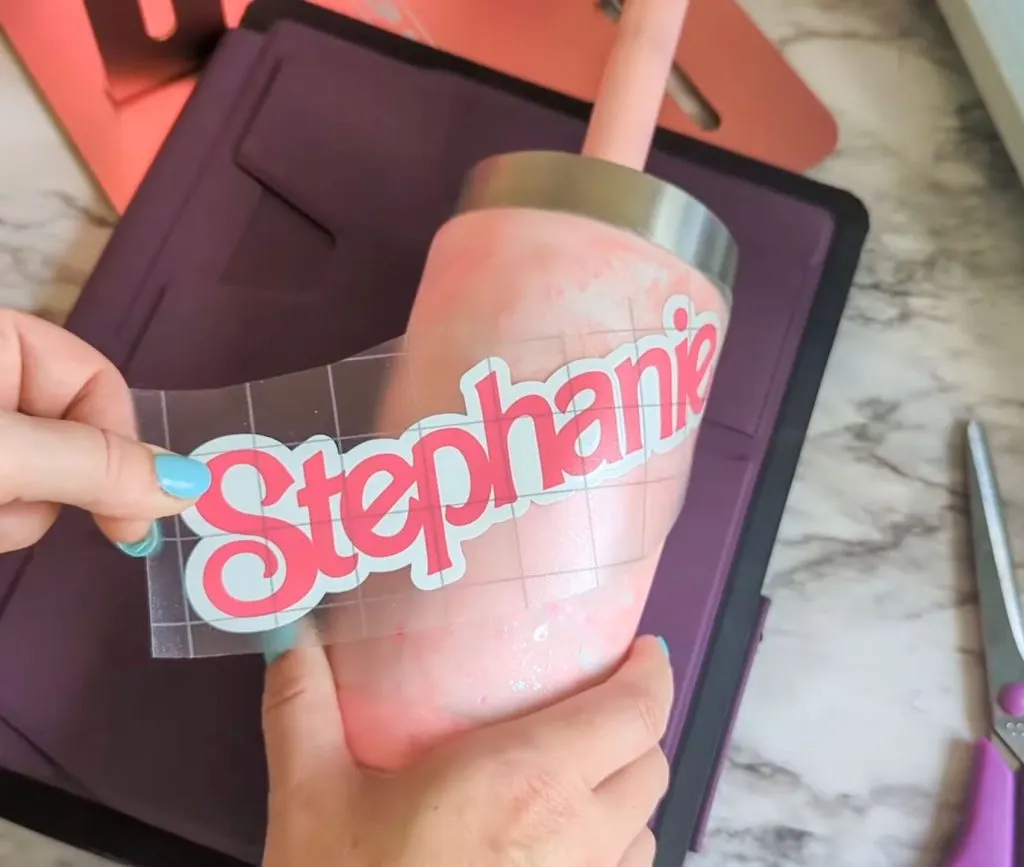
Apply the vinyl and smooth out any bubbles. The heat gun can help here too.

This time, tape off the stainless steel rim, but leave the smallest line of space – this ensures that the final resin coat will really seal in all the other layers.
Mix up 20 mL total of resin, apply and smooth as before. Use the heat gun to remove bubbles. A fine mist of alcohol works too.

Remove the tape before the resin hardens, and let the cup cure for several hours.
Phew, first resin cup completed!

Have you made one before? I can see why they’re so addictive to make. What should I make next after my Barbie Resin Tumbler?