Remember when I showed you all the princess necklaces I painted? I also did some more detailed one that I posted on Undercover Tourist. If you didn’t see them there, here’s your chance now.

‘m sure you’ve all seen different styles of necklaces that have pictures of princesses on them. They’re cute, but what if you are looking for something a little more subtle and grown up even?
Each of these beads was designed to represent a specific princess. Can you identify who I had in mind? Check your matching skills, then I’ll show you how to make your own.
Pocahontas…Belle…Tiana…..Cinderella….Rapunzel
Here’s what you’ll need–
3/4 inch wood beads, found at the craft store
2 small paint brushes…one pointed, one flat
craft paint in assorted colors
5/8 inch wide ribbon
wood skewers, for holding beads while painting
For Tiana:
Using flat brush paint bead light green. When dry, paint pointed pattern in dark green using the pointed brush.
For Cinderella:
Paint bead white with flat brush. Then add 4 bumps in light blue, filling in that side of the bead as well.
For Belle:
Paint bead white. Paint scalloped lines with yellow using pointed brush.
For Pocahontas:
Paint bead tan. When completely dry, wrap a piece of painters tape to make a line at the halfway point of the bead. Paint the exposed part of the bead dark brown. Remove tape, let dry, and using a brush handle, dot turquoise “beads” around the center line.
For Rapunzel:
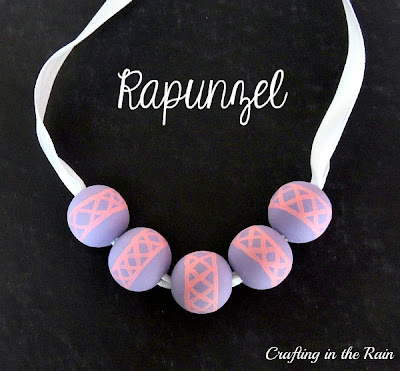
Paint bead purple. Then paint two thin lines of light pink and draw criss-cross lines between them.
What’s great is that now you know how to paint each bead, you’ve got options! You can paint several matching ones and make one whole necklace that represents one princess. Or, mix and match, creating a necklace with several favorite ones!
To create the actual necklace, measure your desired necklace size (shorter if you want to re-tie it every time or longer if you want to to slip over your or your child’s head) Wrap some tape around the end of the ribbon to make a point and thread the beads on. Then remove the tape and melt the ribbon ends carefully with a match so they don’t unravel.
And check out my popular round up with more than 50 other Disney ideas
So let’s hear it–who is your favorite princess?
Do you have a trip to Disneyland coming up and you’d like a way to get discounted Disneyland tickets? Or check out their many other vacation packages!
Visit Get Away Today and use the promocode: CITR to get $10 off any 2-night or longer Southern California package (hotel and 2 ticket minimum).


