• About
  • Contact
  • Shop
    • Facebook
    • Instagram
    • Pinterest
    • YouTube
  • Crafts
    • Disney
    • Kids
    • Sewing
  • Holidays
    • New Year
    • Valentine’s
    • St Patrick’s
    • Easter
    • Mother’s and Father’s Day
    • July 4th
    • Halloween
    • Thanksgiving
    • Christmas
  • Cricut
  • DIY
    • Cleaning
    • Organization
    • Projects
    • Scroll Saw
  • Downloads
    • Printables
    • SVGs
  • Recipes
  • Life
    • Family
    • Fashion & Beauty

Crafting in the Rain

More Ideas for Cone Trees

Uncategorized

This post may contain affiliate links. As an Amazon affiliate, I earn from qualifying purchases. I receive a small commission at no cost to you when you make a purchase using my link.

24 Nov 2012
  • Share
  • Tweet

**ok, so it’s not a crazy giveaway like you may see on some blogs this weekend, but for a tiny birthday treat, I’m giving away a pair of custom earrings–go check it out!**


If you liked my round up of Christmas trees the other day, you might like these too that I recently posted in the Holli Days series at Hiya Luv.

First up is the easiest of the bunch.  All you need is a cone, a doily and a glue stick!  Just make sure that the seam of the cone is in the back.


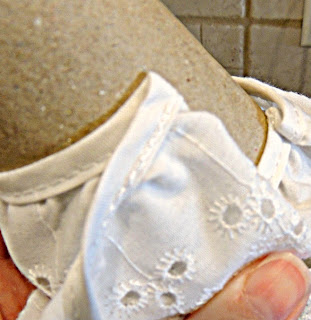
Next up I used a piece of eyelet trim to make pleated rows on the tree.  Start at the bottom of the cone, gluing with hot glue and periodically creating a pleat by gluing the trim back on itself just a bit.  


Cut the trim when you get back to the starting point, then start gluing the next row up the tree.  When you get to the top layer, pinch it up as much as you can (being careful of the hot glue please!)  This would probably look really cute with some kind of topper, but I couldn’t think of what I had on hand that would look good.  What would you suggest?

Next is a ruffle tree that’s much easier than it may look.  It’s that ruffle fabric just pinned around a cone!  

In fact, the one here is a ruffle scarf I own.  I used a few straight pins to secure the end of the scarf at an angle, wrapped the fabric around, put in a few more pins and tucked the rest of the scarf up into the tree!  Just be careful if you do that since, remember, there are pins sticking into it now.


What’s great about each of these is that they’re so neutral they would fit in with any color scheme you have for Christmas.  But they could also be done with more color too.  
What have you done with these cones?

Related Posts:

  • Christmas Trees and Tinsel Please
  • Pine Cone Shark
  • Pine Cone Crafts

Leave a Comment

« Cars Birthday Party
Disney Ornament »

Leave a Reply Cancel reply

Your email address will not be published. Required fields are marked *

This site uses Akismet to reduce spam. Learn how your comment data is processed.

Hi, I'm Stephanie - Welcome to Crafting in the Rain where I've been blogging about the crafty life since 2011. Read More…

Archives

  • Home
  • About
  • Contact
  • Disclosure
  • Index
  • Privacy Policy

Stephanie Paxman is a participant in the Amazon Services LLC Associates Program, an affiliate advertising program designed to provide a means for sites to earn advertising fees by advertising and linking to amazon.com.

Copyright © 2011-2023 Crafting in the Rain