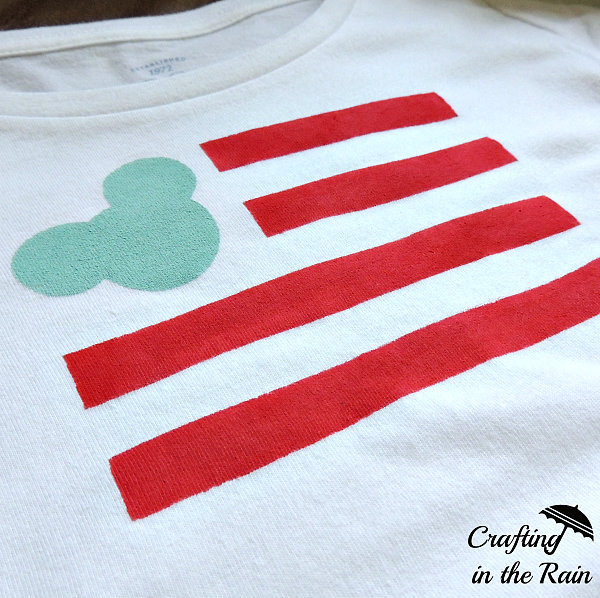
Learn how to make shirt with a Lace Mickey on it

My friend Rachel at R&R Workshop is running a whole month of Disney posts and I can’t wait to see what everyone comes up with! We love Disney stuff at our house, and I’ve done several Disney crafts on my blog and I loved a reason to come up with another one.
Here’s what you’ll need:
Lacy fabric (this is a table cloth I found from Goodwill!!)
Shirt
Thread to match the lace (so probably white or cream)
Freezer paper (found in grocery stores near the wax paper)
606 Spray on Fusible Webbing
Start by drawing a Mickey head shape onto a piece of freezer paper. You can print one to trace or just freehand it.

Place the freezer paper shiny side down onto the lacy fabric. Use an iron on medium heat and iron down the freezer paper. The heat will make the paper stick to the fabric.
Cut the outline, and don’t peel the paper off yet. Place the cutout lace-side-up onto a brown paper bag, the lawn or something else to protect your surface.
Follow directions for the iron on transfer spray: Spray the lace and be sure to spray the edges of the cut out well. Let dry for 15 minutes and peel off of the freezer paper.
Lay the cutout onto your shirt, sprayed-lace side down. (I tilted the shape a little so that Mickey’s ears weren’t in an “awkward” location on my chest.) Cover with a paper towel. Using the iron on high heat, press down on the shape to adhere it to the fabric. Keep the iron moving, spending about 45 seconds on each section.
Use sewing machine to zigzag stitch around the Mickey shape. Then thread a needle to tack down the lace.

These would be great for any Disney trip this summer! How many of these do you need to make now? 🙂

**This shirt should be hand washed. Kinda annoying, I know, but worth it for a cute shirt, right? I know the spray says you can wash and dry it, but my first attempt (without stitching it also) came off in the laundry! I think that because there are so many holes in the lace.
Here are some of my other Disney crafts I mentioned before:

Be sure to visit R&R Workshop to see all of the blogs posting for #MonthofDisney.
Do you have a trip to Disneyland coming up and you’d like a way to get discounted Disneyland tickets? Or check out their many other vacation packages!