This post is brought to you by Cricut. Some links may be affiliate.
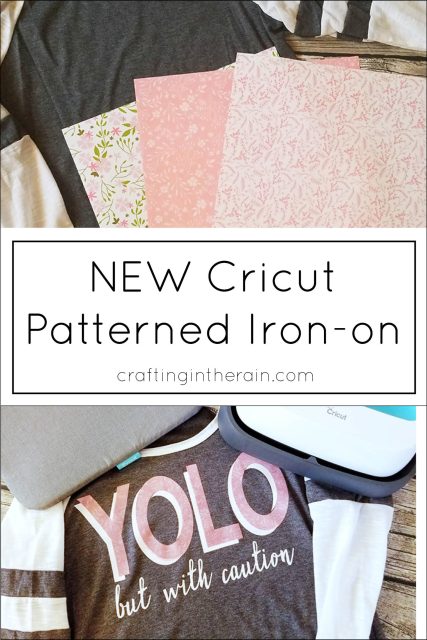
Am I the only one who gets super excited when Cricut releases new materials to cut? Of course I’m not – I’ll bet you guys also have a ton of great ideas on how to use Cricut Patterned Iron-on and SportFlex Iron-on. Let me show you what I made.
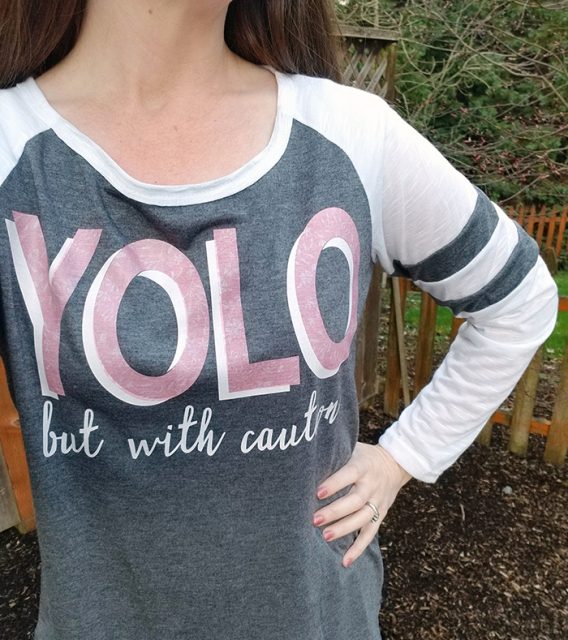
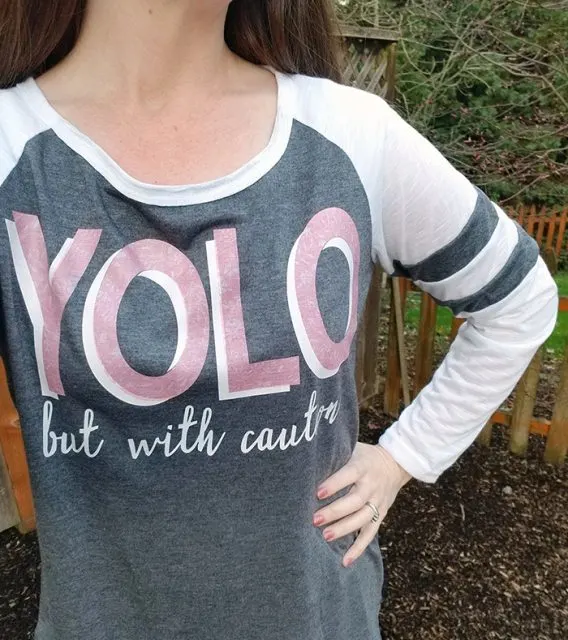
Cricut Patterned Iron on Vinyl
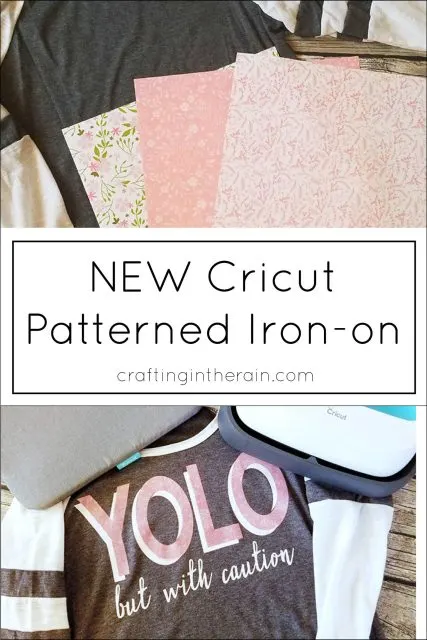
My life is a pretty calm one, and I like it that way. I sometimes hit snooze, I have been known to pull into the gas station with the needle pointing right at zero, and I sometimes get down to my last roll of vinyl before buying more. (Ok, that’s a lie!) So when I saw the phrase YOLO (but with caution), a little while ago, I figured it was a pretty good representation of how I do things. Sure! Let’s have fun! But we have to be safe, and watch for things that could go wrong, and not get too crazy. After all, you DO only live once, so make it last, right?
SUPPLIES
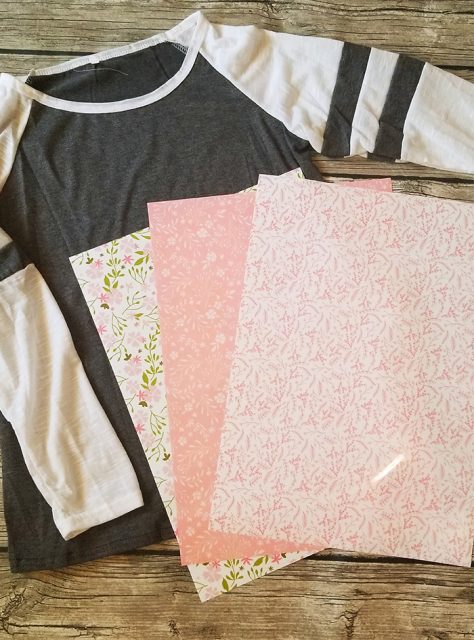
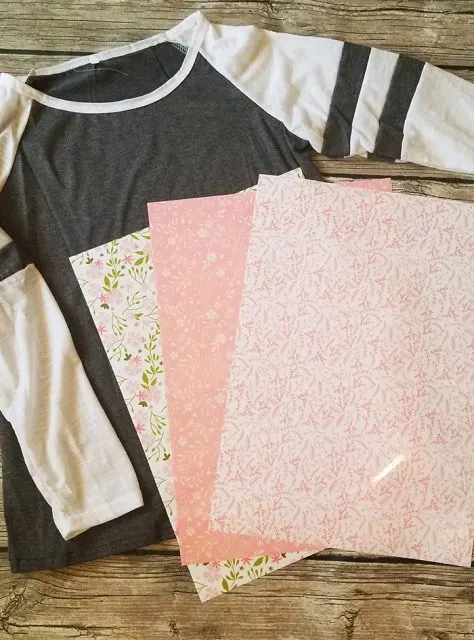
Shirt
Patterned Iron-on (I used In Bloom Pink)
Iron-on Lite (I used white)
Cricut Maker
EasyPress
EasyPress Mat
Open up this Design Space Project. Choose a patterned iron-on (there are tons of packs here to choose from – black, watercolor, blue, and more! I think the blue pattern would look so great on some throw pillows – my next project maybe?)


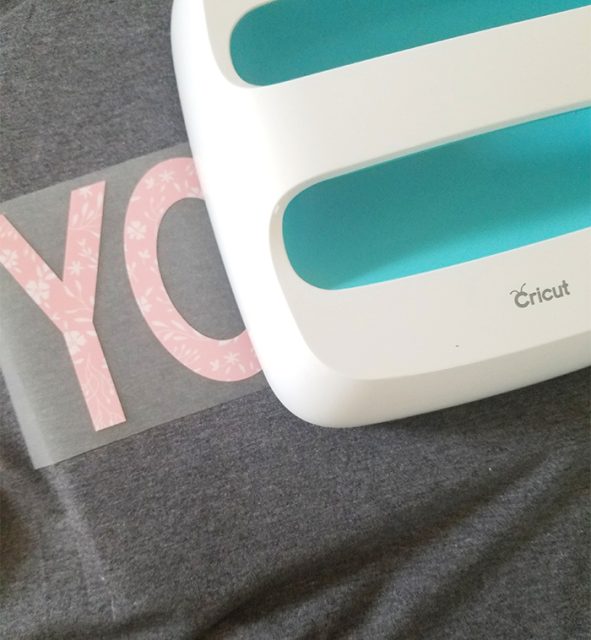
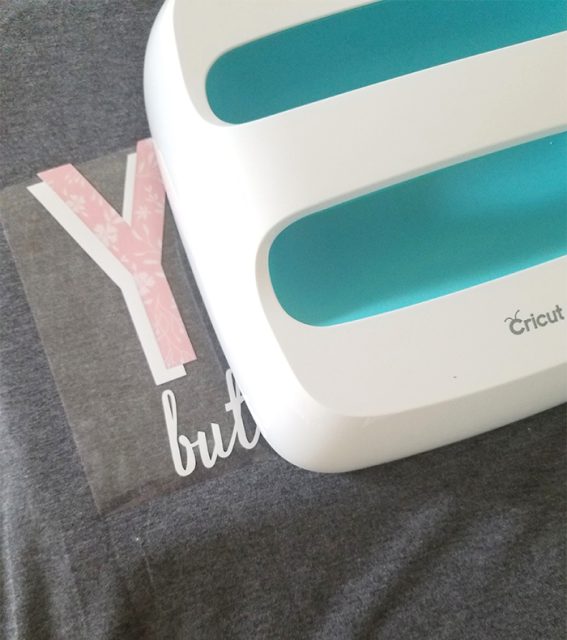
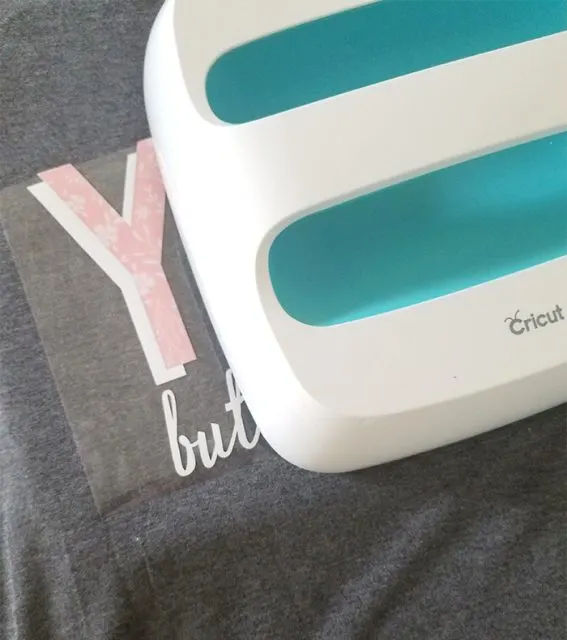
Cut patterned iron on with the pattern side down on the mat. Remember to MIRROR the image when cutting iron on. Cut the regular iron on also upside down – this means the shiny side goes down on the mat.
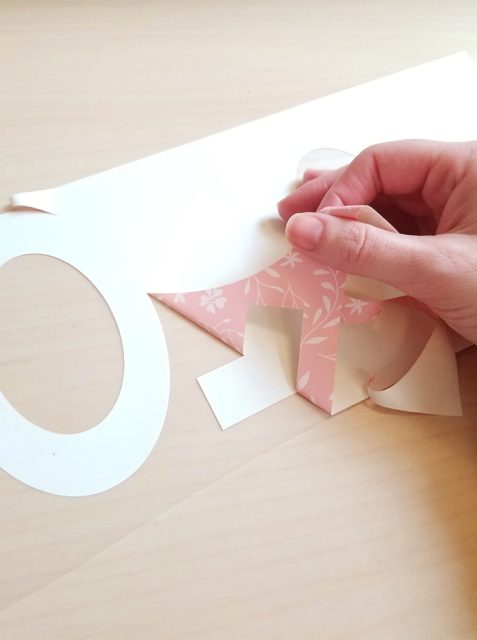

Weed out the extra iron on vinyl and discard.
Instructions for applying Patterned Iron-on
With an EasyPress: Set temperature to 340 and timer to 50 seconds. Push the button on the left, then the up or down arrows to change the number, then push the selector button again. Position cut and press with firm pressure, and click the Cricut start button to start the timer countdown. When the timer beeps, remove the EasyPress and return it to its base. Let the plastic carrier sheet cool, then peel it off the iron on (Cold Peel). For further details, check out this settings chart.
With an Iron: Set temperature to Wool setting. Preheat the material for 5-10 seconds and position the iron-on vinyl. Cover with a thin cloth or protector sheet and press down with firm pressure for 50 seconds. Flip over and iron the back for 15 seconds. Cold Peel.
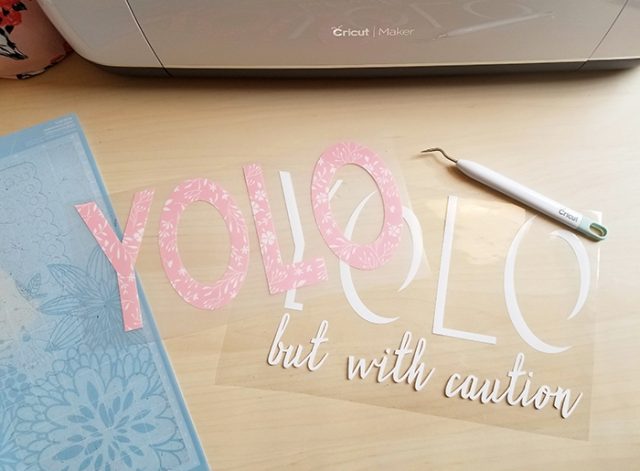
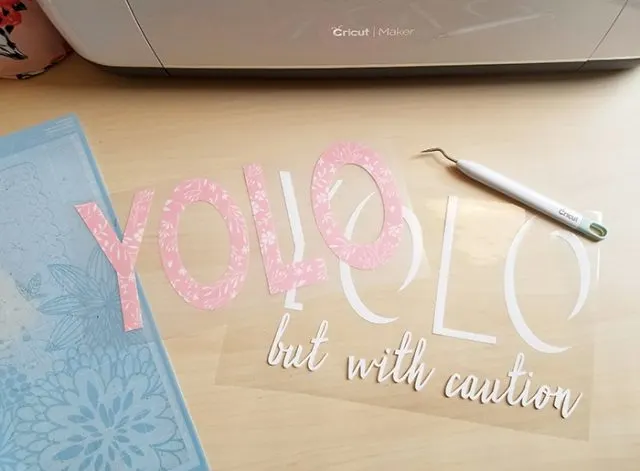
When mixing types of vinyl, apply the higher temperature iron on vinyl first, then add the lower temperature viny. For example, this patterned iron on needs 340 and iron on lite only need 315 – so apply the patterned first. It’s not recommended to layer patterned iron on, so you can see in this design I cut out the top layer from the back layer to make the shadow, in Design Space. Do this with the Slice action.

Carefully line up the white design over the previously applied iron on vinyl.
I want to tell you a little about the new EasyPress Mat too. It goes under your shirt, or other material, to protect your work surface from the heat. It also eliminates moisture and directs heat towards the iron on design. If you don’t have this mat, you can use a folded towel under your project when using the EasyPress. But I love that with the mat, I don’t have to worry about wrinkle lines, or the heat traveling through the towel.
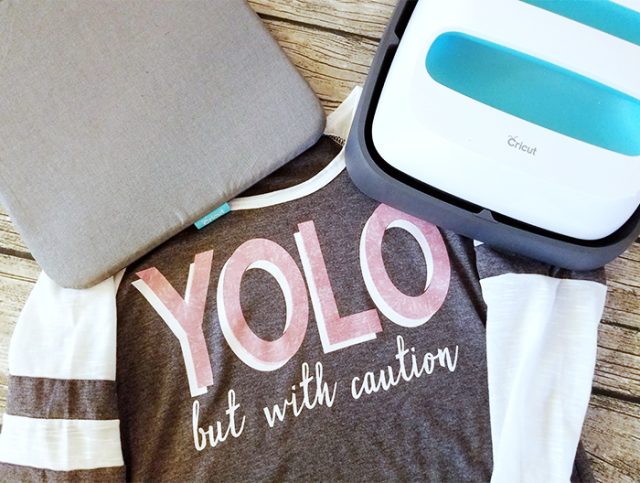

The patterned iron on comes in mixed packs so you can perfectly coordinate projects like shirts, baby clothes, party banners, pillows, bags, original sewing projects, and more. There are currently 9 packs available, each with 3 12×17 inch sheets. I’d love to know what you think of my shirt – and what you want to make with the new patterned iron on?
Learn more about the Cricut Maker
This is a sponsored conversation written by me on behalf of Cricut. The opinions and text are all mine.