• About
  • Contact
  • Shop
    • Facebook
    • Instagram
    • Pinterest
    • YouTube
  • Crafts
    • Disney
    • Kids
    • Sewing
  • Holidays
    • New Year
    • Valentine’s
    • St Patrick’s
    • Easter
    • Mother’s and Father’s Day
    • July 4th
    • Halloween
    • Thanksgiving
    • Christmas
  • Cricut
  • DIY
    • Cleaning
    • Organization
    • Projects
    • Scroll Saw
  • Downloads
    • Printables
    • SVGs
  • Recipes
  • Life
    • Family
    • Fashion & Beauty

Crafting in the Rain

Cricut Backpack for Back to School

Cricut

This post may contain affiliate links. As an Amazon affiliate, I earn from qualifying purchases. I receive a small commission at no cost to you when you make a purchase using my link.

24 Jul 2019
  • Share
  • Tweet

This is a sponsored conversation written by me on behalf of Cricut. The opinions and text are all mine.

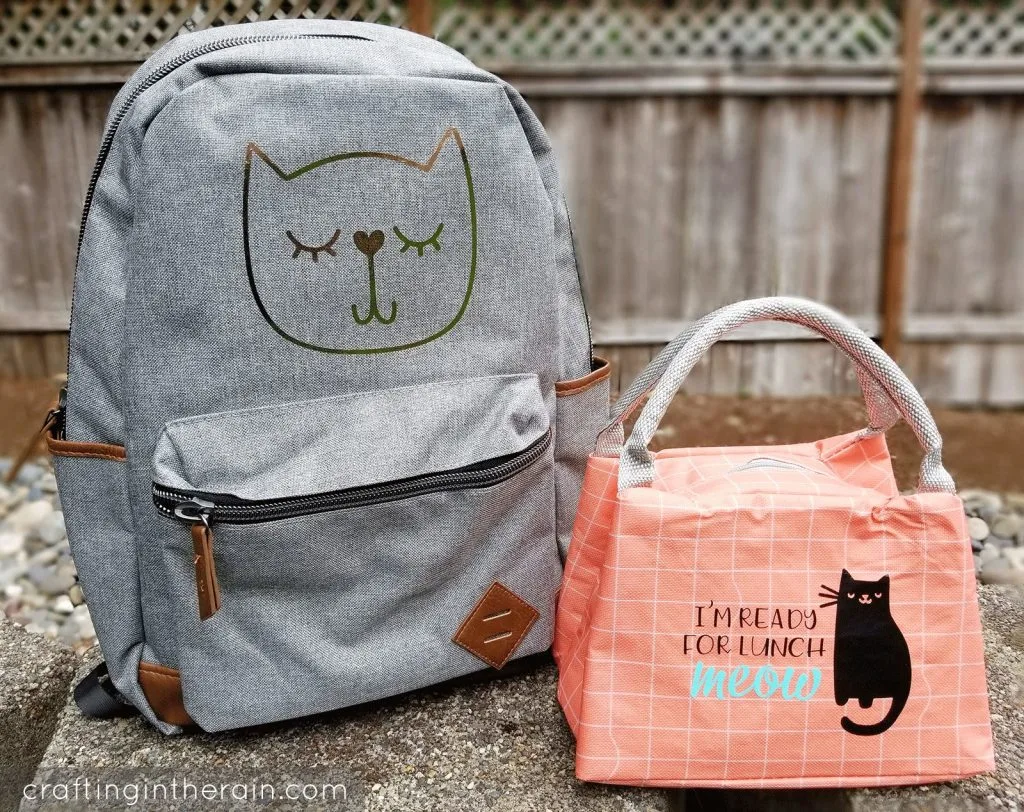
We’re still right in the middle of summer with no signs of slowing down. School is weeks away and we’re all happy about that here. But, it also makes it the perfect time to start on Cricut back to school projects. So I made a cat backpack and lunch box with Cricut and iron on vinyl. Watch how to do it! (some links affiliate)

backpack and lunchbox with cricut

To make your own, pick up these supplies:

  • Blank backpack and lunch box – make sure they have a fabric and not plastic exterior.
  • Iron on vinyl (I used rose gold foil, black and bright teal)
  • Cricut Explore or Maker
  • EasyPress 2 (6×9)
  • EasyPress mat
  • Protective sheet
  • Towels for stuffing

Open up this Design Space Project. Edit the sizes if needed to fit on the backpack and lunch box you have chosen to decorate.

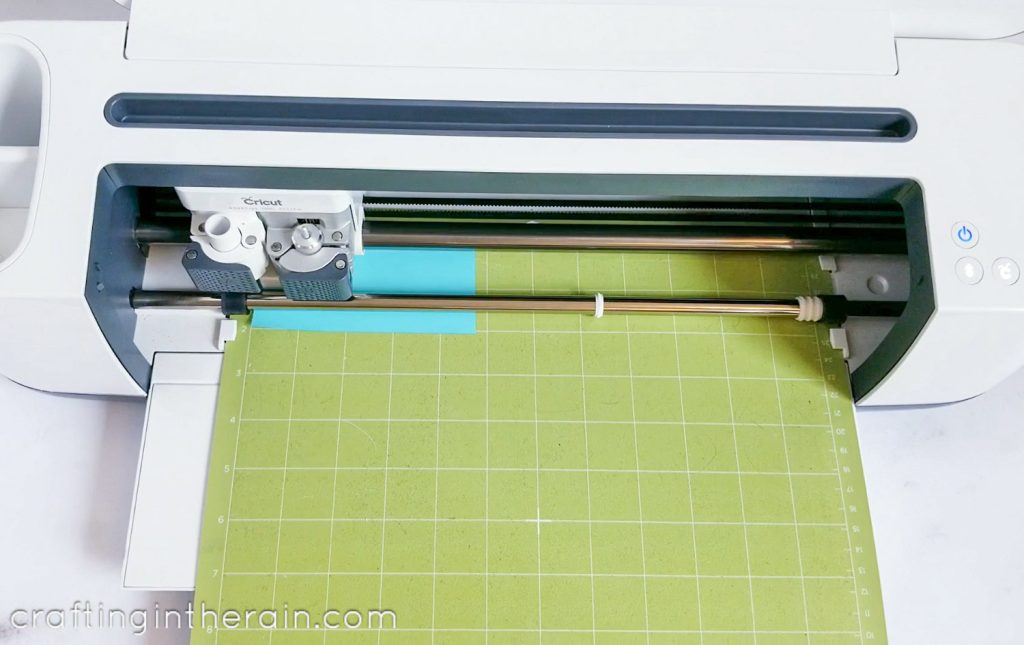
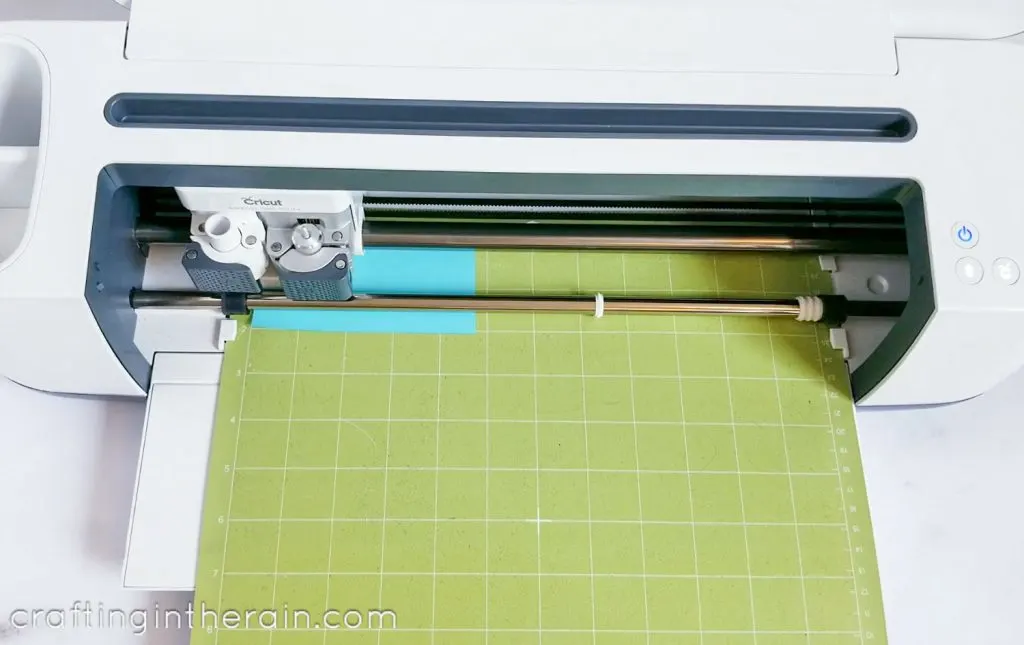
Place iron on vinyl with the shiny side down on the mat and MIRROR to cut.

Cricut cut iron on vinyl

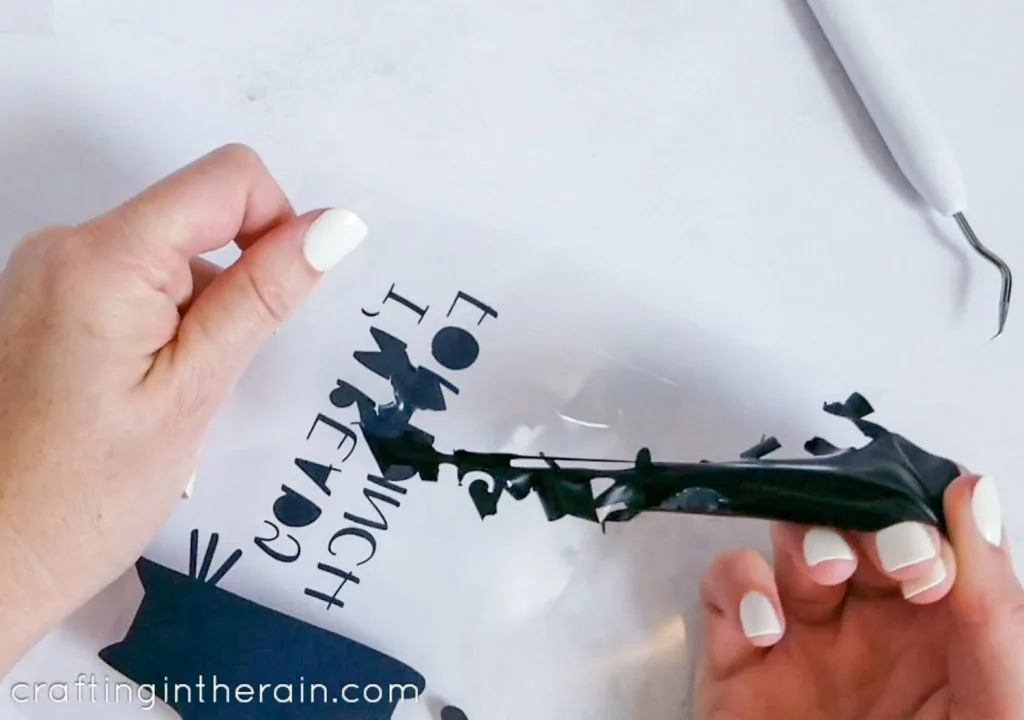
Weed away the extra vinyl.

Weed iron on vinyl

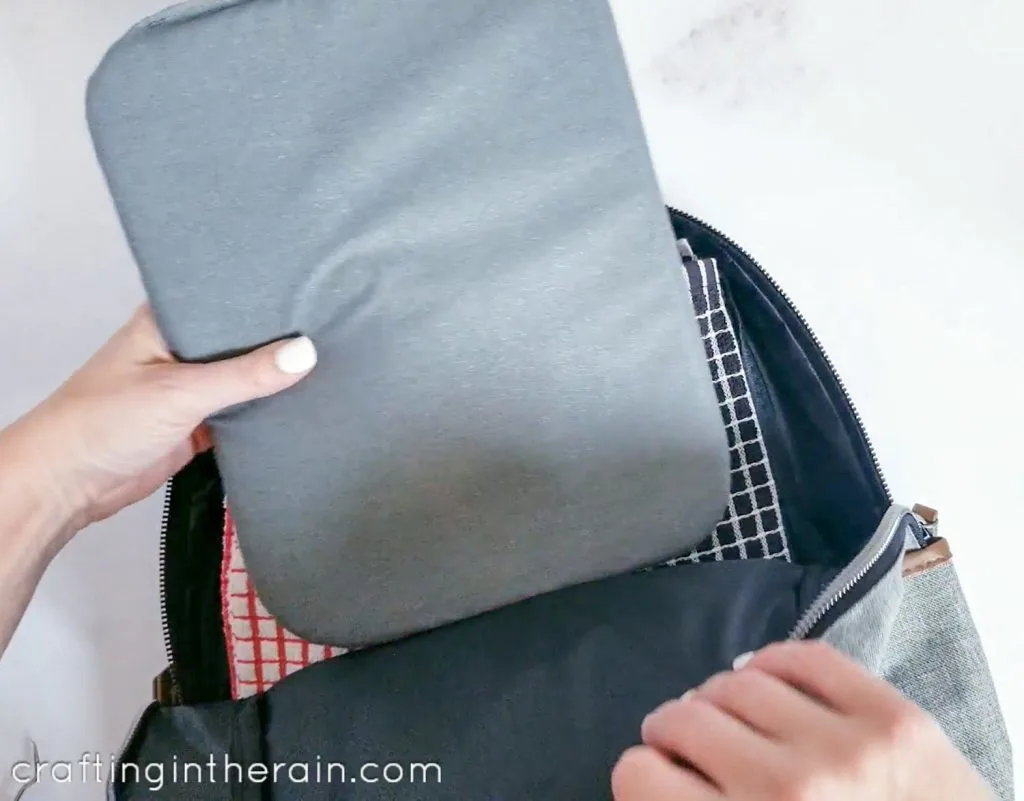
Stuff the backpack with towels and layer the EasyPress mat on top. This way the inside of the backpack is protected, and you have a flat surface to press against.

How to add iron on to backpack

Preheat for a few seconds after covering with the protective sheet.

Protect backpack while adding htv

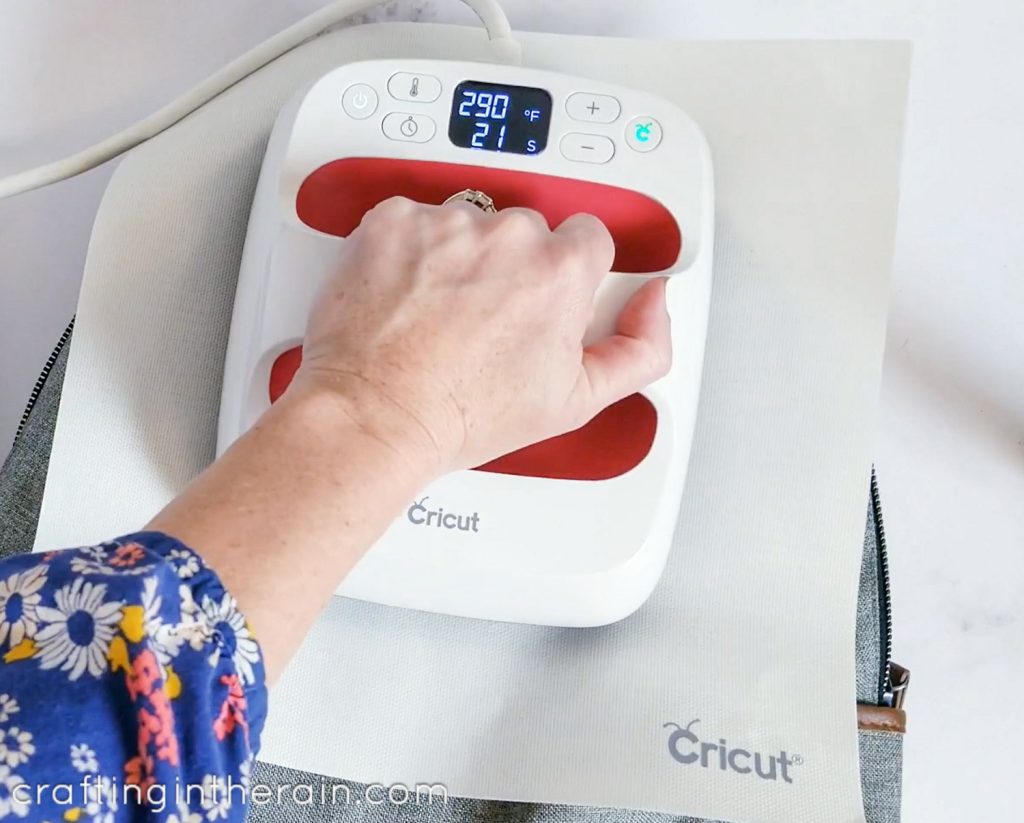
Position the cat face, cover, and heat with the EasyPress at 290 for 30 seconds.

Put htv on backpack

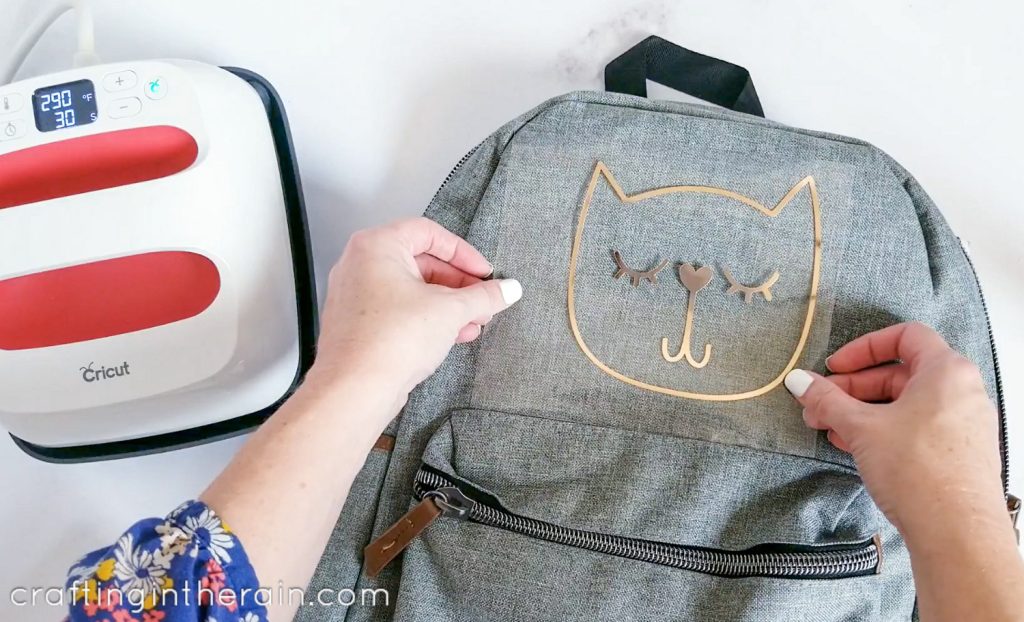
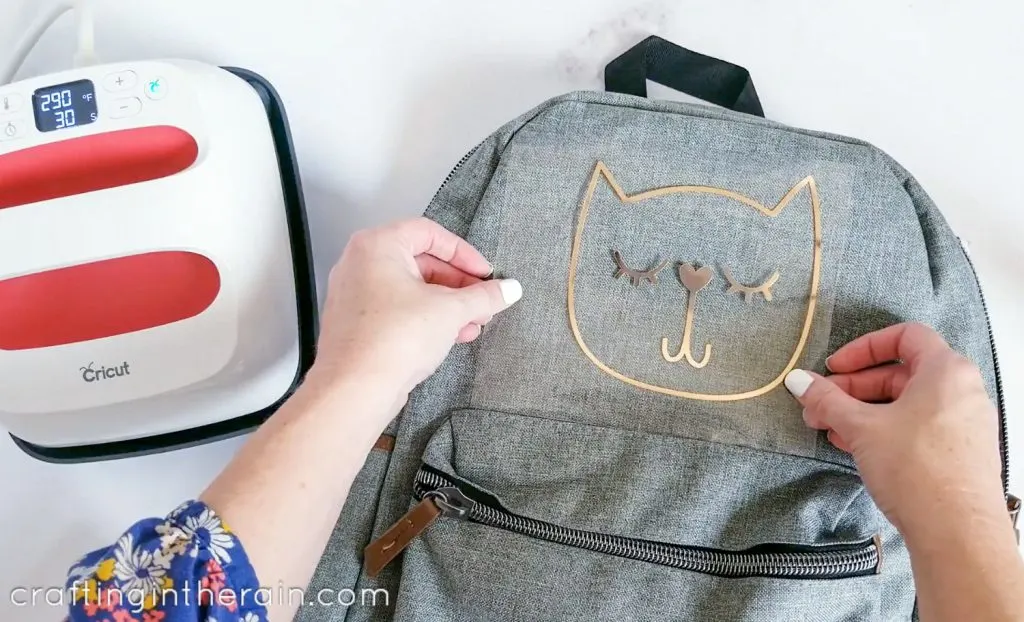
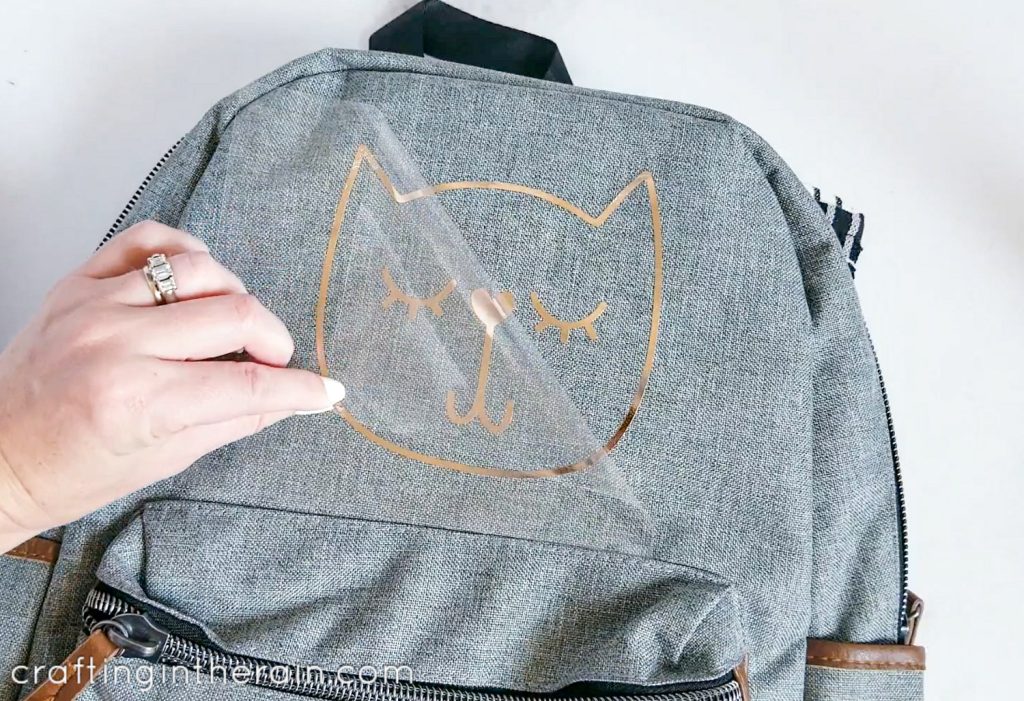
Let cool and peel away the carrier sheet.

DIY cat backpack Cricut

For the lunch box, follow the same proceedure. Stuff with towels, preheat, and keep the EasyPress at 290.

Funny cat lunch box

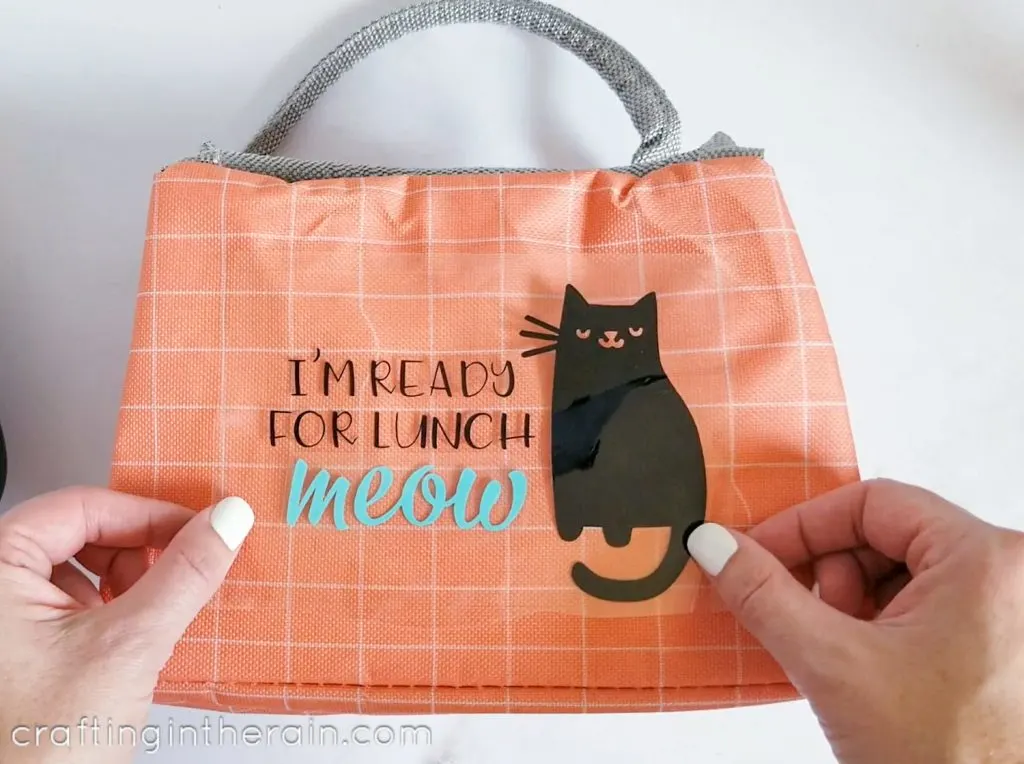
This particular lunch box has an insulating layer inside, and I didn’t want to melt it, so I didn’t increase the heat to match the Everyday iron on (which would have been 315)

back to school cricut ideas

These iron on vinyls have the StrongBond guarantee. These projects will last through bus rides, walking to school in the rain, tumbling around in the classroom lunch bucket, and more!

Have you been inspired to customize a cat backpack or lunch box with Cricut?

Read this post with more tips for using iron on vinyl

You could add other animals, quotes, or monograms – and then you know for sure that there probably won’t be a mix up at school because your kid has a complete original!

Shop all current Cricut sale items

Related Posts:

  • Back to School SVGs
  • 100 Days of School Monsters
  • Pattern Fill in Cricut Design Space

Leave a Comment

« Crepe Paper Peony Tutorial
Upload SVGs to Design Space »

Leave a Reply Cancel reply

Your email address will not be published. Required fields are marked *

This site uses Akismet to reduce spam. Learn how your comment data is processed.

Hi, I'm Stephanie - Welcome to Crafting in the Rain where I've been blogging about the crafty life since 2011. Read More…

Archives

  • Home
  • About
  • Contact
  • Disclosure
  • Index
  • Privacy Policy

Stephanie Paxman is a participant in the Amazon Services LLC Associates Program, an affiliate advertising program designed to provide a means for sites to earn advertising fees by advertising and linking to amazon.com.

Copyright © 2011-2023 Crafting in the Rain