{How to build a framed pegboard}
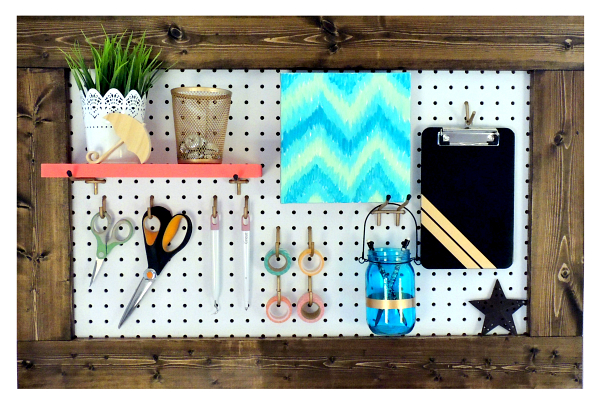
I have another element of my craft room to show you today. It’s a framed pegboard with hooks and a shelf for some craft room storage. After my custom pink shelves came together so nicely, I was ready to tackle another building project. (some links are affiliate)
Here’s what I used:
Pegboard (I bought a 2×4 sheet and used the circular saw to cut it to 2×3 feet–it’s what would fit between my two windows.)
1×4 pine TWO 6-foot pieces (I used the cheaper whiteboard because I liked the knots in it–just make sure to pick out really straight pieces)
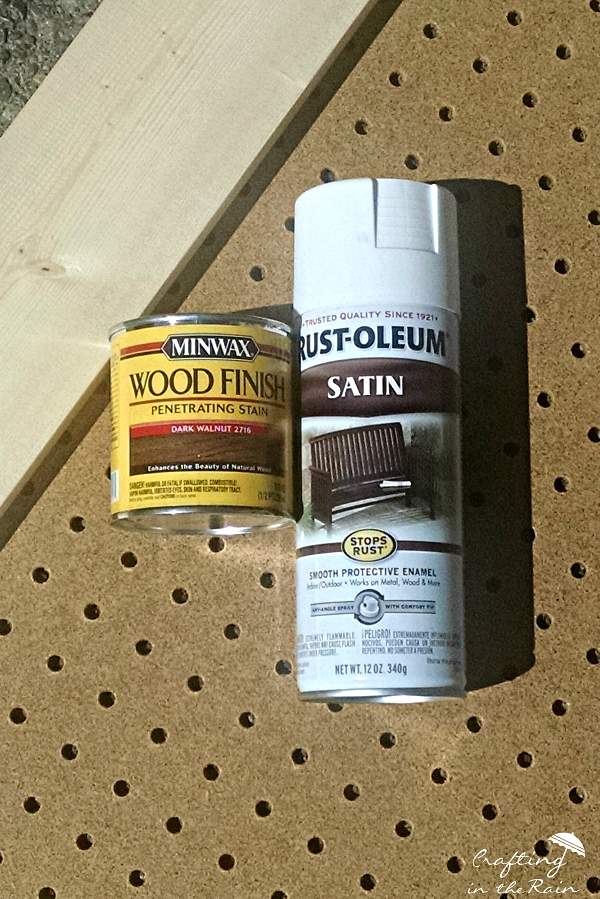
Dark walnut stain
White spray paint
Wood glue
Start by cutting the 1×4.
2 @ 36 inches
2 @ 17 inches
*I like to cut a couple of “waste” inches off the board first so there’s a nice clean edge to start from.
Stain the front and sides of the frame pieces.
The pegboard I bought was just brown, and I wanted it white. So I sanded the front with a sanding block and spray painted it white. You could paint it any color you like of course!
Put 2 pocket holes on each end of the shorter pieces of 1×4.
Line up one short piece and one long piece and clamp them together, or have someone help hold them in place while you attach them with pocket hole screws. Repeat until the frame is complete.
Turn the frame upside down and apply wood glue. Then position the peg board to fit and clamp all around the edge, or weigh it down with paint cans, tool box, and other heavy items to make sure the bond is nice and secure.
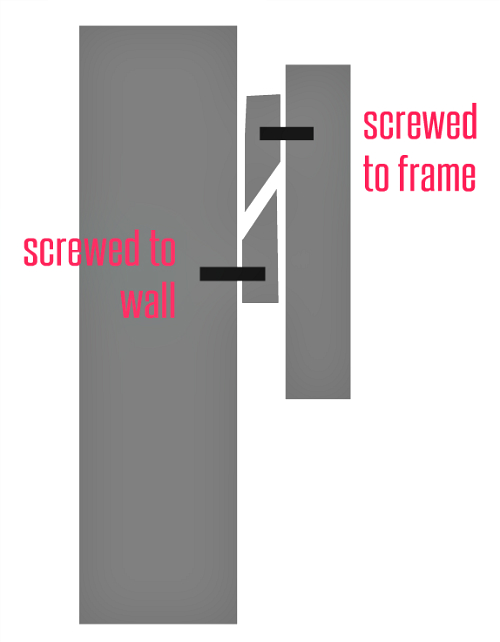
The trickiest part of making a pegboard is figuring out how to hang it. It needs a little bit of space between the board and the wall so that the pegs can poke through and hang right right. And it’s also a little bit heavy, and you want it to hang level. So here’s what I did. I made a French cleat for it to hang on.
Cut a piece of 1×4 on a table saw so it has about a 45 degree angle down the middle. One piece gets screwed into the back of the frame so it’s level with the top.
Then the other piece gets screwed into the wall (into at least one stud) so it is also level. The “shorter edge” is what touches the wall and what touches the frame. That way the angled pieces stick out and hook into each other when you hang the frame.
Then glue a small scrap of 1×4 in the two bottom corners of the frame also so that it all sticks out from the wall evenly.
Then I got to play around with placement of the hooks and where I wanted things to go. See how I spray painted all the hooks with some gold spray paint? It adds just the right touch!
I added spray paint lines to the blue jar and the clipboard too.
I hope I’ve inspired you to find a way to organize a bit of your craft space and get a beautiful framed piece on the wall too!


Postcards from the Ridge
Monday 16th of November 2015
This is a great project. Pegboard is so versatile and such a good way to organize things. Thanks for linking up to the inaugural "Inspired by You" link party!
Kimm Boes
Sunday 15th of November 2015
Oh my goodness, I LOVE this! The combo of white pegboard and dark stained wood is a favorite of mine and those gold hooks are perfect! Thank you so much for linking up to our first Inspired By You link party! We hope to see you back every Sunday.