The Cricut Minute #19 Level up your Print then Cut projects by uploading your own patterns to Design Space!
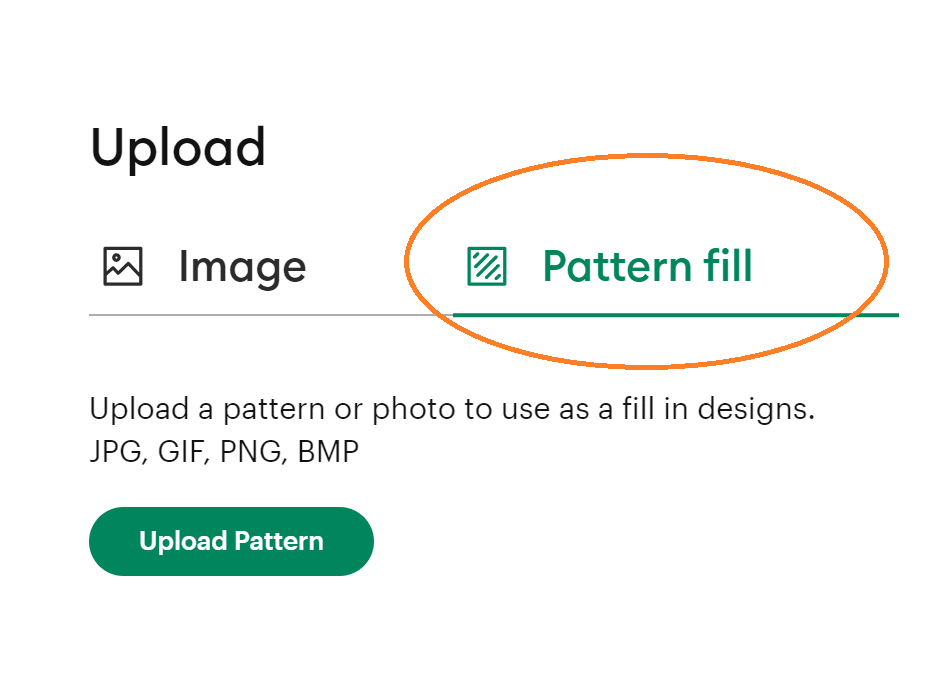
Did you know that on the same screen in Design Space where you can upload an SVG or PNG, you can also click to upload a Pattern!

Instead of clicking the button to “Image” click the button that says “Pattern fill.” Then find on your computer where you have the pattern saved and click to upload it. You will be able to name the pattern if you want, and give it a color category.
This is an AWESOME way to use digital papers – which are easily downloaded from places like Creative Fabrica and Design Bundles.

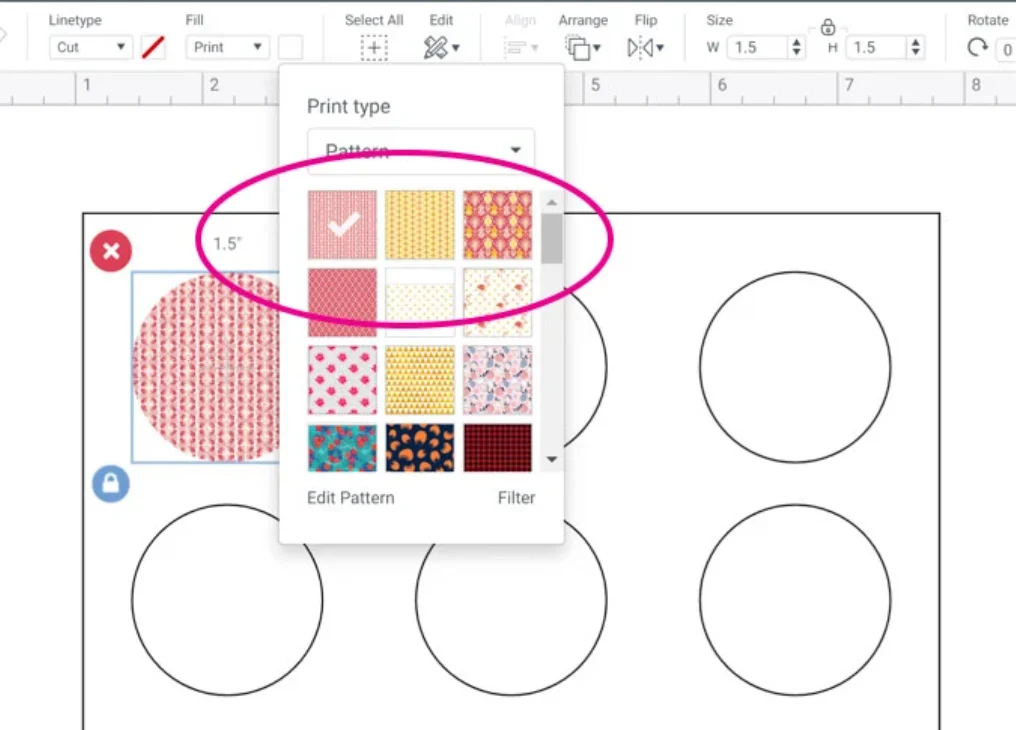
After the pattern is uploaded, you can use it to fill Print then Cut shapes in Design Space. You will find it in the pattern drop down box.
Today’s Tip: Pattern Fill
- There are a lot of patterns already loaded into Design Space. You can upload your own as PNG or JPG images.
- You can’t search the pattern menu, so make sure you assign the pattern a color category so you can at least narrow it down when you’re scrolling to find your pattern.
- This process is great for making address labels, monogram stickers, stationery cards, sticker borders, planner stickers, even patterned boxes and more!
BONUS– You can also make edits to the pattern – zoom in or out, adjust the rotation or position, to help you get the best printed result.
If you want to explore the options more in-depth, you can read this post here, or watch a video tutorial – which ever way you like to learn best!
