
About a week ago I posted the following photo on Instagram. I was photographing wood pens for my husband’s Etsy shop. Lots of you wanted to know more about my set up, and I’m happy to share!

Getting photography right is one of the hardest things about blogging. I could complete the most beautiful chair makeover, or design the cutest card, but if I can’t get an eye-catching picture of it no one will ever be interested in how I made it. Sad, but true.
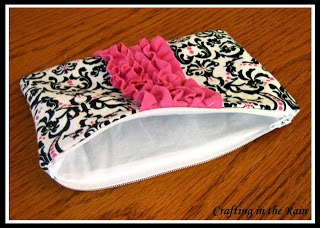
And thankfully, while I still have a lot to learn about taking pictures, you can see how far I’ve come when comparing a few from when I first started out back in 2011.
 |
| OLD PICTURE |
 |
| OLD PICTURE |
I’ve learned that natural light can be your best friend. I’ve also learned that’s pretty hard to come by in the Pacific Northwest where the sun sets by 5 in the winter and it’s cloudy or rainy most days anyway. Photo editing after the fact can help adjust the brightness, but it can lead to everything being washed out. Plus, the less time-consuming editing you have to do, the better.
Enter the Square Perfect photo tents and light. My husband actually bought this set for me for Christmas and I was so surprised–and it’s been perfect!
 |
| Source |
It comes with 2 sizes of white pop-up tents, two lights with stands, a tripod, and colored backgrounds in each size, plus a carrying case for everything. The large tent is supposed to be able to fold back up to fit into the case, but I can’t get it to (even after watching the little video I found online) So I just fold it flat and slide it between the wall and cabinet in my bedroom.
The tripod and light stands all have telescoping legs so you can adjust the height and the angle of the lights can be changes also. This lets you get optimum lighting inside the tent without shadows and glare.
When I’m getting a shoot ready, I set up the size tent I need, pick a background (usually white for me, but I could make some in new patterned fabrics too) and match up the velcro squares. I set up my lights, tripod and camera, and put the light bulbs in last. Turns out they can be a little top heavy, and I’ve already shattered one on the wood floor because it tipped over. (DOH!) They’re pretty pricey to replace, but I bought a pair of 75 W 5000K bulbs at Home Depot and they’re nearly identical (the higher the K value, the closer to full spectrum light) These were much more cost effective!
Here’s a bad night-time phone pic to give you and idea of how the case looks. You can see the large tent behind it folded up.

And here are 3 extra pointers I have for you:
1–Get an extension cord. The cords attached to the lights aren’t very long, so to reach an outlet and have the light in the right place near the tent you’ll need one.
2–Iron the fabric pieces out (medium setting) then store them around an empty wrapping paper tube. If you fold them back up into the case you’ll have to iron them every time.
3–I have found that I need something hard under the tent to support the items I’m photographing…a book, a box lid, something, or the weight of the object creates wrinkles in the tent fabric.
Anyway, I set the white balance on my camera, and then use either manual settings or Aperture priority, and take some pictures. I still do a bit of editing in ipiccy before calling them complete, but it’s so much easier to get good pictures now.
Take these suitcase cards
Or this olive wood pen

If you haven’t seen me posting any of my husband’s pens on Etsy yet, go check them out!

Let me know if you have any questions for me–I’d be happy to help you out!
Answers to questions so far: I use the 30 inch one the most, because the 12 inch one really is pretty small. For small items like jewelry, or those little suitcase cards I made it was perfect. But for most of the things I’m making…the crafty projects, I need more room in there to set things out.
(affiliate links)
William Braylen
Tuesday 16th of February 2016
nice tent