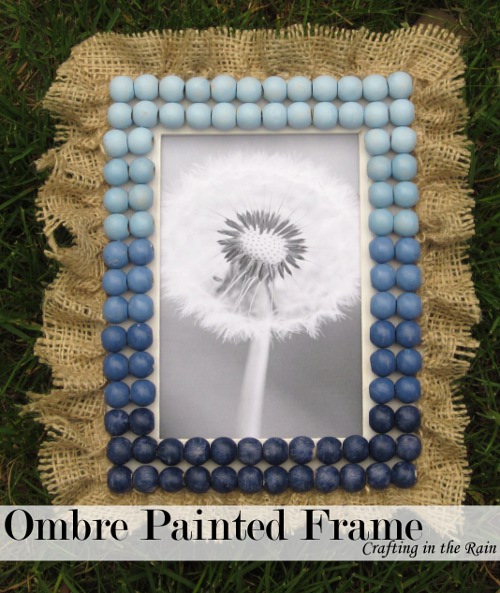

This was my entry for Round 1 in One Crafty Contest. The theme was beads, and if you voted for mine, thanks! There were some great choices over there and I feel lucky to have made it to the next round.
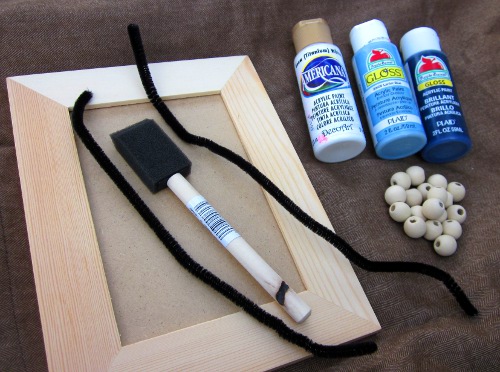
Here’s what I used to make my painted bead frame
Plain bead frame ($1 from Michaels)
Wood beads (mine are 1/2 inch)
Paint (to get the ombre effect I used 3 colors–dark blue, medium blue and white)
Brushes
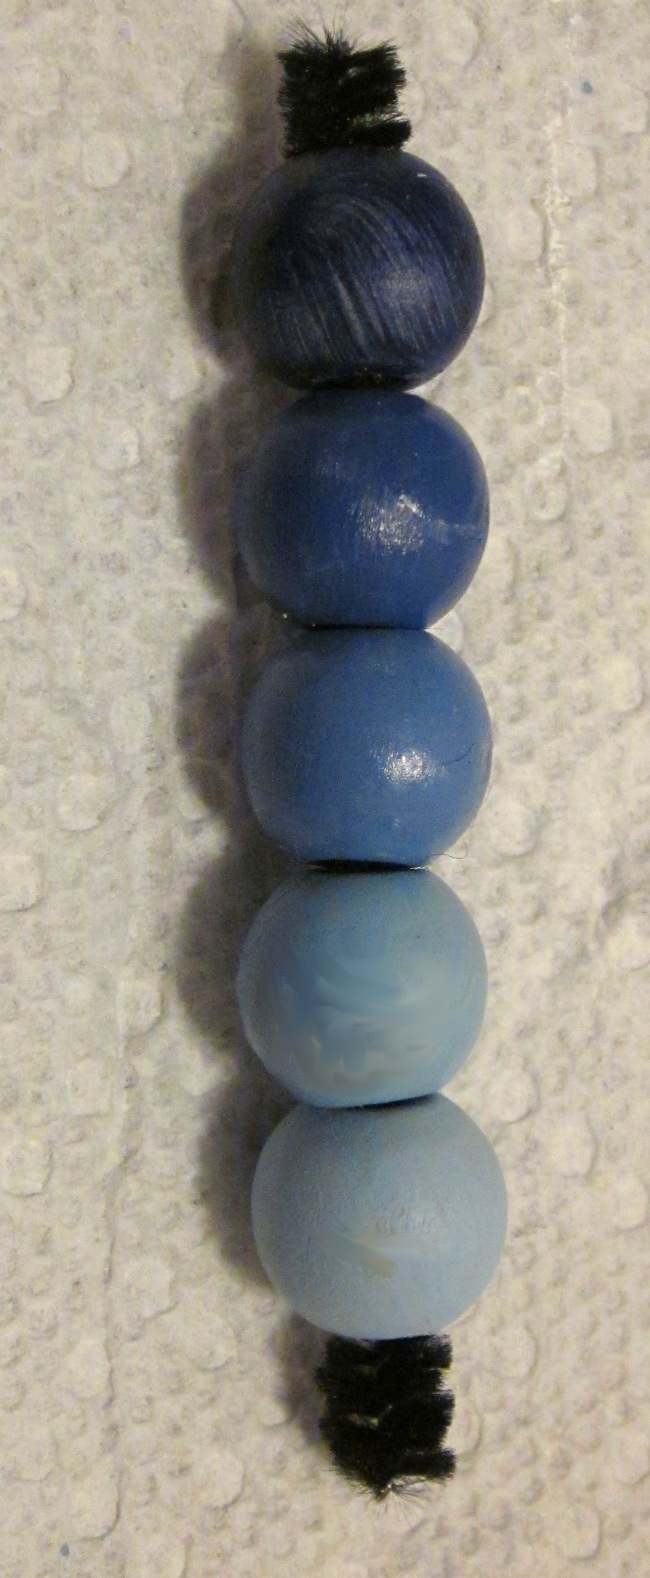
Pipe cleaner (just to hold the beads while you’re painting them)
Hot glue
Burlap (not pictured because I decided to add it later 🙂
Step 1: Paint the frame–I chose to paint it white, though it really does mostly get all covered with stuff
Step 2: Lay out the beads out on the frame so you know how to divide them up (I ended up with 15 lines of beads from top to bottom, so I did 3 lines in 5 colors)
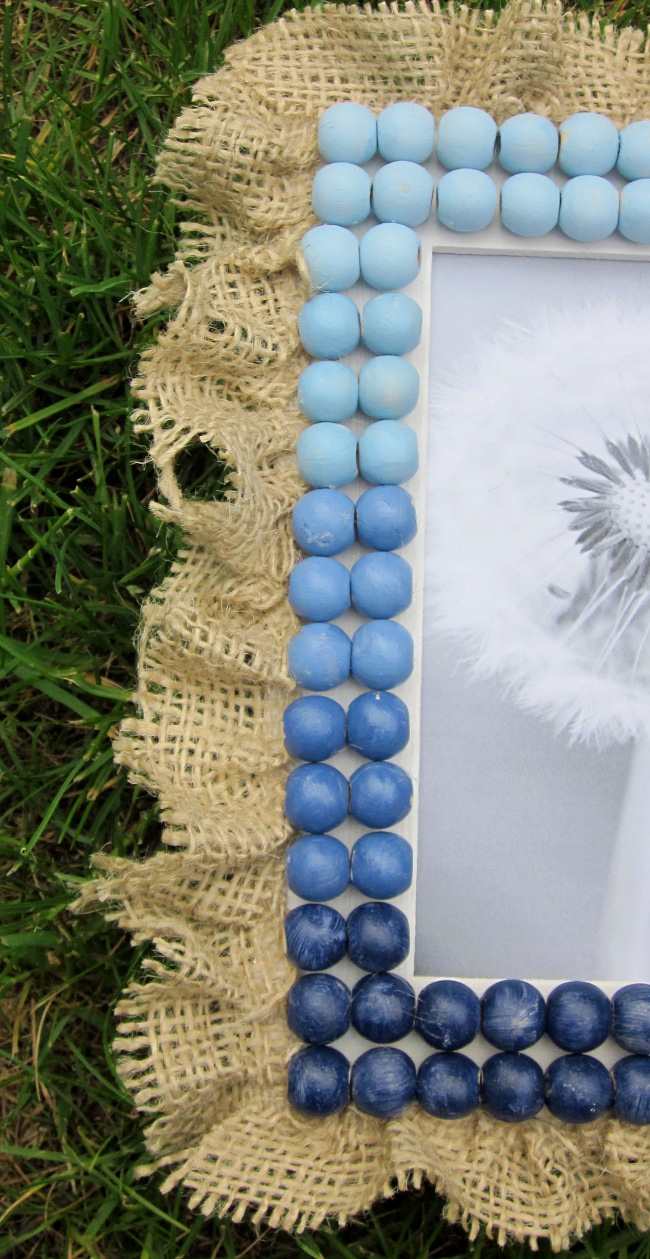
Step 3: Paint the beads. I strung them on pip cleaner so they’d be easier to paint. To get my 5 shades, I did the bottom layer in the dark blue. Next I added some light blue to make it lighter. Then added more for a lighter blue. Then I used the straight light blue. Finally I added some white to make the lightest/top blue color.

Step 4: Glue beads to the frame.
Step 5: Fill in the edges by gluing down a burlap trim. I worked with just a couple of inches at a time so I could ruffle it up a bit before the hot glue set.
For my entry I found a generic black and white picture to print out so that it couldn’t be identified as my project. I love the black and white look in there, so I think I’ll print one out of my son to put in it.
Anyway, for the next round we’ve been given the assignment of using Mod Podge, so I’ve got the decoupage wheels spinning in my head. I’ll send you over to vote next week.