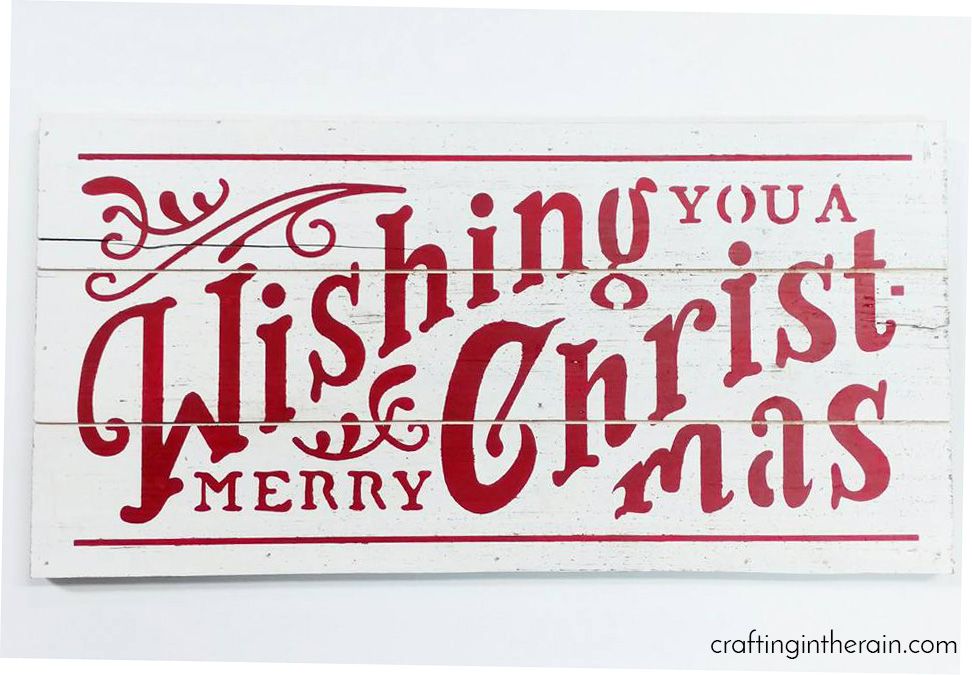
Wishing you a Merry Christmas! Do you guys just love cute Christmas signs? I know I do! This one is easy to make because it uses a pre-made sign base. I got in on sale at the craft store – which saved me the step of cutting and assembling the wood sign. The vinyl stencil is a single, pre-designed file in Design Space.
Once you have your sign base, either that you buy or make yourself, measure it so you know how to size the vinyl piece in Design Space. (some links are affiliate)
For me, my sign was about 10 inches tall and about 19.5 inches wide. (Get access to the Design Space file here.) Resize the file so that it will fit nicely and fill your sign. This file is great because it can be stretched or compacted a bit to fit, and will still look great.
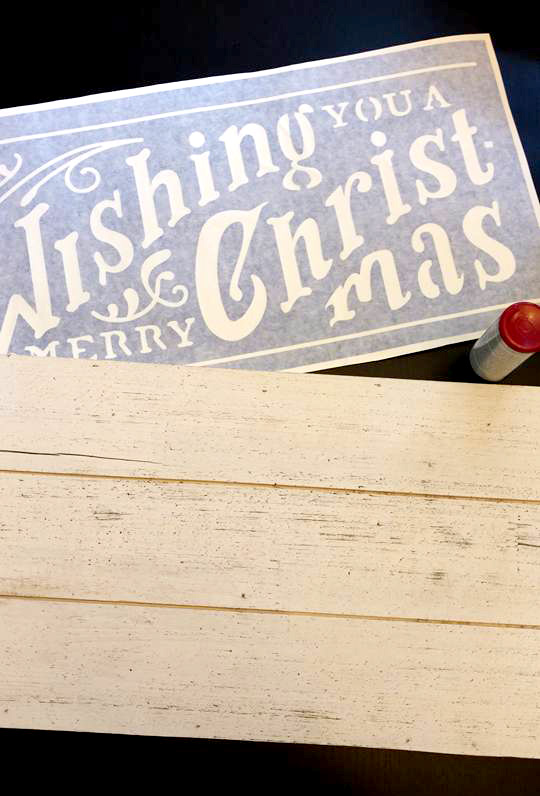
Next, cut out the vinyl. If you want a refresher, I have a great post here on how to cut and apply vinyl. We’ll be using it as a stencil, so after the vinyl is cut, you will weed out all the letters and design elements (instead of weeding away the background.)
This is a picture of the transfer tape and vinyl down on the wood.

Remove the transfer tape and make sure the edges around all the of the letters is pressed down really well with no wrinkles or bubbles. This will keep paint from bleeding. Now just paint in all the cut out spaces– these foam stencil brushes work really well! I also try to not load my brush with too much paint, and that keeps the bleeding to a minimum.

After the sign is all painted, peel up the vinyl, cutting as necessary to make it easier. Let the paint dry completely and your sign is all done!

You might also like this post all about the new Cricut Explore Air 2, and this one where I compare vinyl cutting machines I’ve had in the past.

Simple to make Christmas indicators to embellish your private home - Residence and backyard - Ich mag es zu leben
Sunday 19th of December 2021
[…] Merry christmas signal by craftingintherain.com […]
Easy To Make Christmas Signs To Decorate Your Home – Home and Garden
Tuesday 23rd of November 2021
[…] Merry Christmas Sign from craftingintherain.com […]
Cheri
Monday 14th of October 2019
How do you change the fonts for different words ?
Stephanie
Tuesday 15th of October 2019
This particular design can't be changed because it's a single image that already exists as-is. If you want to know how to change fots for text that you add into Design Space, I have a bunch of posts that teach how to do that - start here: https://craftingintherain.com/using-fonts-in-cricut-design-space/ Hope it helps and let me know if you have more questions!
Crystal Nell
Thursday 17th of November 2016
Love the sign!! Thanks for sharing how to use a vinyl stencil :)