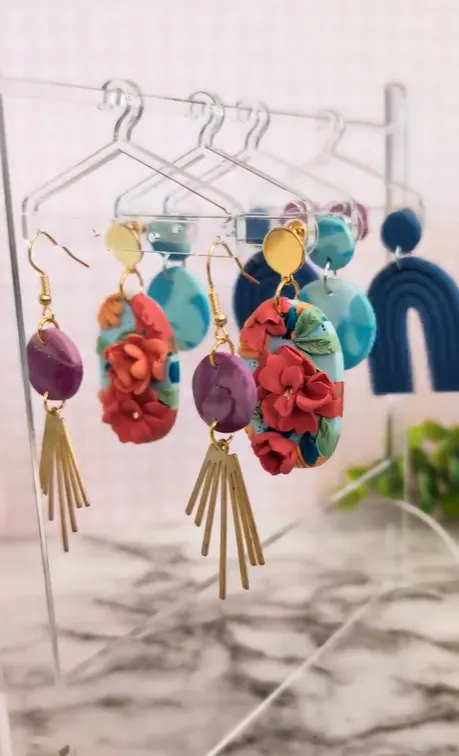
How are you storing your earrings these days? Whether you’re an earring maker, seller, or collector, a stylish and functional way to display and organize your earrings is a must.
I’m partnering with xTool today to show off their new white P2 machine! I was sent the laser to review, and all thoughts and opinions are my own.
WATCH on youtube if you prefer

Unlike diode lasers, this CO2 laser has the ability to cut through a wider array of materials, including clear and transparent acrylic.
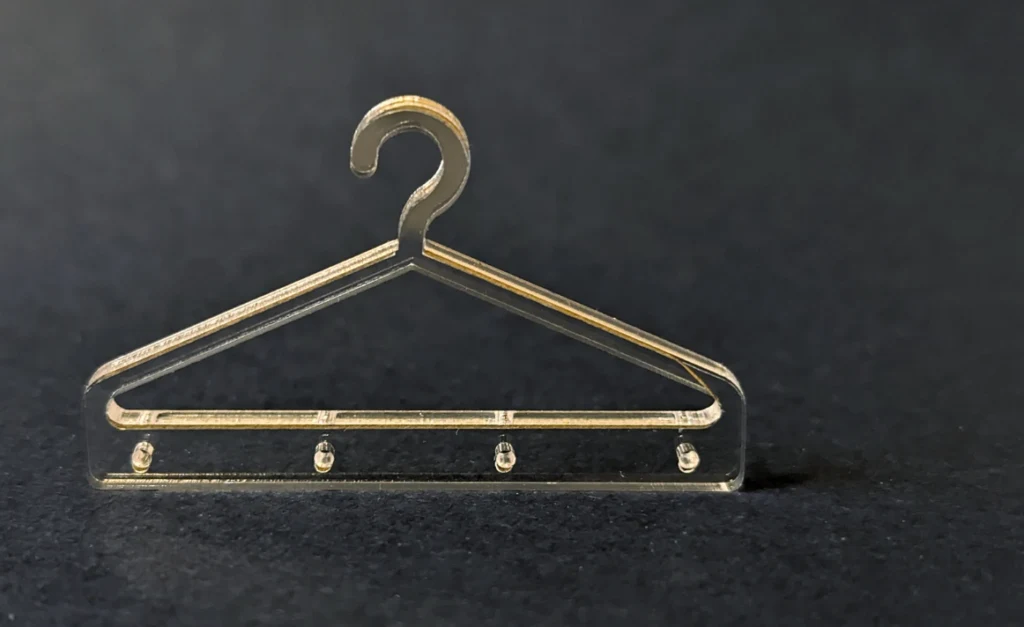
With this in mind, I’ve designed a charming hanger rack perfect for showcasing your collection. These versatile hangers accommodate both post-back and hook earrings, making them ideal for any jewelry lover.
Let’s dive into the process. Here are the supplies you’ll need.
Prepare Your Workspace
Turn on your xTool machine and connect to xTool Creative Space via Wi-Fi or cable. Clean inside the base of the machine, getting rid of leftover bits or wood or acrylic from the last project.
Upload design to xTool
Use this form to access the SVG file for the Earring Hanger.
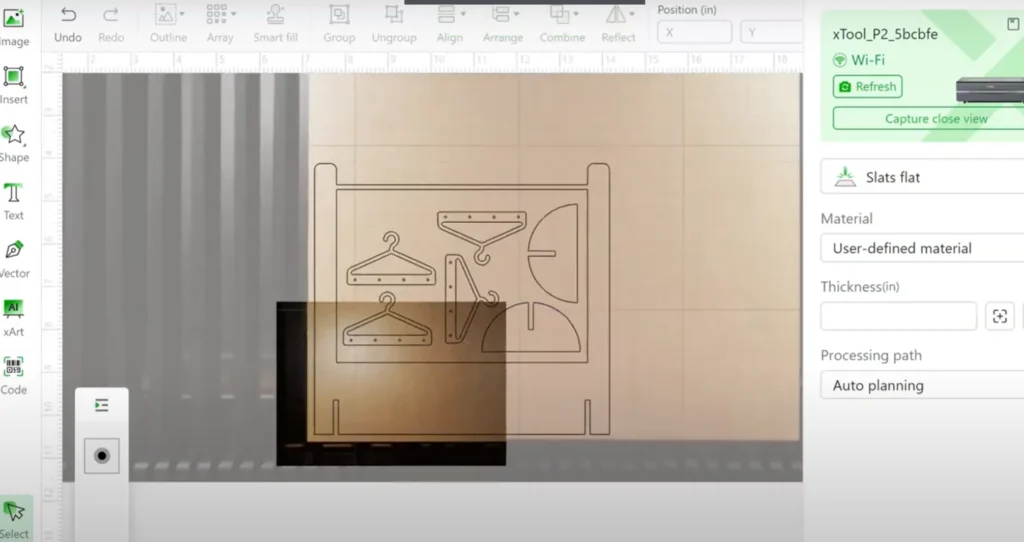
Bring the earring display SVG into Creative Space and check that the size is 6.5 inches tall. Sometimes SVGs load at the size I made them in illustrator and sometimes not, so I always confirm before cutting.
Check your acrylic size
Use digital calipers to accurately measure the thickness of the acrylic sheet. In my experience, sheets that say 3mm can range from 2.5 to 3.2 – and that’s going to affect the size of the slit cuts so that the pieces slide together correctly.
Make adjustments in the design if needed.
Create a rectangle in Creative Space and make it match the thickness of the acrylic sheet you’ll be cutting. Line it up with the slits of the design and check if they’re the same or not.
If the slit is smaller, layer a new rectangle over every location. If the slit is larger, fill it in first by placing a rectangle over it and “combine” the two shapes. Then put the new rectangle in the same location so the slit will still cut in the right place but not be too large anymore.
Repeat for every slit cut in the design.

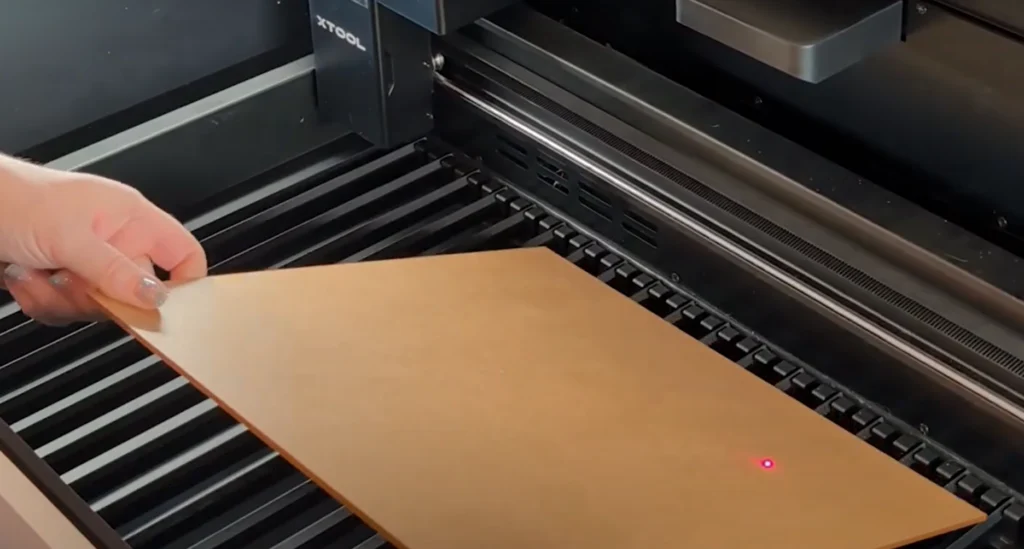
Set the acrylic sheet in the P2 and refresh the image in Creative Space. Then Capture Close View to see a detailed picture of the corner of the arylic so you can accurately place the cut design and save material space.

Material and Settings for cutting acrylic P2
With all the design selected, change processing type from Score (the default) to Cut. Then match the material to what you are cutting.
*As a note for cutting acrylic, I have found that every color and transparency cuts really nicely for me with Power and 45% and Speed at 12.
If you leave the material as “user defined” you’ll need to click the small ruler button to measure thickness for the laser to focus.
Click the process button and the green start button. Then push the button on the machine to initiate the cut.
If you forget to change the process and it just scores the design, place the acrylic back in the machine and use the close camera view to line up the design again with the score lines created. Then use the cut process.

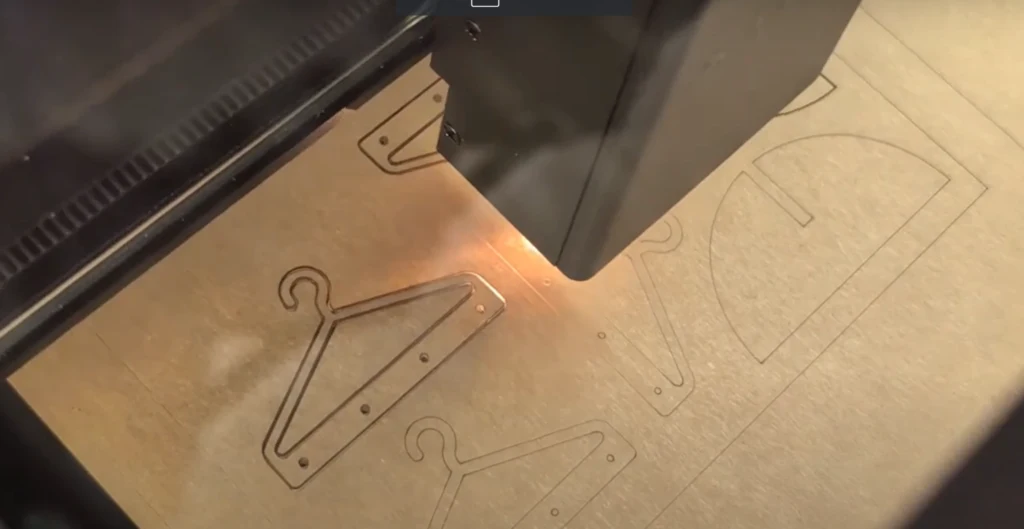
I found that it cut very accurately this way, so I didn’t waste any acrylic!
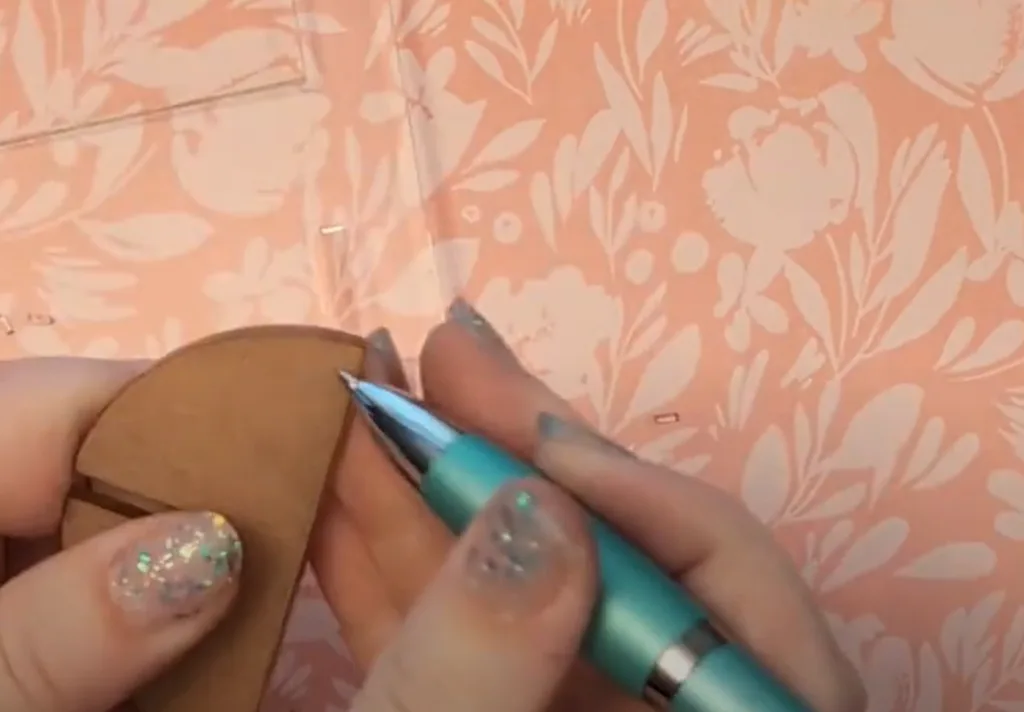
When the pieces are cut, peel away the paper – a razor blade or small weeding tool can help a lot. Remember that you’re trying to get between the acrylic and the paper right on the edge, not digging into the paper which may scratch the acrylic surface.

Assemble acrylic earring display
If any of the small holes are stuck in the hangers, force them out with a weeding tool or pin.

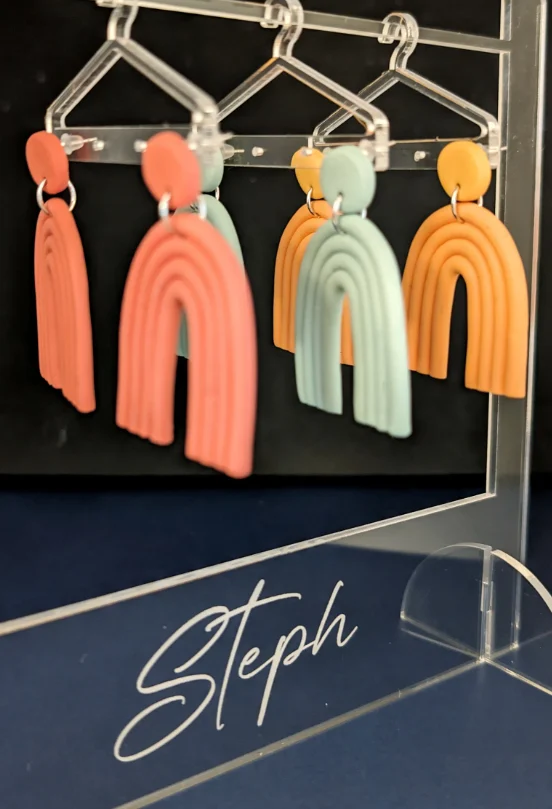
Then slide the two bases onto the main piece so the rack will stand, and then add all your earrings to display!

The bottom part of the earring display can also be engraved with a name, logo, or business name for extra customization.

Be sure to let me know if you have any questions, and if you make one for yourself!