• About
  • Contact
  • Shop
    • Facebook
    • Instagram
    • Pinterest
    • YouTube
  • Crafts
    • Disney
    • Kids
    • Sewing
  • Holidays
    • New Year
    • Valentine’s
    • St Patrick’s
    • Easter
    • Mother’s and Father’s Day
    • July 4th
    • Halloween
    • Thanksgiving
    • Christmas
  • Cricut
  • DIY
    • Cleaning
    • Organization
    • Projects
    • Scroll Saw
  • Downloads
    • Printables
    • SVGs
  • Recipes
  • Life
    • Family
    • Fashion & Beauty

Crafting in the Rain

Gold Paint and Wood Bead Necklace

Uncategorized

This post may contain affiliate links. As an Amazon affiliate, I earn from qualifying purchases. I receive a small commission at no cost to you when you make a purchase using my link.

4 Mar 2013
  • Share
  • Tweet

I’ve been on a quest lately to expand my jewelry collection. 

And by quest I guess I don’t really mean swords, dragons and armor, but more like “hey, I think more jewelry might be nice.”  A little underwhelming?  Perhaps.  But today’s project was perfect for a very beginner level jewelry maker like myself (I don’t think my scrabble-necklace-days-on-Etsy really count)


Supplies:
Gold Paint (I used DecoArt Venitian Gold)
Brush
Tape (masking or painters)
Black ribbon (5/8 inch)
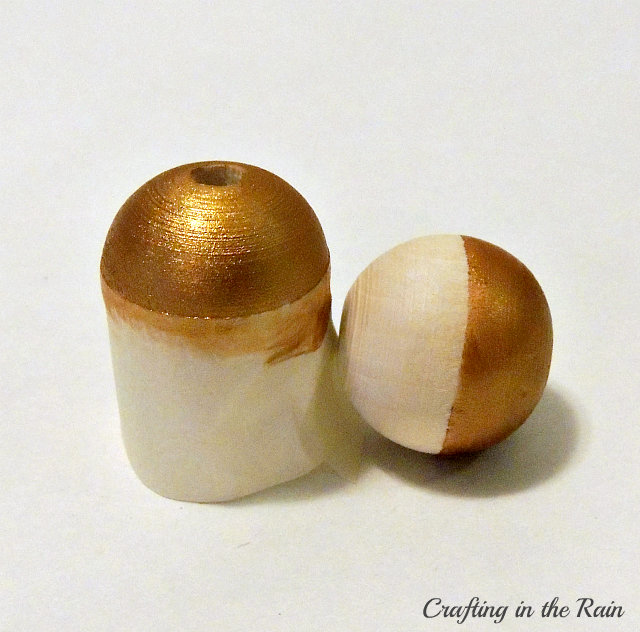
10 5/8 inch unfinished wood beads
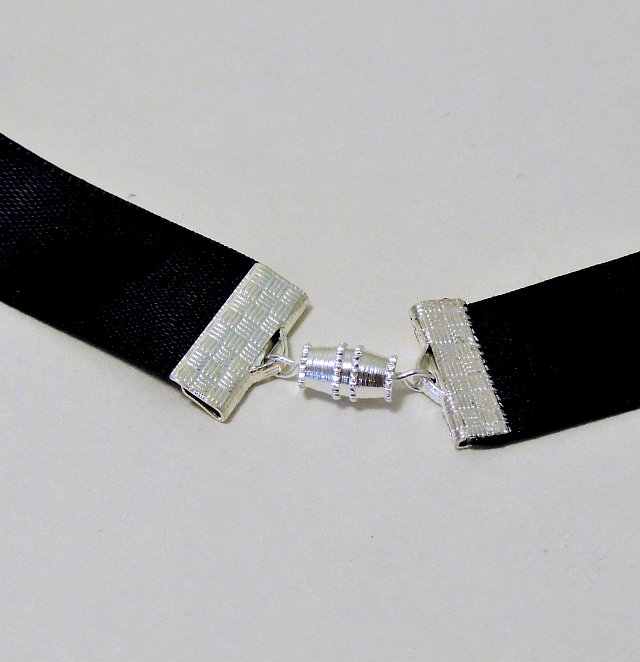
**if you want a long necklace, you can just tie the ribbon ends in a knot.  I wanted mine on the shorter side so I added ribbon clamps and screw fasteners.  I found them both at Michaels in the jewelry section**

First tape off each bead so there’s a line around the middle.  Paint top with gold paint and let dry.

 Wrap a piece of tape around one end of the ribbon (you know, kind of like an aglet–thanks Phineas and Ferb!) and thread on each bead, alternating unpainted and painted sides first.


Cut ribbon to desired length.  Center beads on the ribbon.

Melt the ribbon ends with a match or candle (if you’re including kids, this should be an adult step of course)

Attach fasteners, if using.  I also added just a bit of E6000 to the clamp before pinching the ribbon in it.  Or tie ends in a knot so it’s still big enough to fit over your head.


And that’s it!  A little metallic, a little natural, a lot easy and a lot of fun. 


Plus, I have a whole pile of these beads that are working their way into some other designs that I can’t wait to show you.  Thanks for visiting today!


Photobucket

affiliate links

Related Posts:

  • Resin Cat Earrings and Necklace
  • Cricut Print and Cut Christmas Tags
  • Two Thumbs and Awesome Kids

Leave a Comment

« Potted Bulbs
Point of View Organization Features »

Leave a Reply Cancel reply

Your email address will not be published. Required fields are marked *

This site uses Akismet to reduce spam. Learn how your comment data is processed.

Hi, I'm Stephanie - Welcome to Crafting in the Rain where I've been blogging about the crafty life since 2011. Read More…

Archives

  • Home
  • About
  • Contact
  • Disclosure
  • Index
  • Privacy Policy

Stephanie Paxman is a participant in the Amazon Services LLC Associates Program, an affiliate advertising program designed to provide a means for sites to earn advertising fees by advertising and linking to amazon.com.

Copyright © 2011-2023 Crafting in the Rain