This post is sponsored by Duck Tape. All thoughts and opinions are my own.
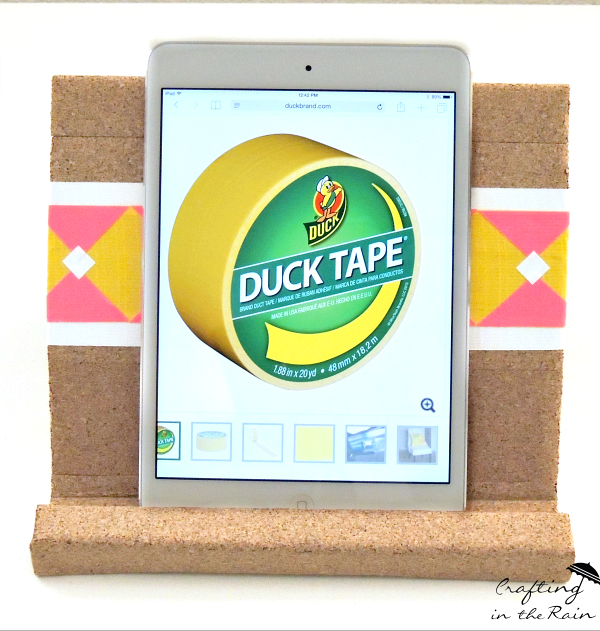
Duck Tape rules the school when it comes to DIY school supplies, and I’ve got a fun project to share with you today. It’s a Duck Tape tablet stand!
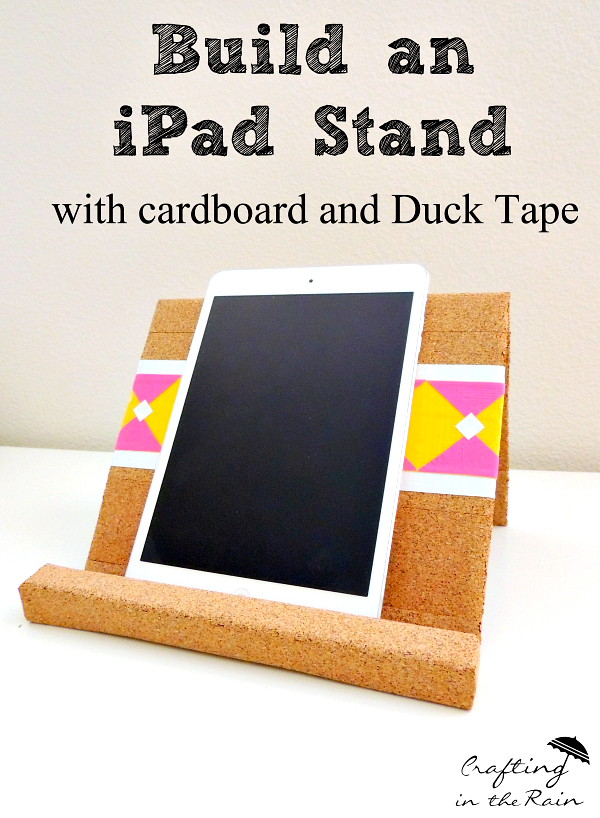
I built mine using cardboard and Duck Tape, and it’s just the right size for holding my iPad mini. If ‘you have something larger you may want to increase the stand size a little.
Here’s what you’ll need:
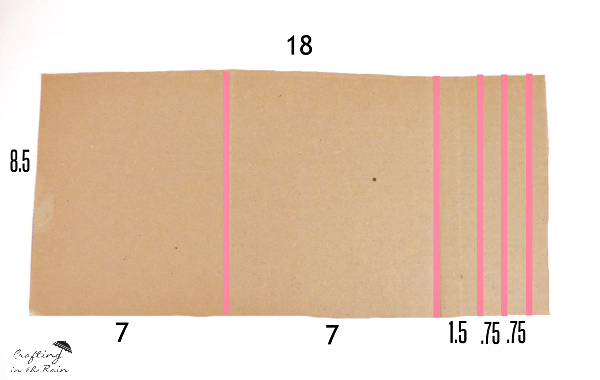
Cardboard rectangle, cut to 18 inches x 8.5 inches
Duck Tape (I used cork, white, yellow and pink)
Glue gun

Start by making some fold lines in the cardboard. See the following picture. You want lines 7 inches from the left, then 7 more inches, then 1.5, and finally two .75 inch spaces. To make my crease marks I lightly ran a blade along a straight edge after measuring. You don’t want to actually cut through any of the cardboard, just make it easier to fold.
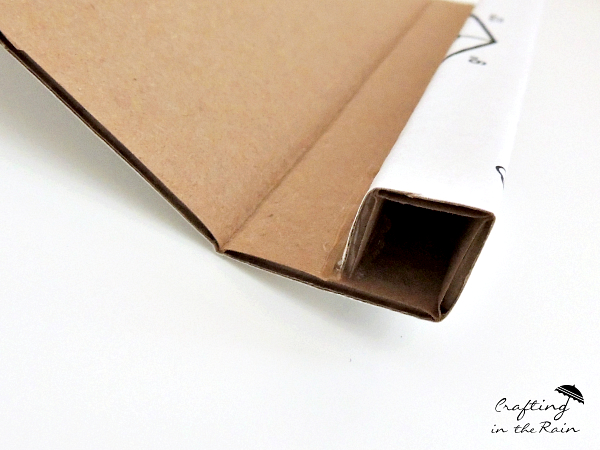
The first line you scored will be a mountain (make a peak) fold. All the other lines are valley folds. The right end folds into a cube like this, which will keep your screen from sliding off the end. Feel free to trim that end piece if you nee d to, to make a nice cube shape. Secure the folded end to the main cardboard piece with a line of hot glue.
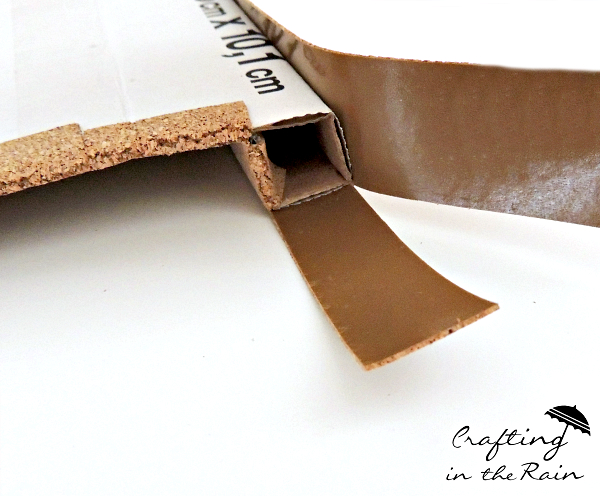
Now it’s time for the fun part: decorating the stand with Duck Tape. First cover the whole stand with strips of the cork Duck Tape, folding over in the back.
I admit this end was tricky, but just make a cut in the Duck Tape so there’s a nice piece to fold over and cover the edge.
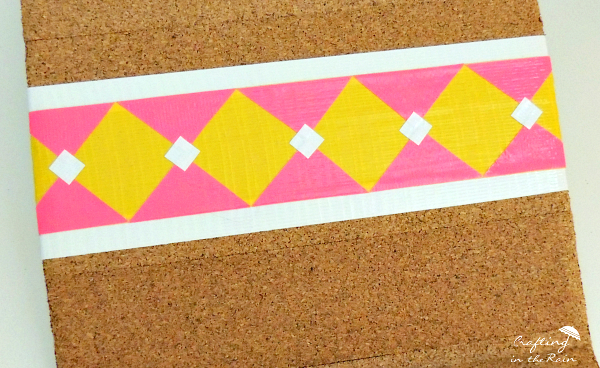
Decorate the stand anyway you like. I decided to make this pattern by first laying down a strip of pink tape. Then I cut narrow stripes of white for the top and bottom. To make the design, I cut yellow squares of tape and then small white squares to add on top.
To keep the stand from flattening out as soon as a device is placed on it, tape must hold the front end and back end together. Then add a piece of tape on top of the exposed sticky side so it can’t accidentally stick to the inside of the stand (or collect dirt.)

What do you think? Will it make the perfect Duck Tape school supply for you? I’d love to hear how you would decorate it….or better yet, make one and show picture!
Follow the Duck Brand Pinterest page for more amazing Duck Tape craft ideas
27 Duct Tape Crafts for a Sticky Situation
Saturday 8th of May 2021
[…] Credit: craftingintherain.com […]
27 Duct Tape Crafts for a Sticky Situation - Craftsy Hacks
Thursday 15th of April 2021
[…] Credit: craftingintherain.com […]
Kelly
Monday 6th of April 2020
Omg you have saved my life lol and my kids!! I made one this afternoon when I finally was fed up of my little boy getting mad every time his iPad slipped over! So easy and basically free, had everything right here. I adapted mine to be a little shorter as the iPad is mainly in use horizontal. I also scored then taped the whole cardboard piece (in black duct tape) front and back to make it really kid-proof/splash proof etc! I used ribbon as the binder between the A-frame. Thank you for your clear instructions :)
Kimberly Lewis
Sunday 30th of August 2015
Loving this! You are so talented. Thanks for sharing this at our party. Pinned and tweeted. I hope to see you on Monday at 7 pm, so we get to party with you again! Lou Lou Girls
Donna Wirthlin
Tuesday 25th of August 2015
VERY unique! Hope you will share at our party #OMHGWWhttp://twochicksandamom.blogspot.com/2015/08/oh-my-heartsie-girl-wordless-wednesday_24.html