If you love Disney princesses–or jewelry–or especially both, you will love today’s post! These DIY Disney Princess Necklaces designs are inexpensive and easy to make.

I had this idea a while ago to paint some wood beads to represent one of the princesses. As I worked on it, the idea grew.
I looked up dozens of pictures online to best capture the different character’s color palettes and design features.
A set of princess necklaces would be perfect for a trip to Disneyland, party favors, or the finishing touch to a princess costume.
Supplies for DIY Disney Princess Necklaces
- Craft paint in your chosen colors
- Small paint brushes
- 3/4 inch wooden beads
- Wooden skewers – for holding the beads while painting
- Ribbon 5/8 inch wide

Take the quiz
Can you tell who I had in mind when I made each one? Make your guesses then check the answers below.

.
.
.
.
.
.
.
.
.
.
.
.
.
.
.

Did you get them all right?
Now I’m sure you can tell just by looking at the pictures what kinds of colors I used, but I thought I’d go ahead and give you the “recipes” here too:
NOTE: Some people have wished I used different colors – so here’s the beautiful part, you can change them up if you want!!
Snow White 2 dark blue, 2 red, 1 dark yellow
Ariel 3 purple, 2 dark green
Belle 3 light yellow, 2 dark yellow
Sleeping Beauty (Aurora) 3 white, 2 light pink
Jasmine 3 turquoise, 2 gold
Merida 3 dark blue, 2 reddish-orange
Rapunzel 3 purple, 2 light pink
Cinderella 3 white, 2 light blue
Pocahontas 2 tan, 2 brown, 1 turquoise
Tiana 3 light green, 2 dark green
Mulan 2 light blue, 2 dark pink, 1 purple
Update to princess bead necklaces
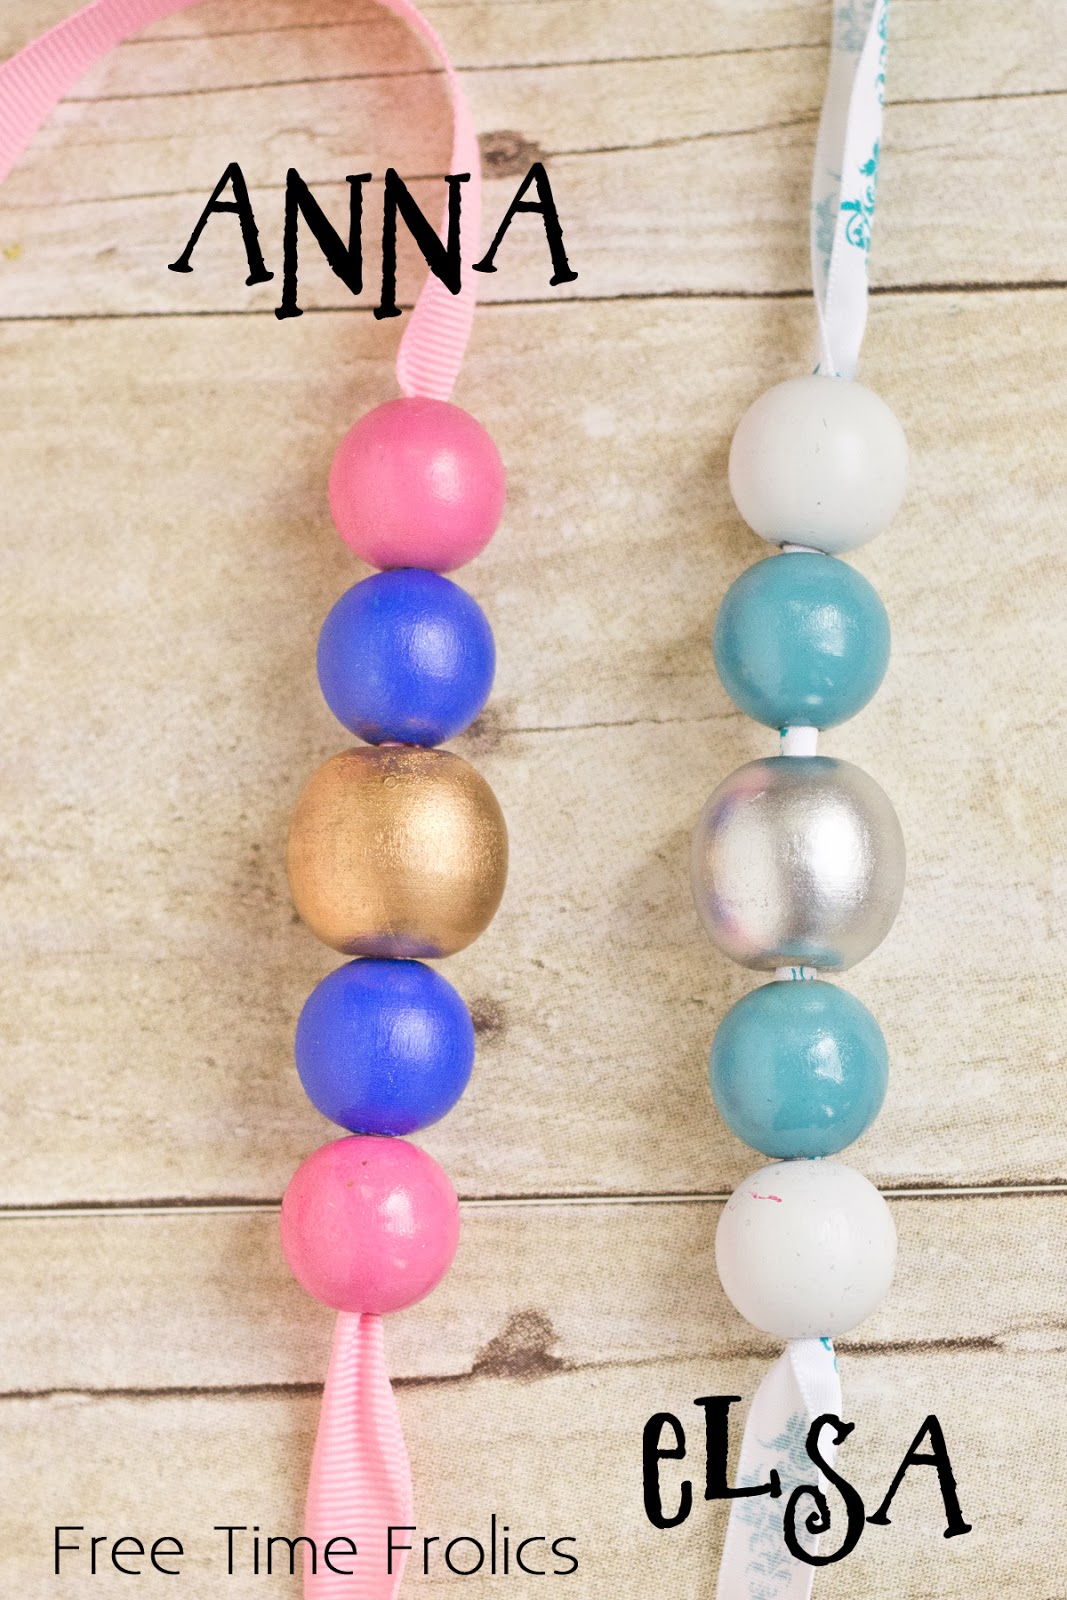
Adrienne from Free Time Frolics made Anna and Elsa necklaces! Go check them out.
Since I first published this princess necklace tutorial, we’ve added a few more heroines to our Disney lineup.
Here are some suggestions – let me know in the comments if you have other additions or color recommendations!
Moana: Rust, Brown, Cream
Mirabel: Lime green, Teal, Fuschia
Raya: Turquoise, Red, Tan
Vanellope von Schweetz: Red, Light green, Orange, Pink, Blue
To make one, hold wood beads onto a skewer and paint the desired color. Some of the lighter colors may need two coats.
Measure desired ribbon length around neck and add 2 inches (if you don’t want to re-tie them every time, make sure you have it big enough to slip over the head)
Using a match or candle, very carefully melt the ends of the ribbon so they don’t fray. When beads are dry, thread them onto the ribbon and tie ends in a knot.
Do you have a trip to Disneyland coming up and you’d like a way to get discounted Disneyland tickets? I’m an affiliate with Get Away Today. Check their current Disney and Southern California vacation packages.

And if your princess needs her own castle, find out how I made this cardboard castle for a birthday party a few years ago.

Courtney
Wednesday 7th of March 2018
Love these Stephanie! The colors are perfect and look so fun to make. I'm going to have to make the Snow White one.