• About
  • Contact
  • Shop
    • Facebook
    • Instagram
    • Pinterest
    • YouTube
  • Crafts
    • Disney
    • Kids
    • Sewing
  • Holidays
    • New Year
    • Valentine’s
    • St Patrick’s
    • Easter
    • Mother’s and Father’s Day
    • July 4th
    • Halloween
    • Thanksgiving
    • Christmas
  • Cricut
  • DIY
    • Cleaning
    • Organization
    • Projects
    • Scroll Saw
  • Downloads
    • Printables
    • SVGs
  • Recipes
  • Life
    • Family
    • Fashion & Beauty

Crafting in the Rain

Business Card Holder

Sewing

This post may contain affiliate links. As an Amazon affiliate, I earn from qualifying purchases. I receive a small commission at no cost to you when you make a purchase using my link.

17 Feb 2012
  • Share
  • Tweet

I started blogging a year ago tomorrow. And what a fun year it’s been, writing this little blog of mine!

No fancy parties or gigantic giveaways, but thanks for coming and reading.  It makes my day!

So, I’ll give you this project instead, as my free gift–no purchase necessary.

 
Pin It

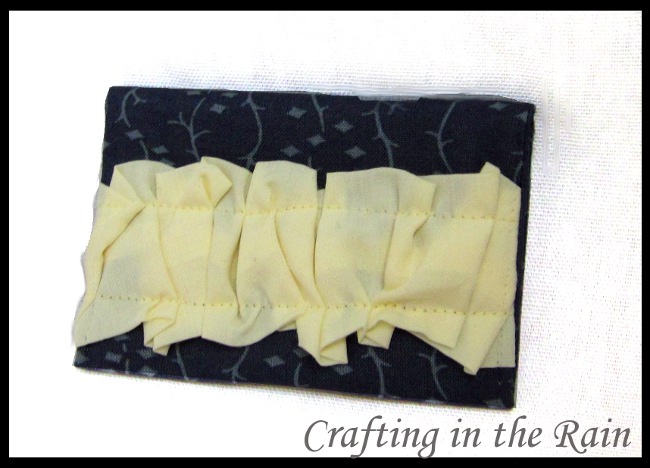
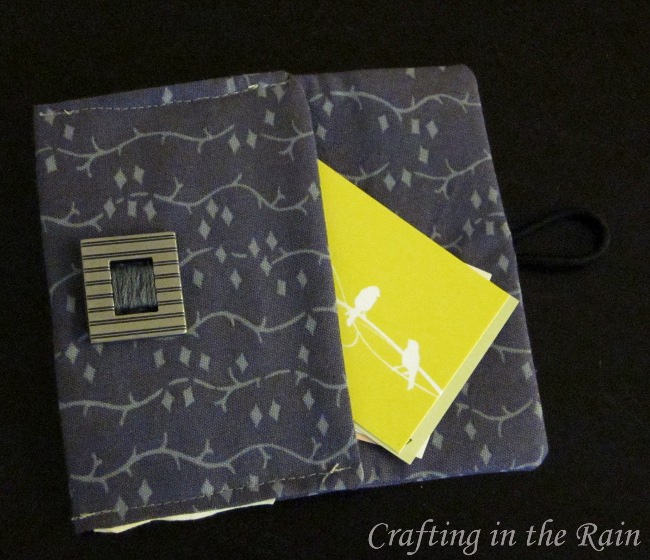
I keep thinking I should make up a few cards to take with me to SNAP in a couple of months.  I haven’t actually done that yet, but just in case I do, I now have a cute holder for them.  And isn’t that what’s really important?

Here’s how I made mine:
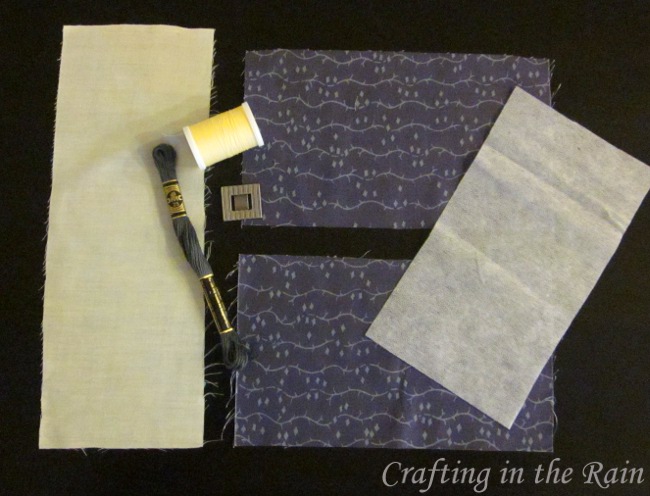
inner fabric 8×5 inches
outer fabric (mine was the same, yours can be different) 8×5 inches
fusible interfacing 7.75×4.75 inches
ruffle fabric 4×14 inches
elastic (hair tie)
ribbon slide (or regular button)
thread
embroidery thread (optional)


  • iron interfacing to the wrong side of inner fabric
  • sew ruffle fabric into a tube, right sides together, turn right side out
  • pin ruffle fabric onto the right side of outer fabric, 3.25 inches up from the bottom


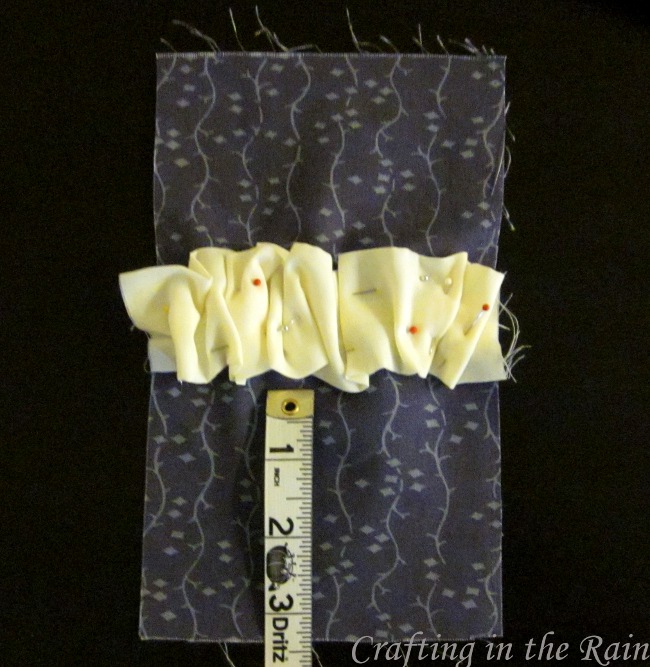
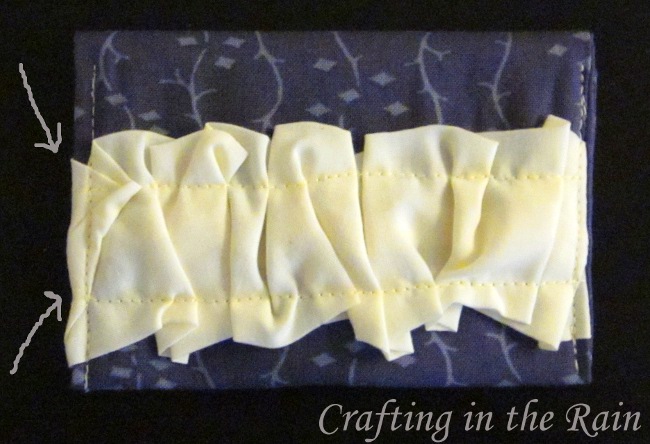
  • sew ruffle fabric on–once down the middle for a regular looking ruffle or close to the edges to create a “smashed” ruffle like mine


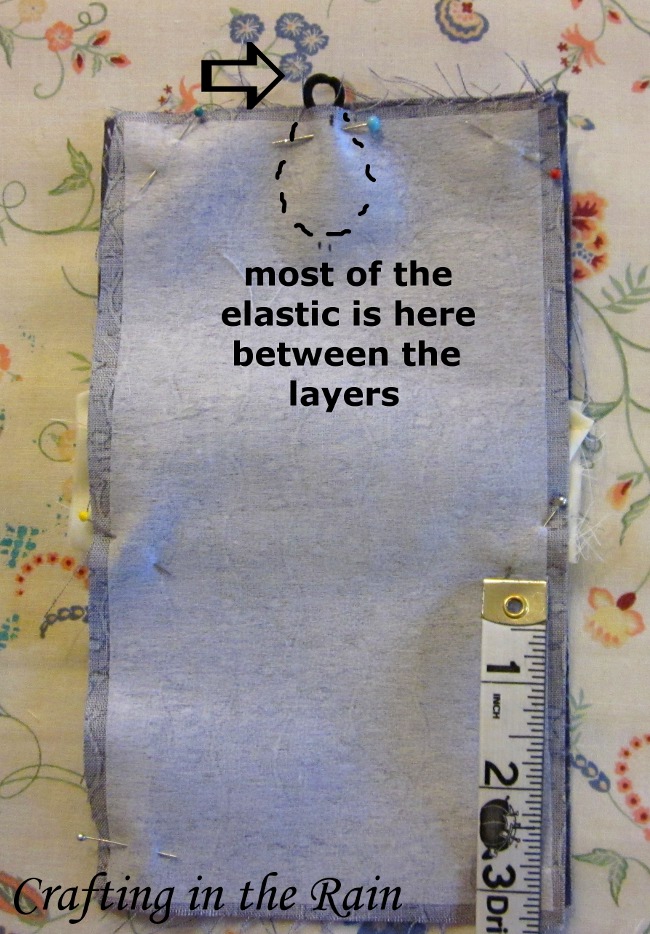
  • pin hair elastic to the top of the outer fabric so that some sticks to the inside (right side)


  • pin right sides together, 1/4 inch seam, leaving an opening to turn right side out
  • fold up the bottom to see where your ribbon slide or button should be placed
  • sew on–I used embroidery thread to attach my ribbon slide


  • fold up the bottom and sew, close to the edge, to create the pocket 


  • and you’re done!

Fill it up with cards that you can give me if we meet at SNAP.

Related Posts:

  • 15 Profitable Business Ideas You Can Make with xTool
  • DIY Test Tube Holder
  • DIY Magnet Cord Holder

Leave a Comment

« Some Things I Know
Fala Portugues? »

Leave a Reply Cancel reply

Your email address will not be published. Required fields are marked *

This site uses Akismet to reduce spam. Learn how your comment data is processed.

Hi, I'm Stephanie - Welcome to Crafting in the Rain where I've been blogging about the crafty life since 2011. Read More…

Archives

  • Home
  • About
  • Contact
  • Disclosure
  • Index
  • Privacy Policy

Stephanie Paxman is a participant in the Amazon Services LLC Associates Program, an affiliate advertising program designed to provide a means for sites to earn advertising fees by advertising and linking to amazon.com.

Copyright © 2011-2023 Crafting in the Rain