This post is brought to you by FloraCraft® as part of their Make it: Fun® Team.
It’s Halloween crafting time! I made a Halloween sign and it’s all out of foam.

Supplies:
FloraCraft® Make it: Fun® foam block 18″ x 12″ x 1″
FloraCraft® Make it: Fun® foam discs 10″ and 8″
Design It:® Simple Style® burlap garland
Design It:® Simple Style® LED light strand (2 strands)
FloraCraft® Smooth Finish (two containers)
Paint (black, orange, brown)
Vinyl, black
Paint brush
Painters tape
Glue gun
FloraCraft StyroCutter Plus
Sand paper

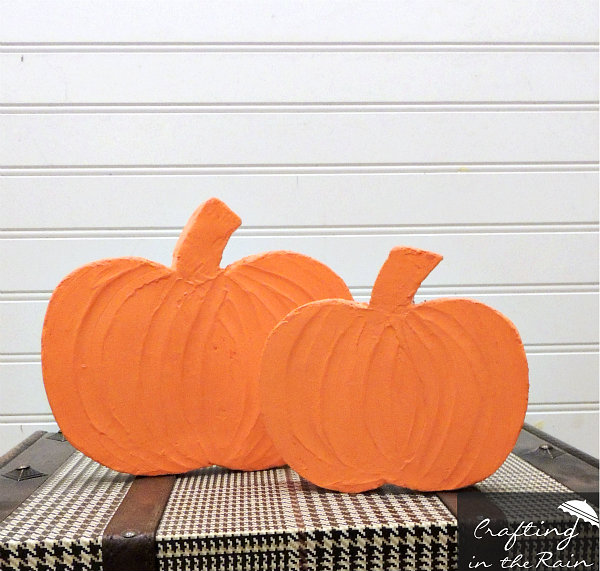
Start by heating up the StyroCutter and sketch out two pumpkin shapes on the foam rounds. Use the cutter to cut away the extra foam. Use sand paper to smooth out the shape.

Spread Smooth Finish over the top and edges of the large foam piece and the two pumpkins. I noticed that one of my jars needed just a teeny bit of water added to it. If it’s clumping up at all as you’re trying to spread it, then add a little water.

Let dry, and add another layer to the top of the rectangle, making is as smooth as possible. On the pumpkins, drag some curved lines through the Smooth Finish. Once that’s all dry again, lightly sand.
Paint pumpkins orange and brown. On the rectangle, mark out 2 inch stripes and paint 5 of them black.
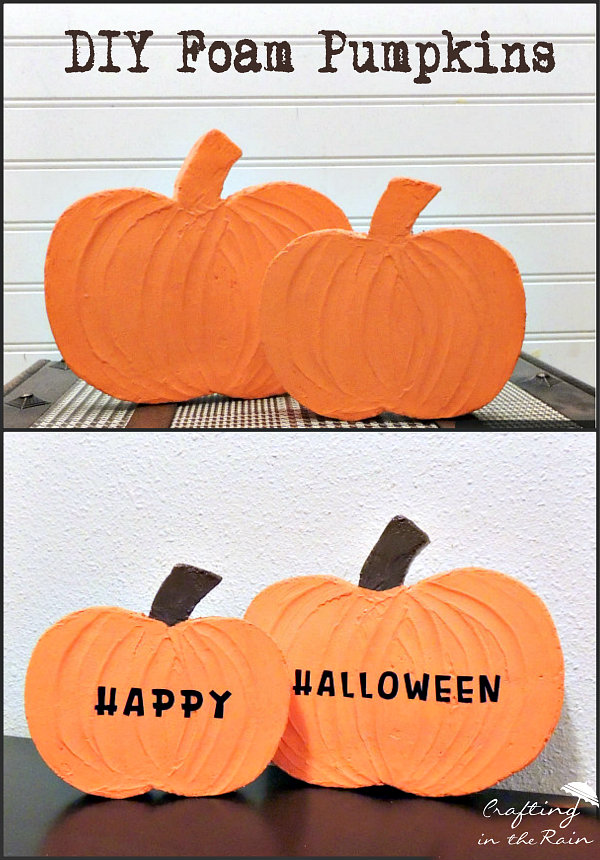
Add Happy Halloween vinyl to the pumpkins. Use hot glue to attach the light strands around the edge and stick the battery pack of each strand into the back side of the foam.

Cut a piece of the burlap garland and glue to the back of the foam board and use to hang from the door. As the sun goes down, twist the lights on and enjoy your festive door!
The pumpkins could stand alone as their own decorations too.
So, what do you think?
