Partnership with Munbyn. All thoughts and opinions are my own. Get a Munbyn coupon code at the bottom of the post
Introduction
Ever wished you could make DIY custom labels without using so much printer ink? Or maybe you’ve made some with your Cricut before, but it takes so much time to print, transfer to mats, let the Cricut scan and cut each one, and then carefully remove them from the mat without damaging them?

A Munbyn thermal printer is your solution! Here’s what you need to know:
Supplies for making fast printed sticker labels at home
- Paper bags – choose the size you need – party favor bags, larger gift bags, I’m using 6-inch bags because they will fit our smaller products nicely.
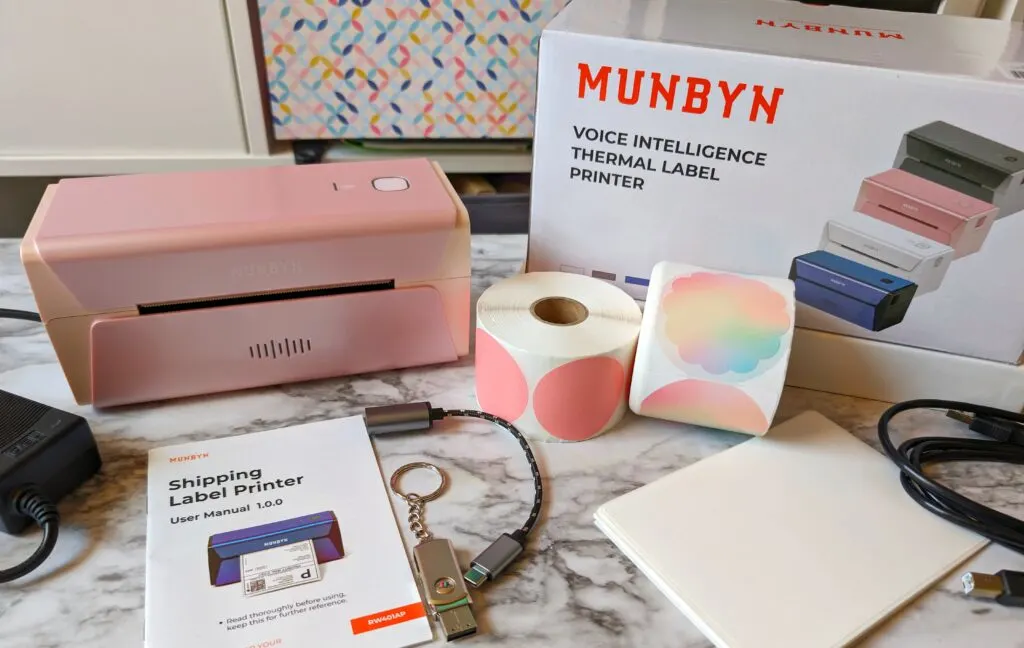
- Labels – I’m using the Rainbow Scalloped Round Thermal Sticker Labels, and the 2-inch Pink Circles.
- Munbyn RealWriter 401 AirPrint
Munbyn provides variety of shapes, sizes, and colors so you’re certain to find what you need. I can use the large 4×6 white labels for printing shipping addresses, and the smaller labels will work perfectly for logo stickers and thank-you stickers, like you’ll see below!
Brainstorm all your own ways you could use these lables as well.
- Product information, ingredients and instructions
- QR code stickers
- Personalize belongings
These labels are also waterproof so you can use them on bath products, or other containers that might get wet. Browse thermal sticker labels here.
Designing and Printing Thermal Labels
I’m going to show you how I printed some personalized sticker labels all from my phone.

The Munbyn printer can also print from a computer or laptop, which will be great when I use it for printing my Etsy shipping labels.
You’ll get cords necessary for connecting to different devices, plus of course the power cord and some labels to get started.
Using the Munbyn app
Download and open the Munbyn app. Make sure your phone Bluetooth is on, and that the printer is plugged in and turned on.

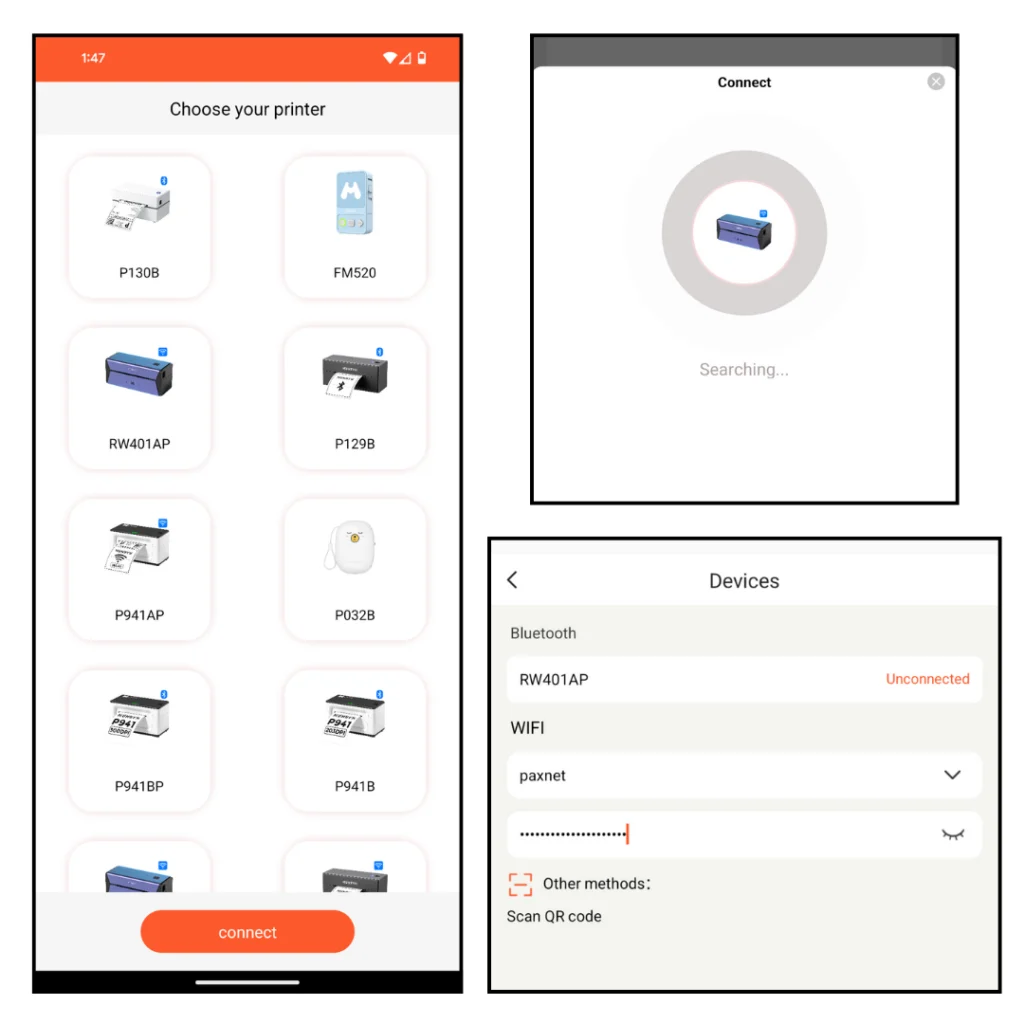
Go to your Bluetooth settings and connect to the printer – look for the letters and numbers on your printer to select the correct machine.
You’ll need to enter the password of your home wifi so the printer can connect to it.

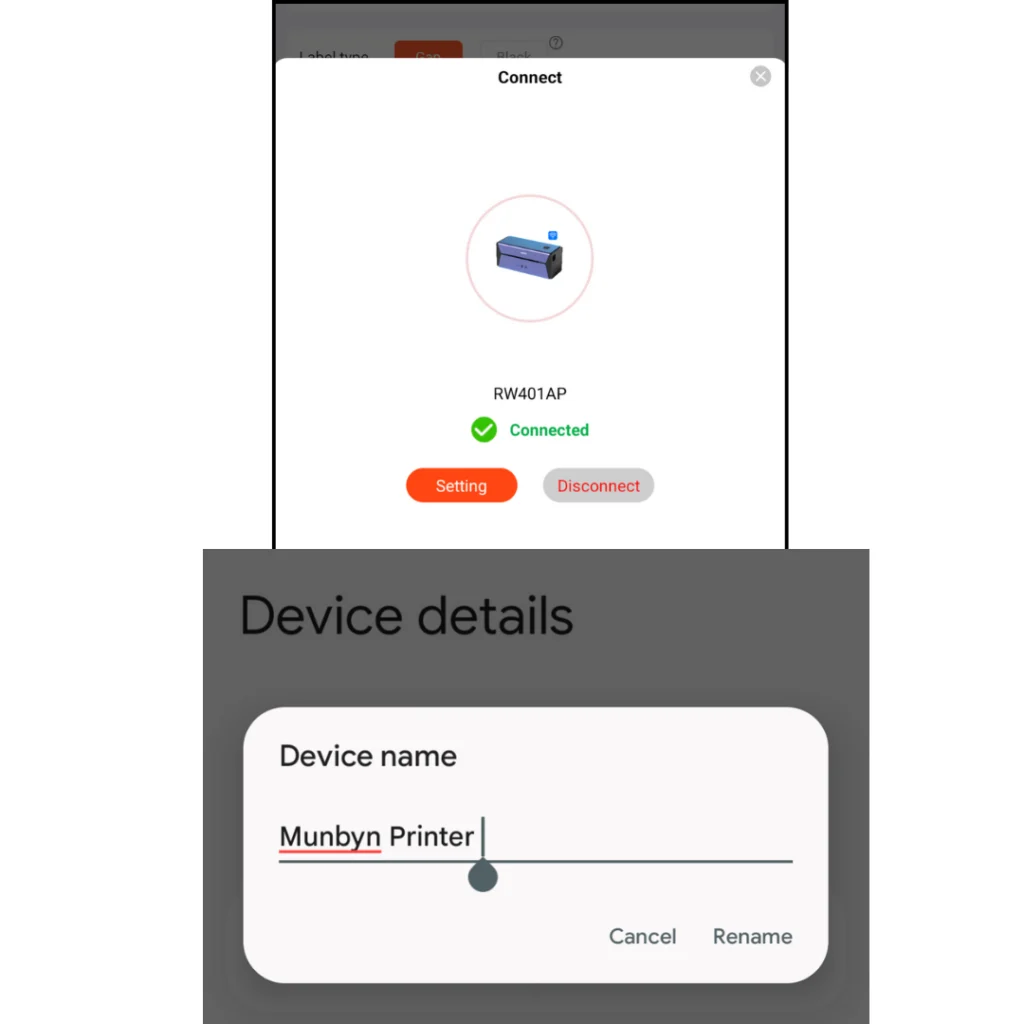
I also used this as time to rename the device, so I don’t have to remember those numbers and letters later.
Here’s a great YouTube video from Munbyn on the connecting process too.

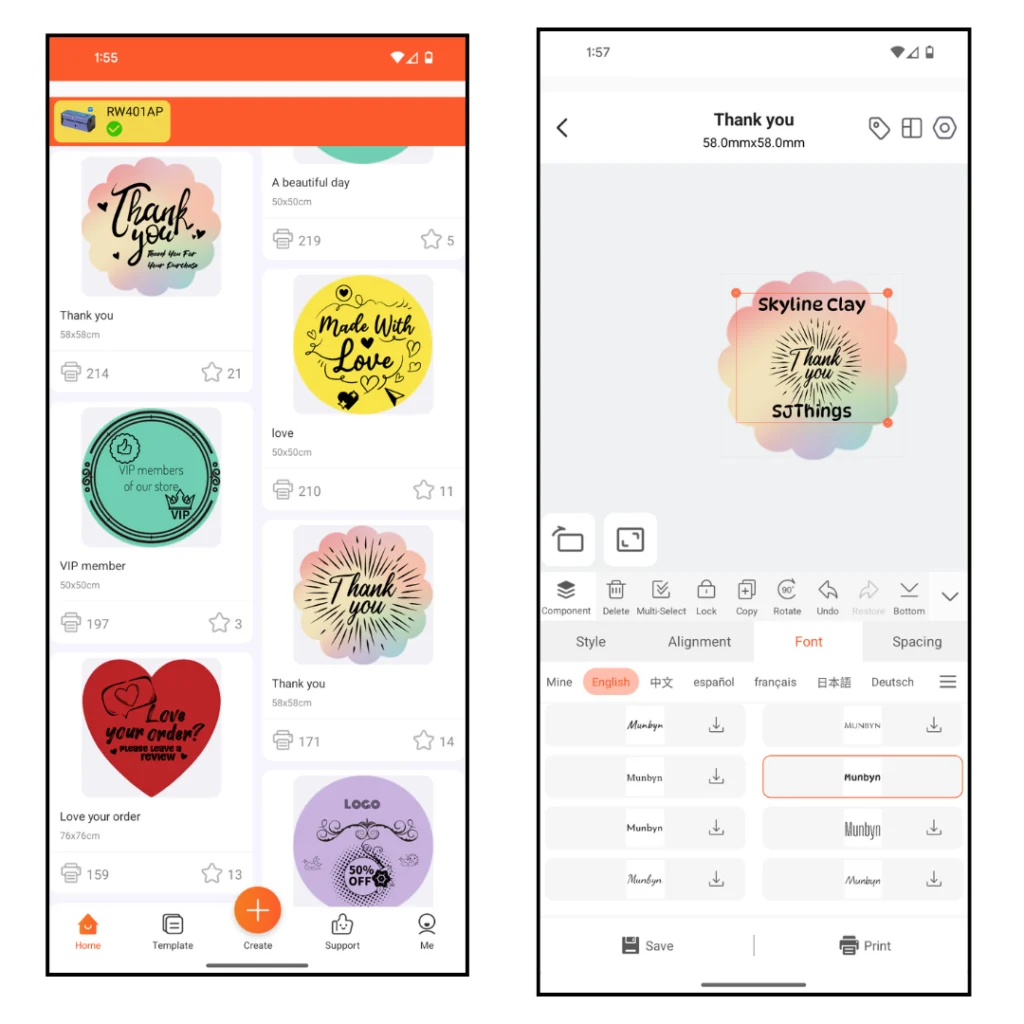
You can design all kinds of labels and stickers inside the app – lots of preloaded options, and you can upload your own designs as well.
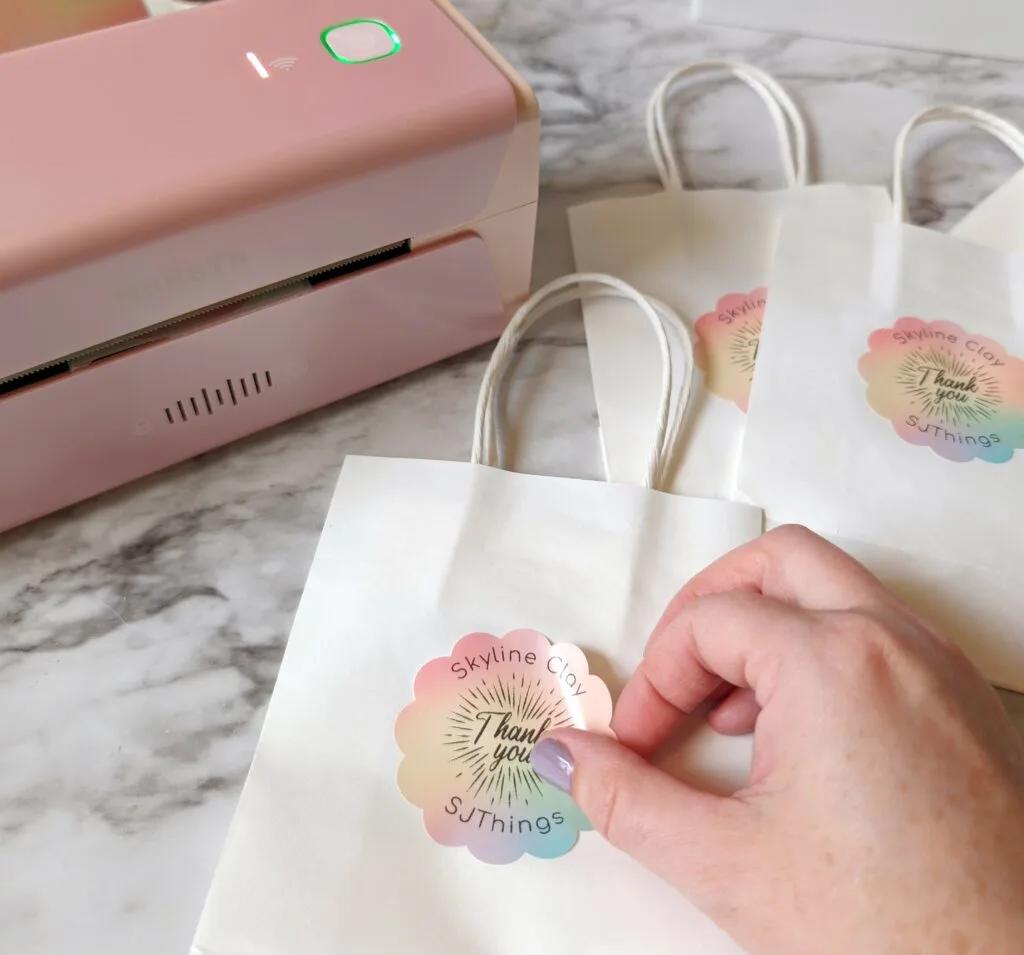
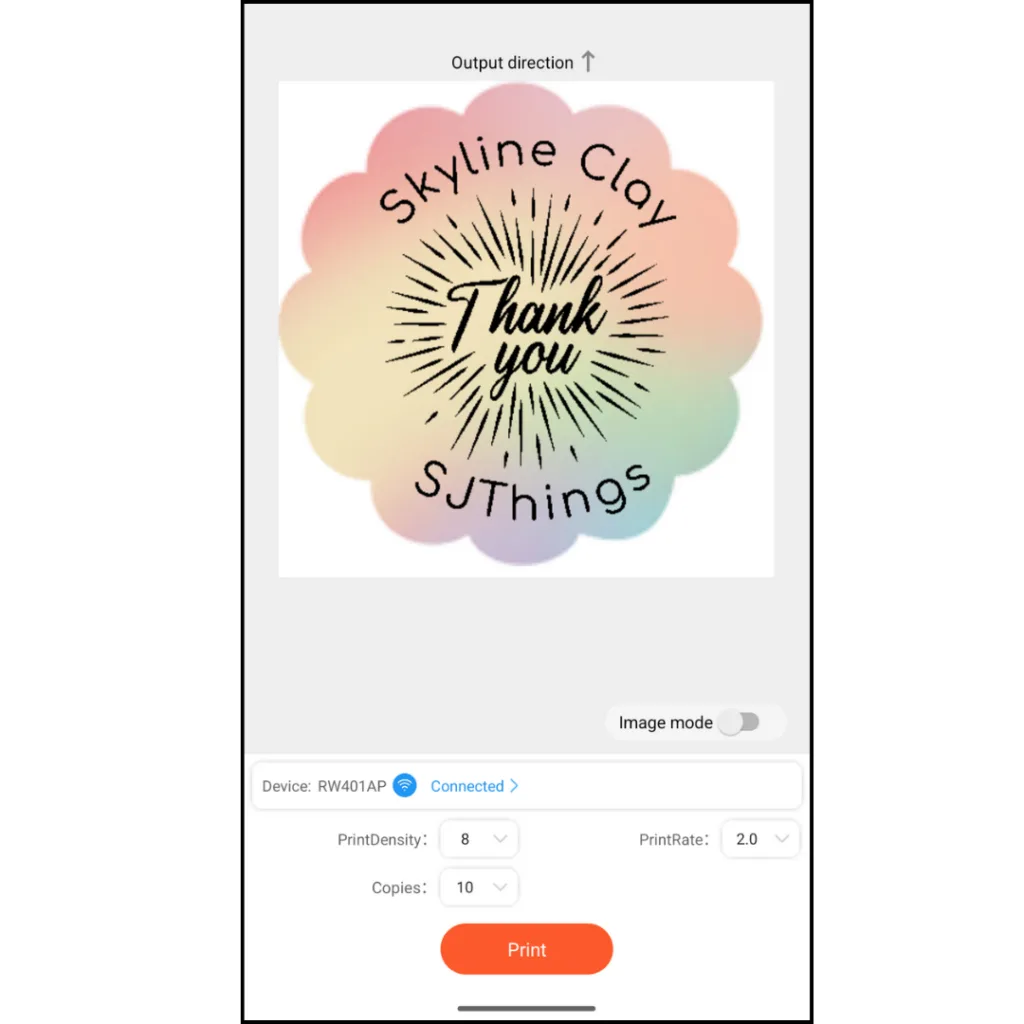
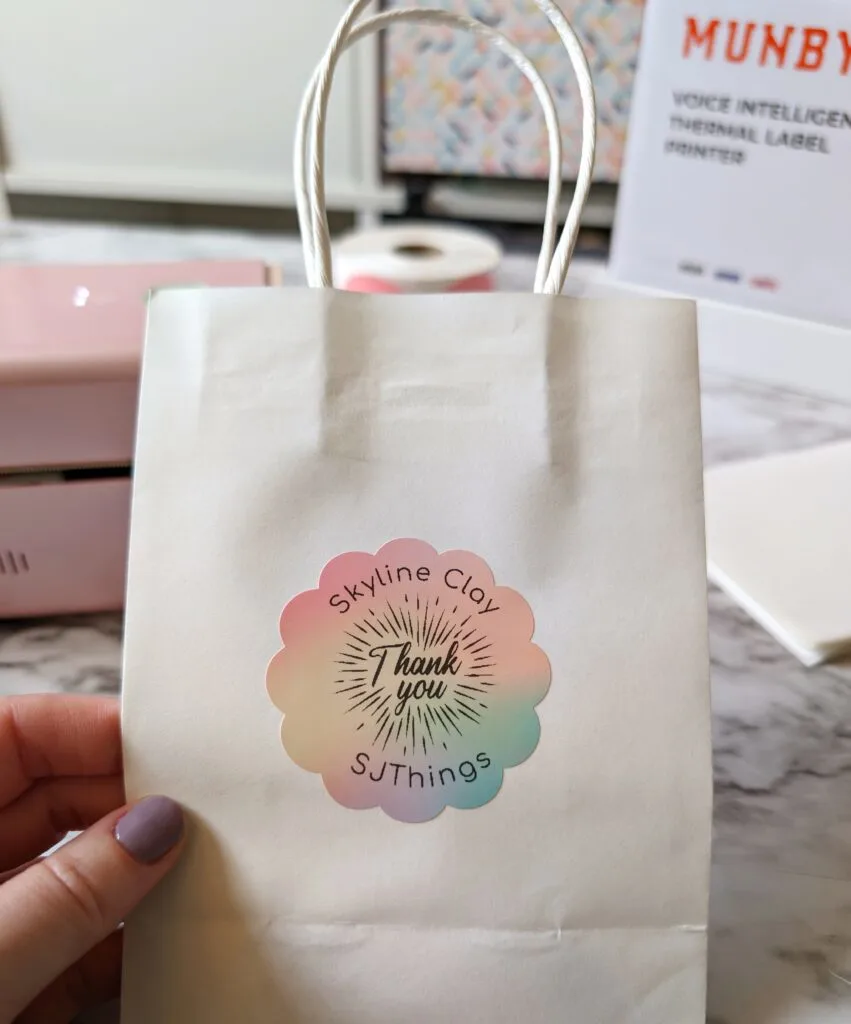
I started with this Thank You design and the rainbow scalloped stickers. my husband and I are doing a couple of craft fairs together – me with my polymer clay earrings, and him with 3D printed and lasered items. I added the two shop names so we can use these bags together.

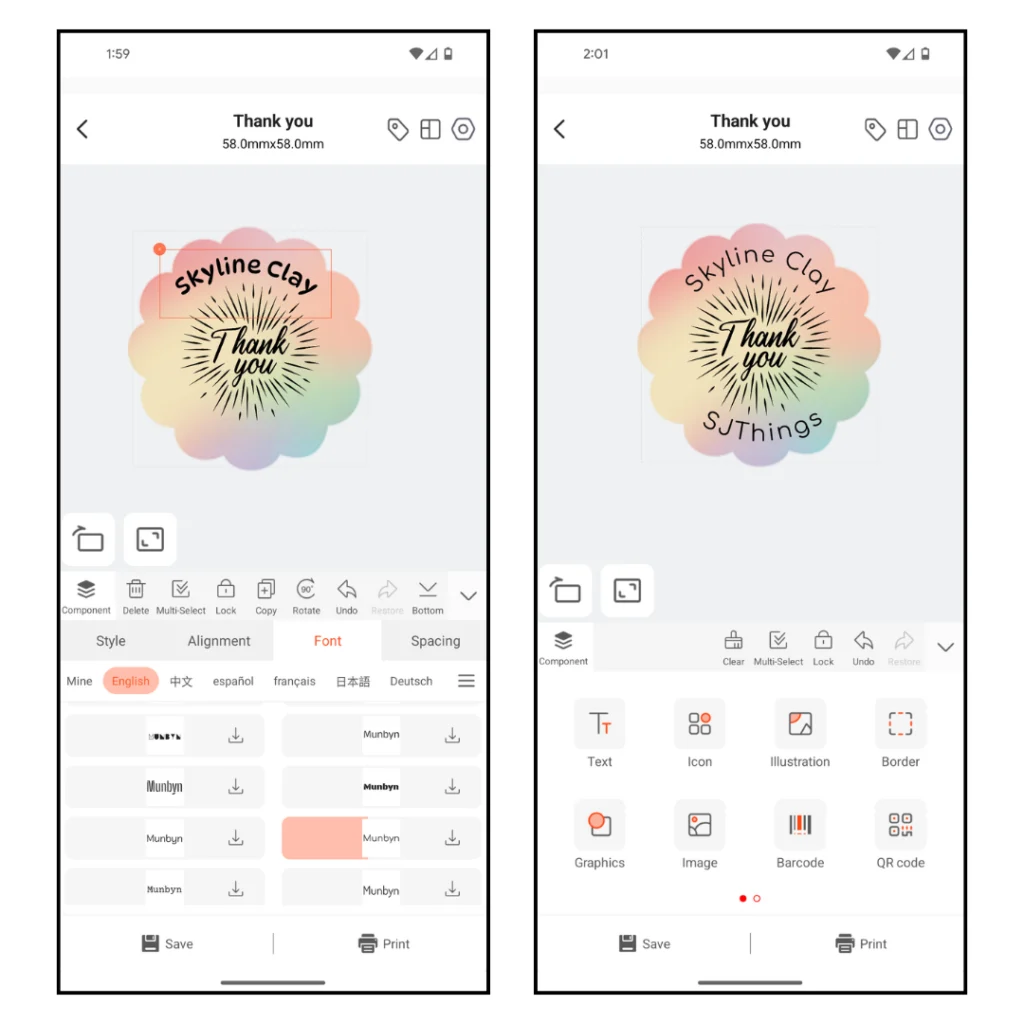
It’s pretty intuitive to find where to add and edit different things in the design. Change the size of elements, download new fonts from Munbyn, and then you can edit text spacing, curve it, etc.
When I had the sticker design how I liked, it was time to load the sticker roll into the machine.

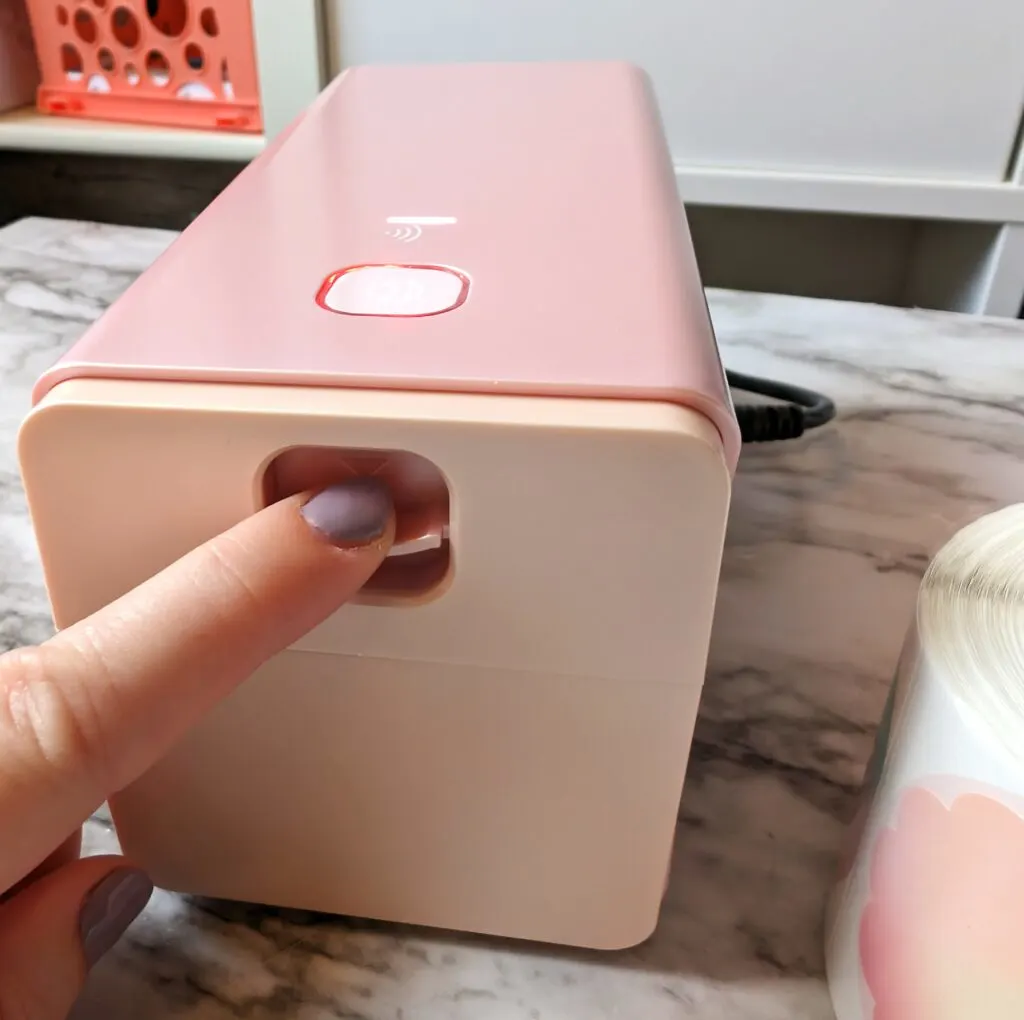
Just push down this small lever on the side, and it pops open. Then pull it the rest of the way open and tuck an end of the labels between the guides.

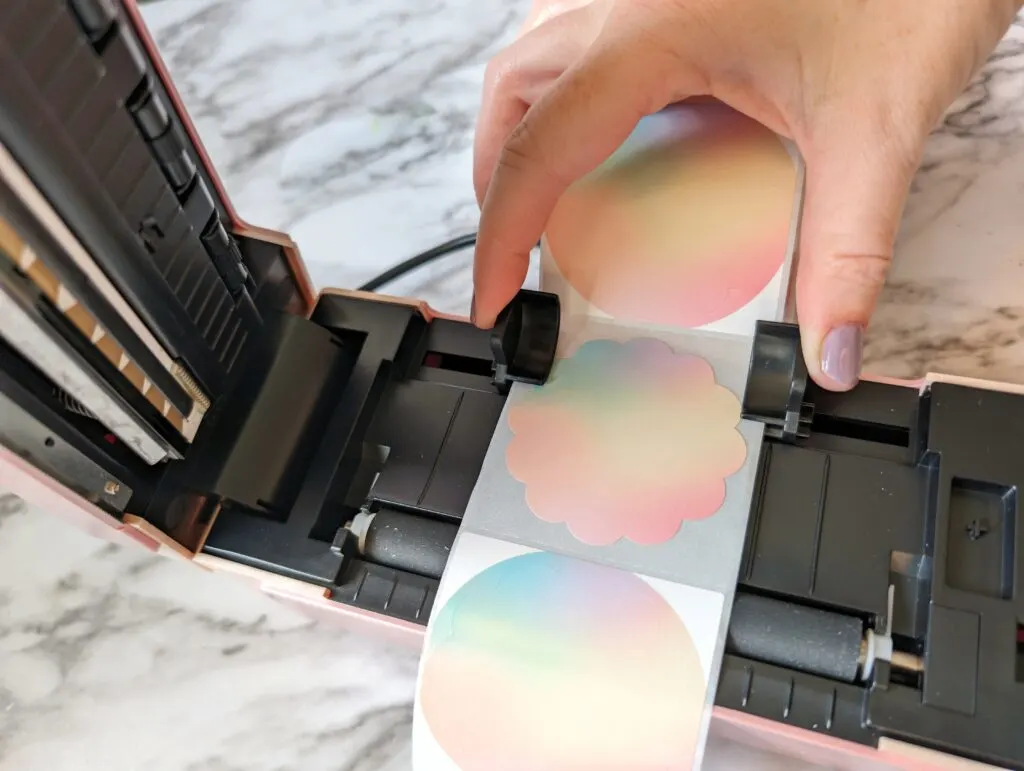
They pinch in easily – you want it to hold the edges of the strip but not put so much stress that it causes wrinkles.
Close the lid so it snaps back down and click print in the app.
You’ll be able to choose how many copies you want, and also print rate and density (learn more about those settings on the Munbyn site here.

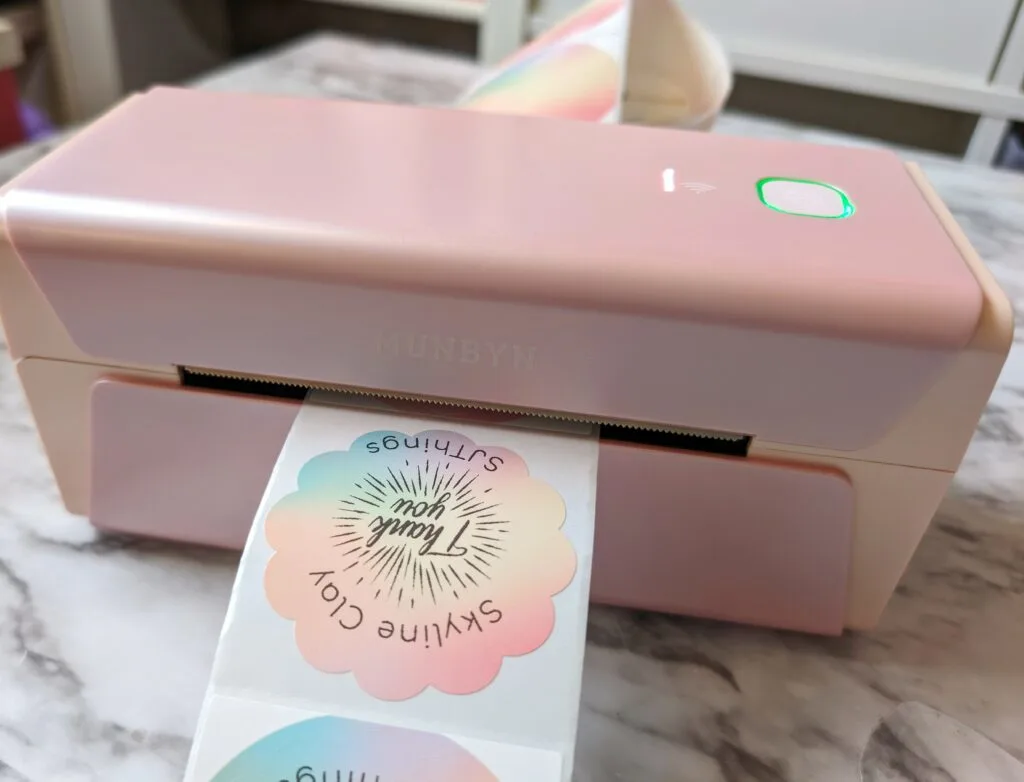
Then almost like magic, the printer starts spitting out completed stickers! The Munbyn thermal printer will print a label per second.
This was quicker than designing this all out for a Cricut Print then Cut project – plus it uses no ink! And you can see in the photos that it’s nice and compact. It won’t take up much space in my room!

After making the labels for our bags, I use the pink circles to make some labels that I will use when I send out clay earrings from my shop.

I uploaded an image of my logo – it’s just black and white so it worked great.

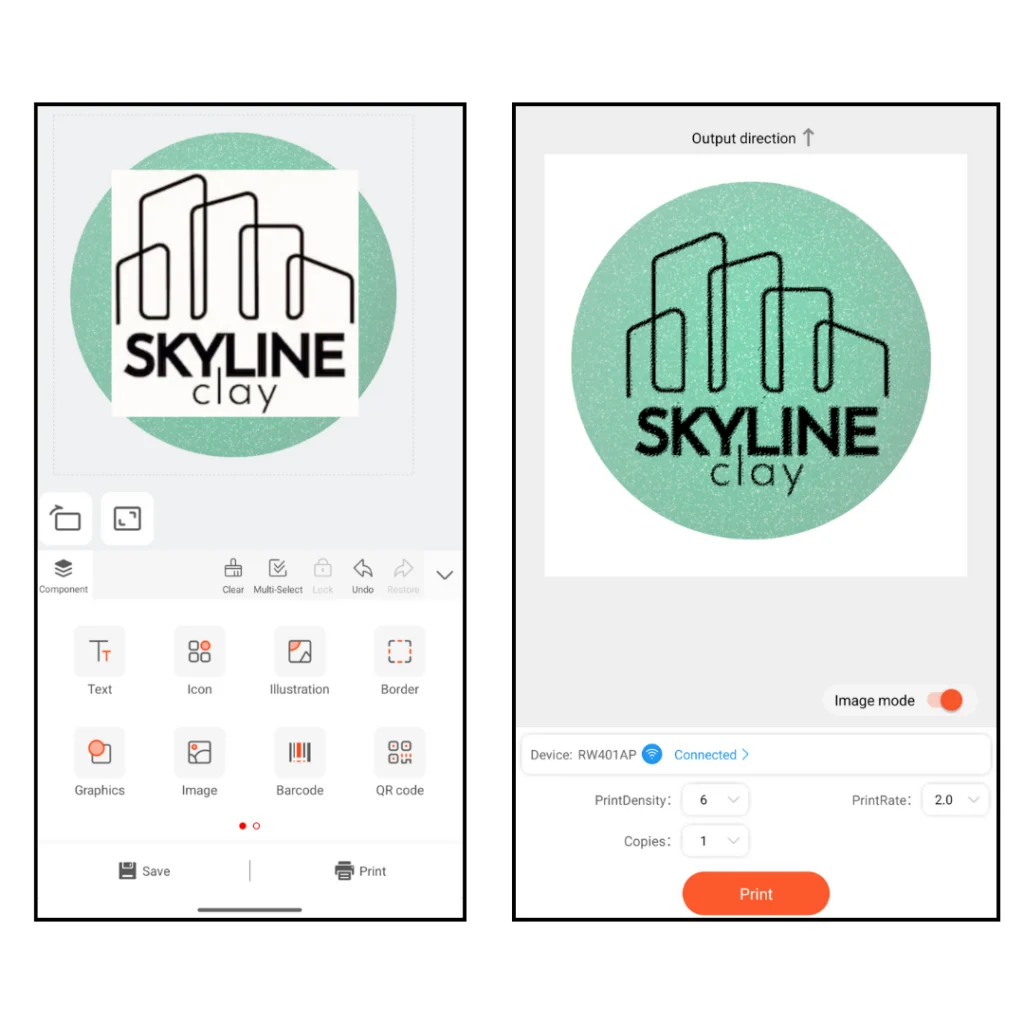
You’ll see that when I bring it in, it has the white background, but after I have it sized and positioned and move to the next screen, all that will print is the black.
I printed out several so they will be ready to go on my next orders, and I saved the design in the app as well so it will be so fast to make more again.


Benefits of a Wireless Thermal Printer
Printer high resolution
The Munbyn thermal printer uses 300dpi. This high resolution means you’ll get clear prints every time.
Speed of thermal printer
Munbyn thermal printer can print up to 60 labels per minute. This fast speed will save you lots of time whether you’re working on packaging, party prep, or anything else.
Cost saving of thermal printer
Have you ever cringed at the price of replacing ink cartridges on your regular printer? You don’t have to worry about that at all here – no ink is required!
Space-saving design
This printer is nice and compact, meaning it can sit on the side of my table, or tucked in a shelf. The wireless technology means I only need to be able to plug it in to power, and not worry about cords and cables connected to my computer or phone.
Thermal printer for shipping
I love this speedy thermal printer, and I’ll be using the 4×6 labels when I’m mailing out my clay earrings.

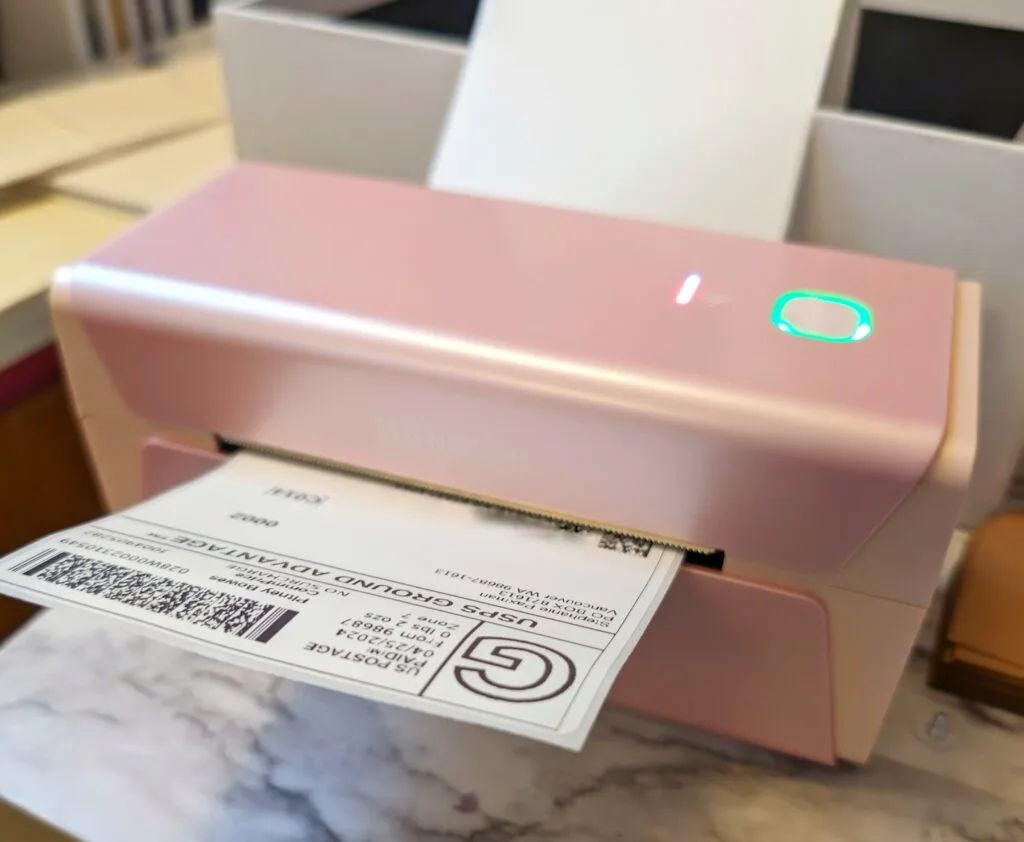
Remember that when creating your label, either direclty from Etsy, or some another postage service like ShipStation, make sure that you select this label size when setting up the address label.
By default, at least on mine, it wants to print on 8.5 x 11 regular paper, and if you set up a label that way but send it to your thermal printer, it will print sideways, cutting off some of the label as well.
Final thoughts
This particular model is also voice activated! It announced to me when it was connected to Bluetooth (which was super helpful since I had struggled with that at first, so it was great to know when it worked) It will also tell you when it’s out of labels.
You can tell it things like “print test page” and “learn label.” If you’re not interested in those features, just say “turn off voice.”
So, after going through this tutorial, do you have any questions for me? I’m happy to help out! If you’re looking for a wireless label printer, this is going to be a great addition to your hobby or business!
Munbyn Coupon Code: BLOG12OFF to save 12% on any order, no minimum, US only.