I’m still learning stuff too! Like when I figured out this Cricut slicing hack the other day.
I’ve been a Cricut user for over 15 years – we’re talking back to cartridge days.
So I feel pretty confident being able to teach. But I’m happy to still be a learner, too.
Sometimes it’s something I learn watching someone else, and sometimes I figure it out on my own.
Today’s tip is the latter – I stumbled upon it while doing some slicing, and it’s so useful!
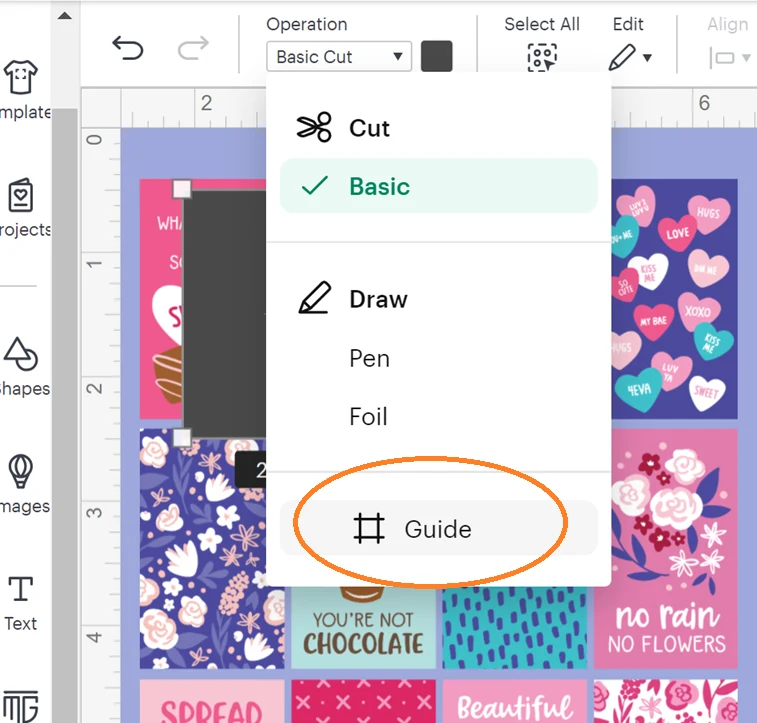
You can SLICE using any shape that’s a GUIDE, so you can line things up better!
Here’s what I mean. Last week I was using newly created washi tape shapes to slice from patterns on an image.
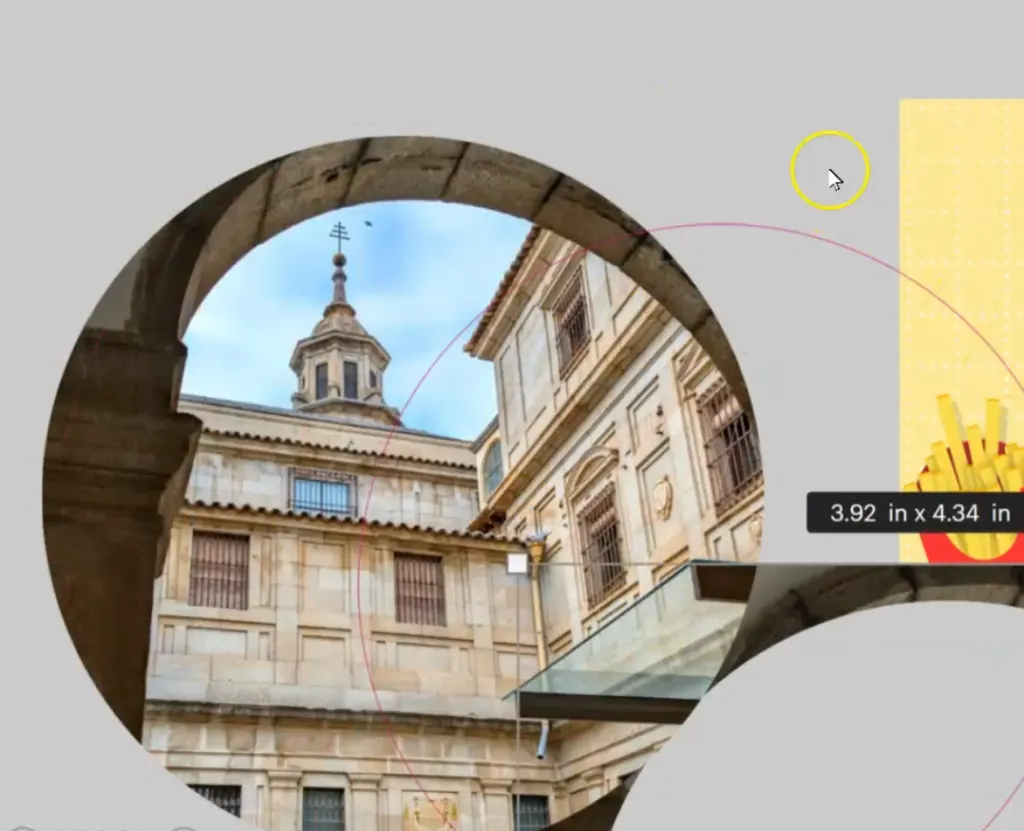
I have used circle shapes to slice a face from a photograph. I have used squares to slice and delete stickers I didn’t want to print but were attached to other images.
All sorts of things. And you have to sometimes guess and hope that your image and shape are lined up just right – OR you have to undo and try again.
So instead, change the shape from CUT to GUIDE and then make it the top layer. Now there’s just an outline for the cut and you can see through to what you are slicing.

See the rectangle on the left, I perfectly lined up and sliced with the guide. And then the Circle (I made a little thicker so it’s more visible here) You can see exactly what will be inside the circle when I slice!

Today’s Tip: Use GUIDEs for Slicing
- Change the shape you want to slice out from Cut to Guide
- Make sure the guide layer is above the image, then position to exactly where you want it to slice out
