(Some links are affiliate)
Watch how to use the Cricut EasyPress to make a Halloween sign on wood.
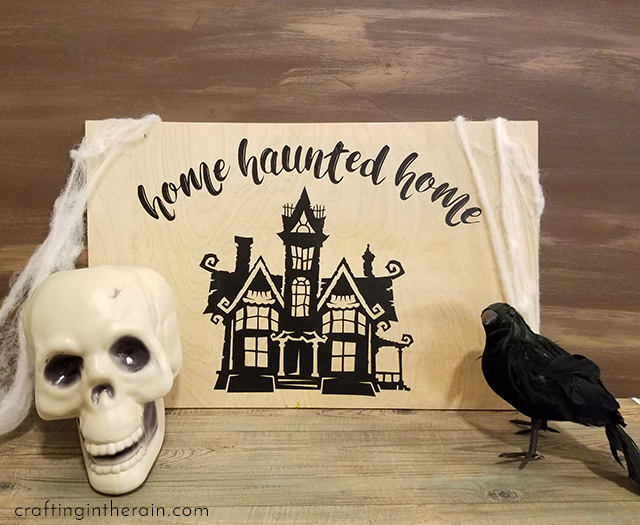
The haunted house image can be found in Cricut Design space. There are a few other haunted houses too, but this was my favorite for this project. And looking at all those thin lines, I knew regular vinyl would have a hard time sticking down to wood.
The iron-on vinyl makes a great solution!
You can download the text for “home haunted home” here. The font is called Just Write. Then upload it to design space and position it over the house. Select everything and attach, edit to the size you want, and send it to cut. Make sure you mirror the image before you start cutting, and that the iron-on vinyl is shiny side down on the mat.
Select your material as “iron-on” and let it run.
My favorite trick I’ve learned for weeding iron-on is to leave it all on the mat while you weed! Since the carrier sheet stays stuck down flat, it’s much easier to peel up the vinyl pieces you don’t need. The BrightPad also helps so I could see all the cut lines and know where to weed.

This is how it looks when all the extra vinyl is gone.

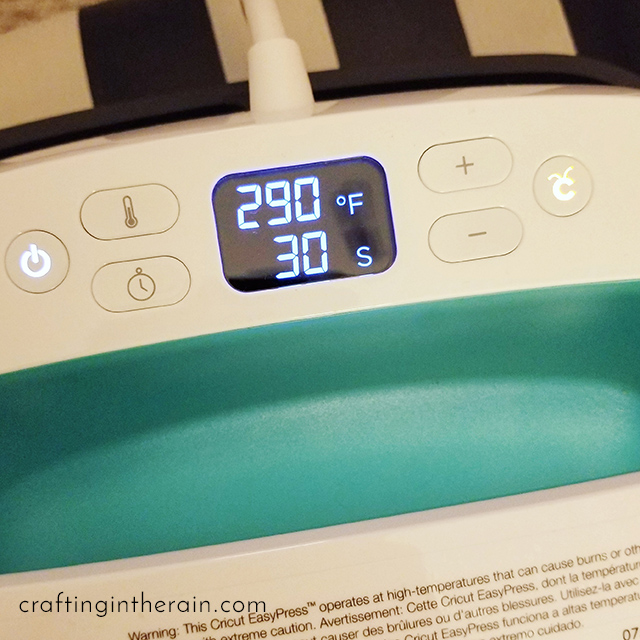
Once the vinyl is ready, position it on your piece of wood. I used a thin piece of plywood. Place a folded towel on your table and put the wood on top. Turn on the EasyPress by pushing the power button. Visit this link for a settings chart for materials and temperatures to use with the EasyPress. For regular iron-on on wood the recommendation is 300 degrees and 40 seconds. Push the temperature button and then the + button to set the temperature. Then push the timer then + button to set the time. When the EasyPress has reached your set temperature, the Cricut light will turn green.
Just leave the EasyPress in its base while it heats up. It is designed to hold the press and protect your table.
When it has come to temperature, set the press on part of the design, push the Cricut (start) button and apply light pressure. When the timer beeps, repeat on a new part of the design. The plate of the press is 9 inches square, so if your design is less than that size, you’ll only need to do this step once! As with any iron-on vinyl project, make sure that you don’t slide or shift the iron while it’s down on the design. It can cause wrinkles in the vinyl.

Let the carrier sheet and vinyl cool, then peel off the sheet. Look how those tiny pieces stayed stuck!
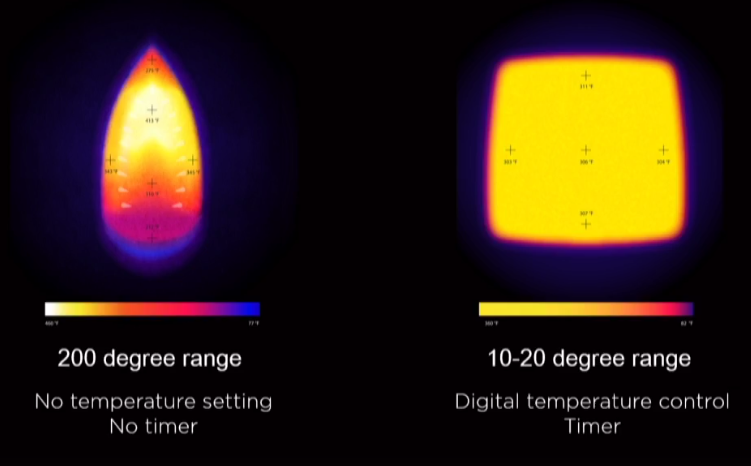
Something else you should know about the Cricut EasyPress: The EasyPress keeps a much more consistent temperature than a regular household iron. Check out this picture to see the differences. Plus, there are no holes like in the iron, that can leave circles on your vinyl.
I’m at least one step closer to being ready for Halloween, and I hope you learned something about the EasyPress.
For several weeks they kept selling out, but it looks like they’re back in stock everywhere. You can find the EasyPress at Cricut.com (and get 10% off if you have a Cricut Access membership) or from Amazon.com (with Prime shipping) Or places like JoAnn and Michaels if you’d like to get dressed and go to an actual store. If you have any questions about the Cricut EasyPress, please comment below!
Want to learn more? Read these!
What Can I Make with Cricut?
Cricut BrightPad Review
Cricut Maker Review
This is a sponsored conversation written by me on behalf of Cricut. The opinions and text are all mine.

Halloween Crafts and Projects with the Cricut - Hey, Let's Make Stuff
Monday 31st of May 2021
[…] Halloween party and home with this mat from Crafting in the Rain. Home Sweet Haunted Home that is! Read More… Spider Web Earrings Make these DIY spider web earrings on your Cricut or other cutting machine […]