Are you looking for Halloween décor inspiration? I created a whole Neon Halloween table using my Cricut Maker and I’m excited to show you how it all turned out. Neon colors pop against the black, and it’s all easy to make. Let me show you how I made all these DIY Halloween crafts.


Start by opening the Design Space file where I’ve already combined all of these projects. (some links are affiliate)

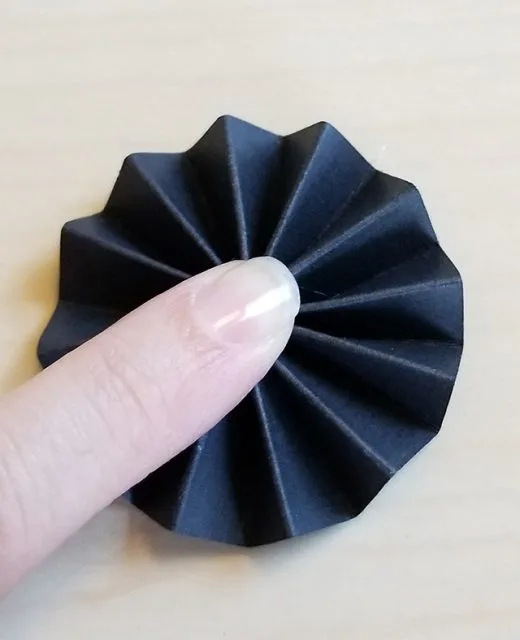
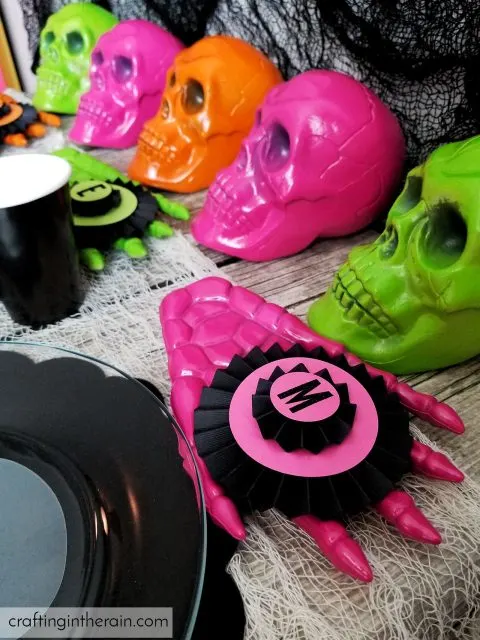
Paper Rosettes with Scoring Wheel

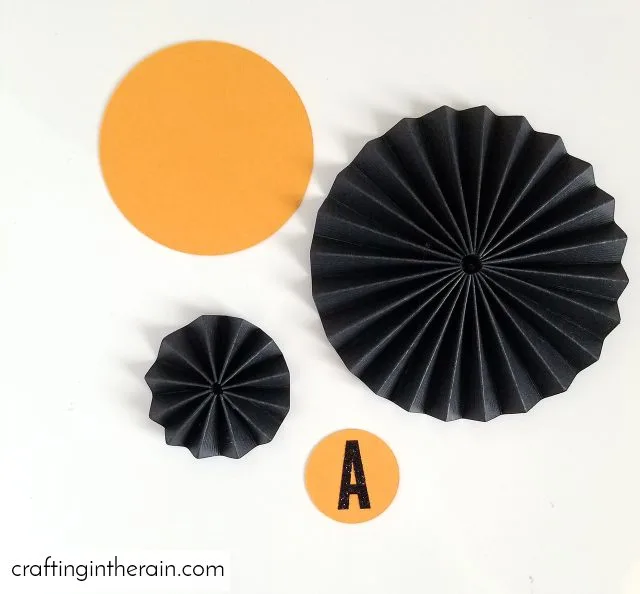
Paper rosettes can look confusing, but the Scoring Wheel makes them a breeze! Using the increased pressure of the Cricut Maker, the Scoring Wheel gives deeper, better fold lines.

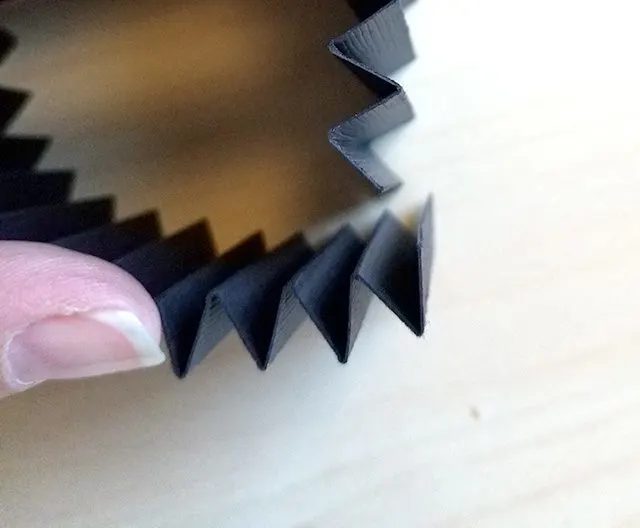
Load the cardstock in the machine and make sure the 01 wheel is in the machine. After the paper cuts, fold back and forth along the score lines. The larger rosette takes two strips glued together. The smaller one just uses one. Glue the ends (I like hot glue because it sets so quickly!) to make a ring.

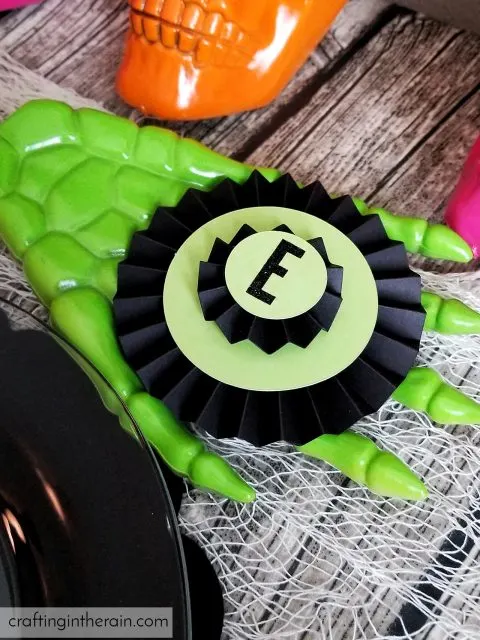
Put some hot glue on the black cardstock circle and then press the center of the rosette ring down onto it to hold the rosette in place.

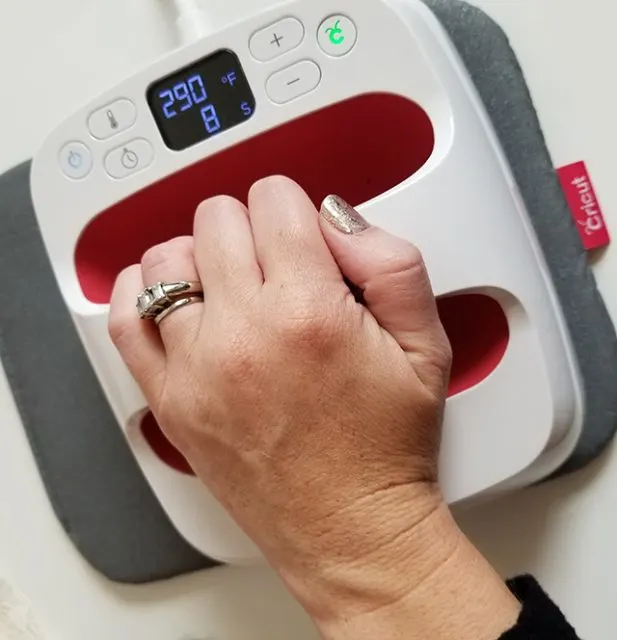
To add the initial, set the EasyPress2 to 290. Preheat cardstock for 5 seconds. Then position the iron-on in the center of each small colored circle and press for 30 seconds. Flip over and press for 15 seconds.

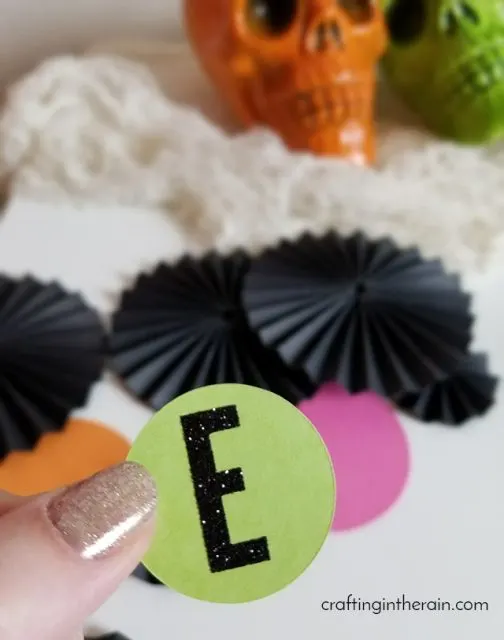
Warm peel the plastic carrier sheet. To build each place card, layer the large rosette, the large colored circle, the small rosette and finally the circle with an initial.

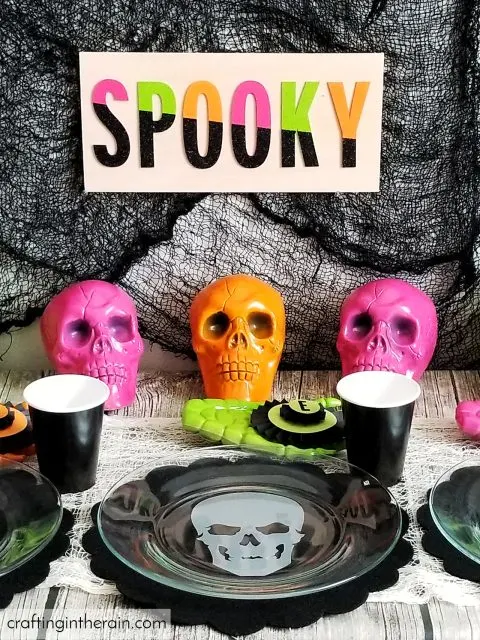
Basswood Sign with Knife Blade
One of the best things about the Maker is the Knife Blade. It can cut materials like balsa wood and basswood. I always recommend basswood because balsa can be fairly brittle and sometimes break when you work with it.
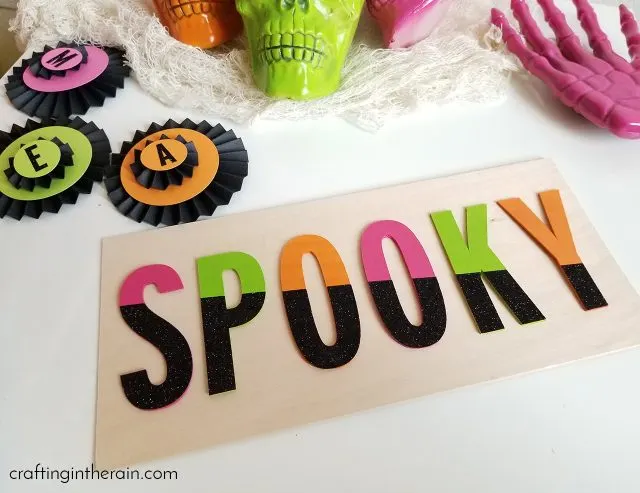
So I cut the word SPOOKY from 1/32 basswood. You can usually find it in the hobby section of a craft store. The width of the basswood I found was 4 inches, so I made my letters 3.5 inches tall so they would fit nicely.

Tape the edges of the wood onto a purple (strong grip) mat. Move the white star wheels all the way over to the right side. The Knife Blade will make several passes on the wood, and I like to start checking the cuts before it has a few left, because sometimes the cuts finish early.
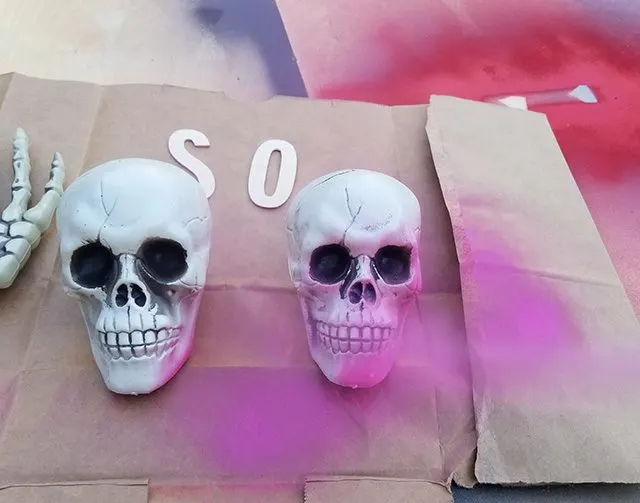
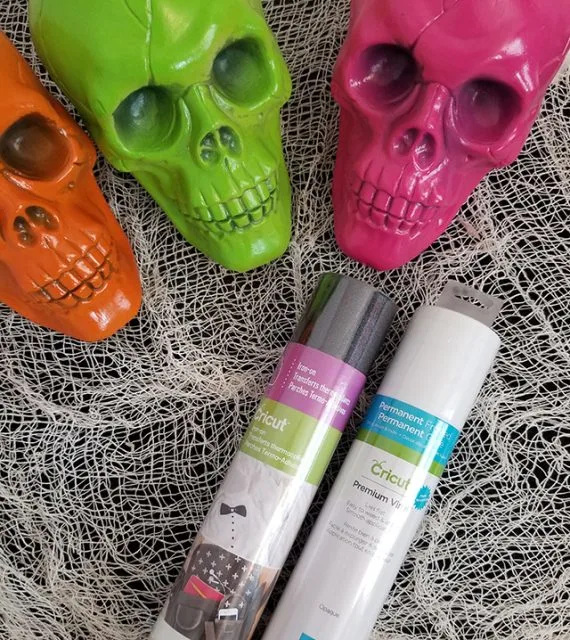
Once the letters finished, I got out the spray paint. For my neon Halloween I had bright pink, orange and green. I painted skulls and hands from the dollar store, along with the wood letters. I was pleased to find that a couple coats of spray paint covered the plastic heads nicely but didn’t completely cover the dark spots in the eyes and teeth. So it gave them a really cool look.

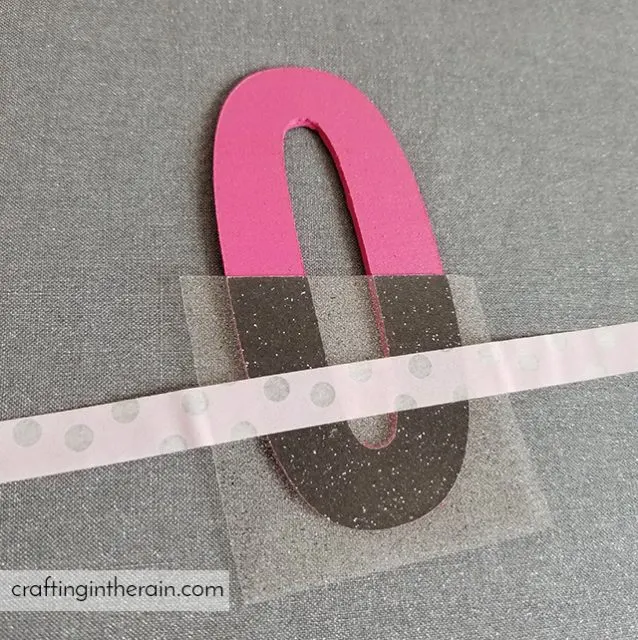
Ok, to finish the sign, I then cut the bottom parts of the letters out of black glitter iron-on. To attach the iron-on to the wood, I secured a piece of tape across the plastic liner. I wanted to make sure that it didn’t slip at all when I set the EasyPress down on it. Set the EasyPress to 300 and press for 40 seconds. Then peel off the carrier sheet.

**Check out the interactive EasyPress guide – use the drop-down menus to select the type of iron-on and the base material, and it gives you instructions!
The wood letters wanted to bend up just a little with the heat, so I just put a book on them to keep them flat while they cooled. Then I glued them to a wood base with hot glue to complete the sign.

Etched Glass Skull Plates
To make the Etched Skull Plates, I found clear glass plates from the dollar store. I used the Frosted Vinyl and cut skulls. Since the image is going on the back of the plate, be sure to mirror the image when you send it to cut. Search “Etched” in the Custom Materials and select the permanent etched vinyl.
Weed the excess vinyl and put transfer tape down on the design. I found that with the frosted vinyl, it worked best to peel the paper backing away from the vinyl, instead of peeling the vinyl off the paper.

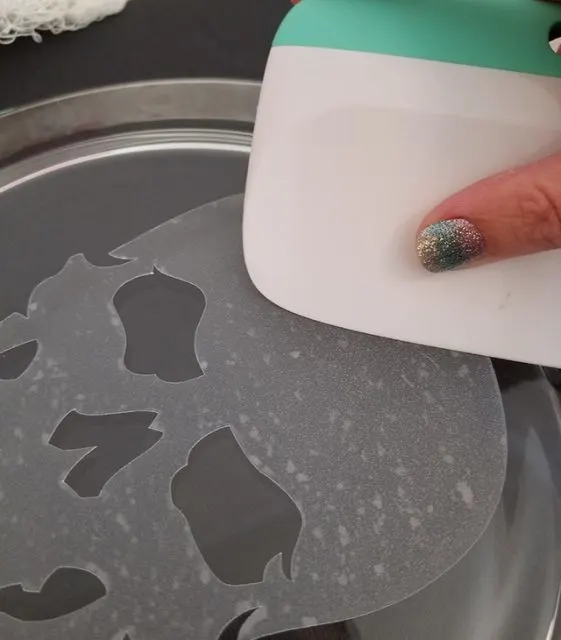
Then position it on the bottom of the plate and use the XL scraper to remove air bubbles. There were still some air bubbles that I couldn’t get out, and I was starting to get frustrated. But I came back a few hours later, and they were gone! As the permanent adhesive cures, the air bubbles all disappear. (Wait at least 24 hours before washing.)

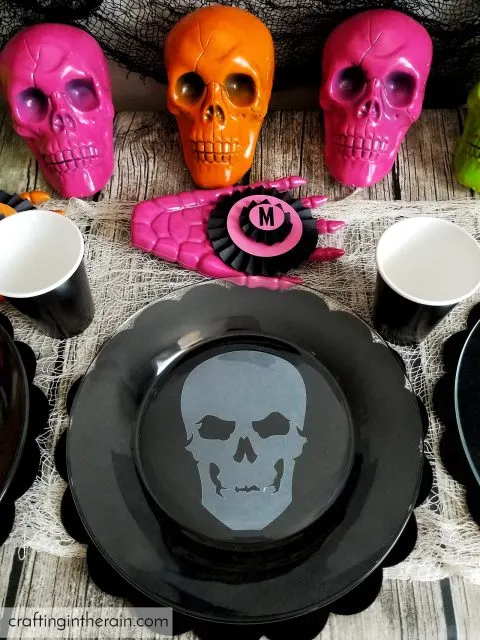
Felt Placemats with Rotary Blade
The placemat project doesn’t really need too much explaining, except to remind you that I love how the Cricut Rotary Blade cuts felt. I wanted something black under my etched skull plates, to be sure that the image was noticeable.

I have had success using the “Felt” setting that shows up in the popular materials. But if you search for “Felt” in the “Custom Materials” list, there are a few different types. If you are having any trouble cutting felt, try some of these other settings.
Some people like to put a piece of transfer tape on the back side of their felt to keep the fuzzies off their mat. I just have a green mat that I reserve for felt, and that works great for me.

Combine all your Neon Halloween decorations into a super festive table setting, and you’re guaranteed to have a spooky good time with these DIY Halloween crafts! What’s your favorite part? Did any projects surprise you?

Start shopping! Cricut is having a flash sale, so you can save big $$ on most of the products I used in my post!
XL scraper
Frosted vinyl
Glitter iron-on
Weeding tool set
Knife blade
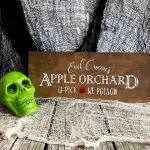
You might also like these two Halloween signs I’ve made with my Cricut:
Queen’s Apple Orchard

![]()
![]()
This is a sponsored conversation written by me on behalf of Cricut. The opinions and text are all mine.
65 Halloween Projects to Make with a Cricut - Lydi Out Loud
Saturday 7th of August 2021
[…] Make Liz On Call’s cute DIY Disney Halloween Shirts for your entire Disney crew. SEE MORE Neon Halloween Decor Steph from Crafting in the Rain created a whole Neon Halloween tablescape using a Cricut […]
Cheryl Spangenberg
Wednesday 26th of September 2018
Everything is so cute! I especially love that SPOOKY sign!