This is a sponsored post written by me on behalf of FrogTape. All opinions are 100% mine.
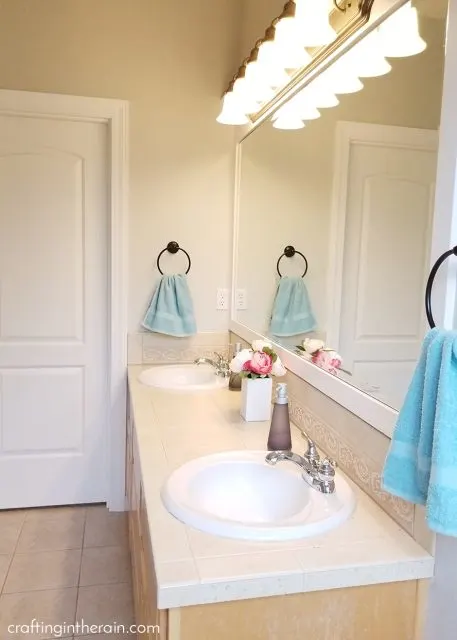
Our master bathroom has been on my list to paint for a while. Since my kids went back to school, it was the perfect time to jump into this project. Here’s what my bathroom looked like before. Not terrible, but fairly bland.

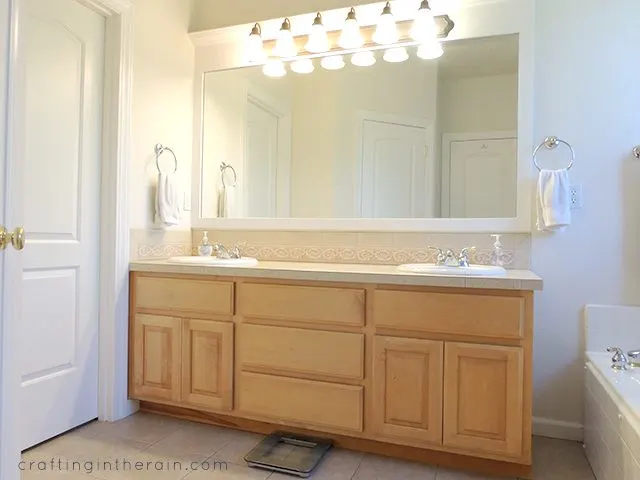 Plus, while you can’t really see in the pictures, is that the previous owners patched lots of small holes in the walls, and they were not done well. So most walls had some splotchy, discolored spots on them.
  I sanded down all the old patches, and had a few more dings to repair with spackle.
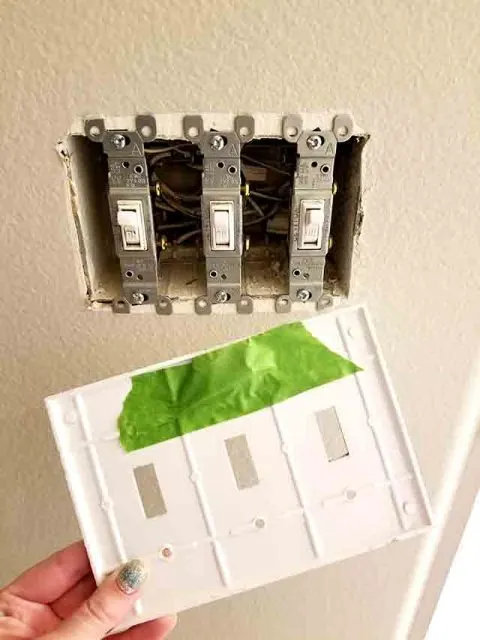
I removed light switch and outlet covers and towel bars. I recommend using a bit of FrogTape to secure the little screws so you don’t lose them! 
No matter how good of a painter I think I am, there’s always at least one drip from the brush, and the roller can send off tiny splatters that you don’t even notice until days later. So I use an old sheet as a drop cloth on the floor. I also like to wipe down the walls quickly with a damp cloth, especially up in the corners where cobweb seems to hide.
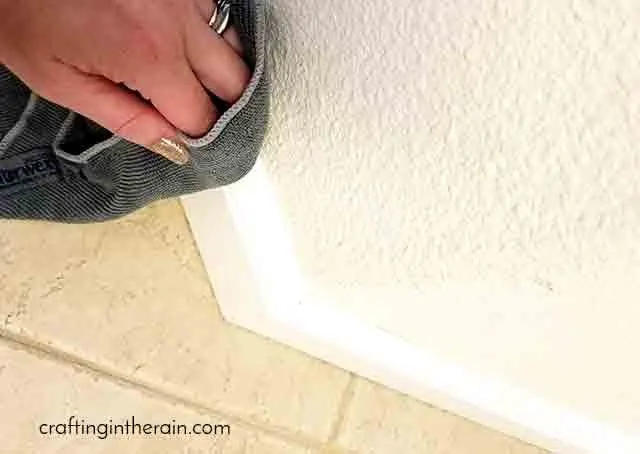
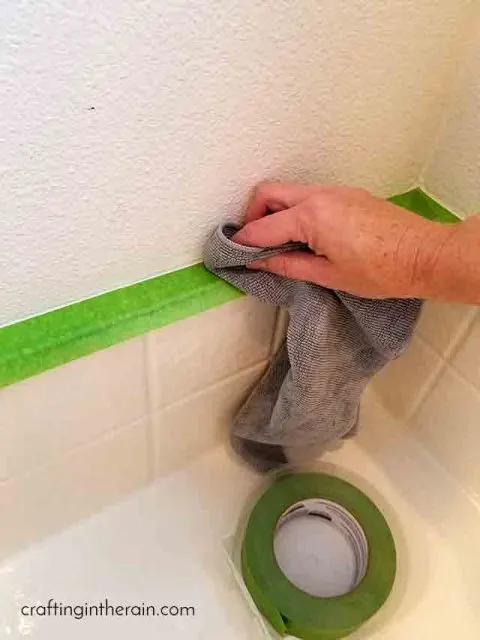
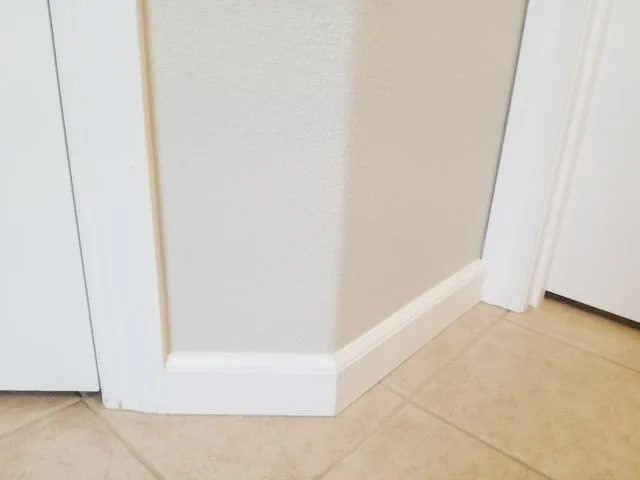
Don’t forget to clean the tops of the baseboards with a cloth also. This will ensure that the tape will create a good seal and give you a nice crisp line. 
 Determine where you need to tape, and where you can use an edging brush.
Use FrogTape (FrogTape is the only painting tape treated with patented PaintBlock® Technology.)
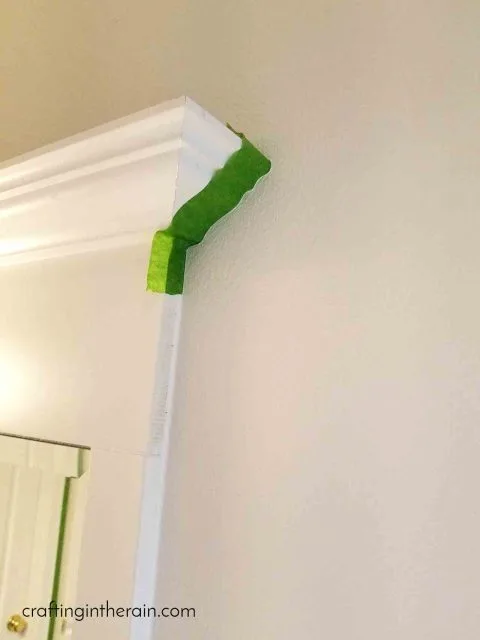
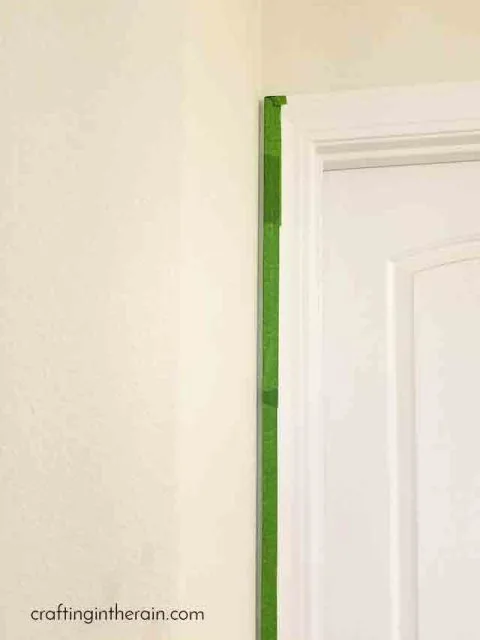
- On baseboards
- On oddly shaped edges like tile or moldings


- Where window or door trim comes too close to the adjoining wall

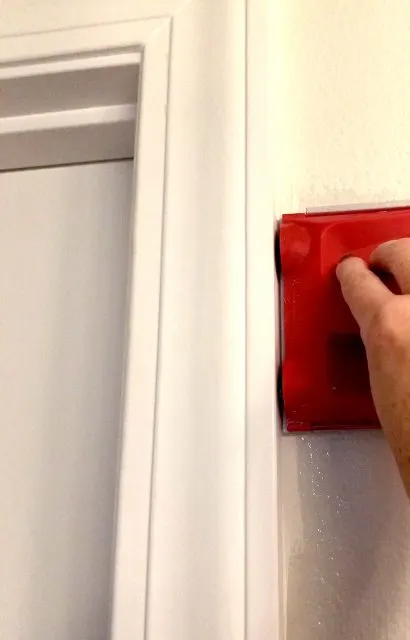
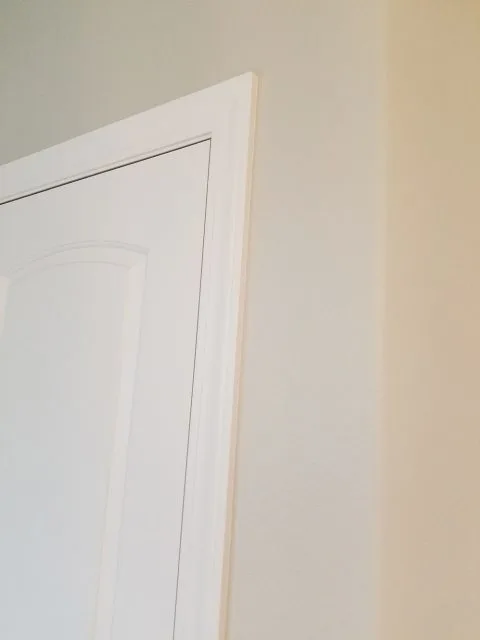
Use paint edger
- Around door frames


- Around window casings
- Around outlets and door switches
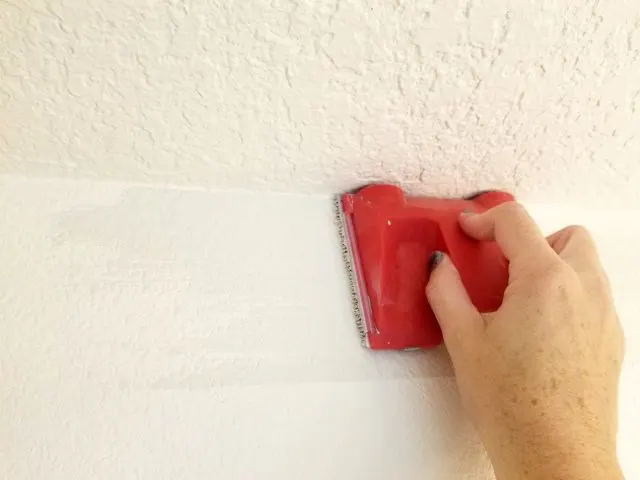
- At the ceiling line


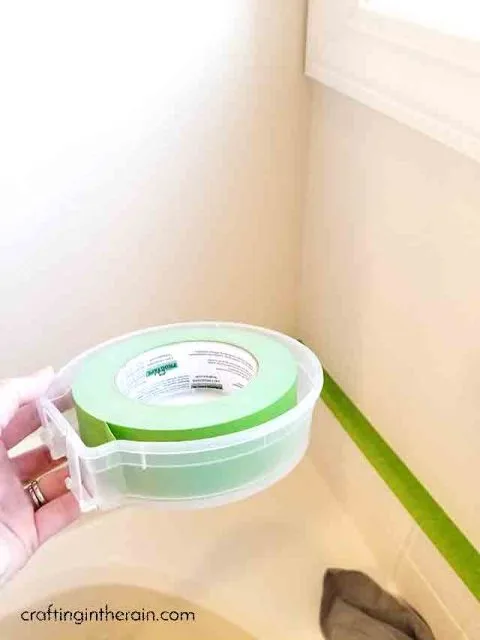
To apply the FrogTape, I like to tear off sections so I can get the edge lined up perfectly with the wall before I stick the tape down. Be sure to set the roll of tape back in the package – this will keep the tape edges nice and clean for you.
The PaintBlock® Technology a super-absorbent polymer that reacts with the water in latex paint, instantly gels to form a micro-barrier that seals the edges of the tape.
 Overlap the strips of tape a bit, and then I like to use a dry cloth and my finger to press the edge of the tape down really well.
Now it’s time to start painting.
My paint color: Behr Paint matched to SW Agreeable Gray.
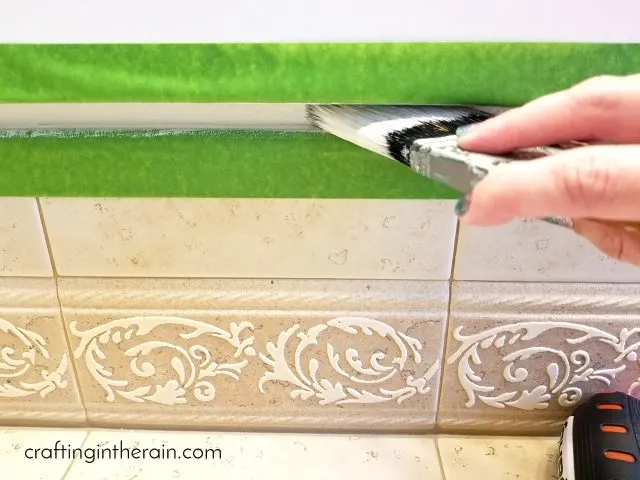
Pour paint into a tray with a plastic liner and wipe drips off the can with a paper towel. I start with the paint edger and paint the ceiling line around the room. Then I move to the doors and other straight edges.
Here’s my tips for getting the best results with an edging tool. Load up the brush side with paint, on about the top half of the brush. Drag along the paint tray to remove drips. Paint first about ¼ inch away from the edge (ceiling or trim.) Then move the wheels to touch the edge and paint again. This keeps paint from gathering too close to the wheels and getting on the edge you’re trying to keep clean.
Also, feather out a little towards the wall to make sure there are no drips or lines of paint that will be noticeable when the paint dries. Next tackle all the edges that have been taped. For these edges, use a brush. I brush along the direction of the tape, and then away towards the wall. Use the brush for painting down the corners of the walls.
I have tried using special corner brush pads for this, and have never been happy with results. Go with the brush. Be extra careful when getting up into the top corners at the ceiling level. 
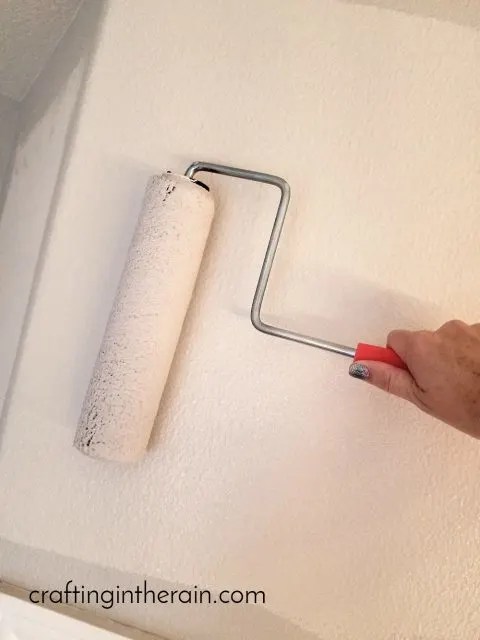
 Now it’s finally time to roll the walls. I still leave all the FrogTape on at this point because I don’t want to accidentally get paint on the baseboards, or any other trim I had to paint off. Use the paint tray to load roller with paint and start painting.

Start with a W shape, then back over it. Then turn the roller sideways and smooth out the paint. Be sure to overlap the paint with the edging done before. 
Let the paint dry for at least a couple of hours. Wrap all brushes, rollers and paint trays with plastic wrap or foil. Check for any missed spots and roll again, or use the brush against edges. Now it’s time to peel all the tape back and be impressed with your fantastic paint lines.


The next day I add outlet and light switches back on, and anything else I removed from the walls. 
I love how clean it all looks with a fresh coat of paint! When we moved in, there were dozens of tiny (poorly) patched spots on the wall, and it makes such a difference to have those all covered up now. 
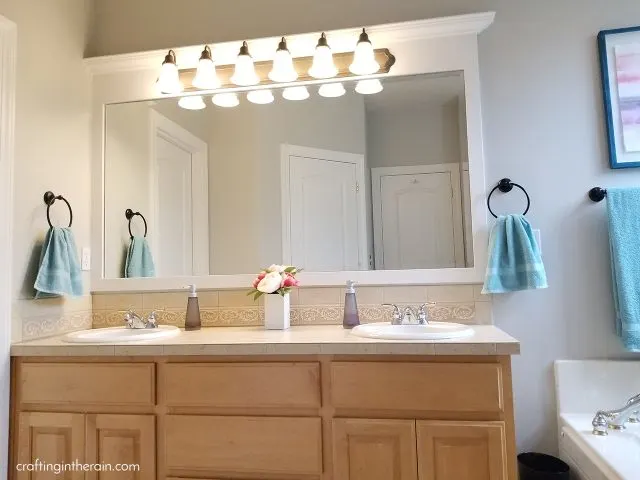 You may have noticed that I also painted the towel rings and towel bar. I didn’t love the two-tone metal look, and since I had to take them off for painting the walls anyway, it was the perfect time to take them outside and hit them with a few light coats of black spray paint.
So what do you think of my newly painted bathroom? Did you learn any new painting tips from my post?
Want to see a newer picture of the bathroom? I painted the cabinets!